OpenShift Regional Disaster Recovery with Advanced Cluster Management
- 1. Overview
- 2. Deploy and Configure ACM for Multisite connectivity
- 3. OpenShift Data Foundation Installation
- 4. Configuring Multisite Storage Replication
- 5. Create VolumeReplicationClass resource
- 6. Create Mirroring StorageClass resource
- 7. Install ODR Cluster Operator on Managed clusters
- 8. Install ODR Hub Operator on Hub cluster
- 9. Create DRPolicy on Hub cluster
- 10. Create Sample Application for DR testing
- 11. Application Failover between managed clusters
- 12. Application Failback between managed clusters
1. Overview
The intent of this guide is to detail the steps and commands necessary to be able to failover an application from one OpenShift Container Platform (OCP) cluster to another and then failback the same application to the original primary cluster. In this case the OCP clusters will be created or imported using Red Hat Advanced Cluster Management or RHACM.
This is a general overview of the steps required to configure and execute OpenShift Disaster Recovery or ODR capabilities using OpenShift Data Foundation (ODF) v4.9 and RHACM v2.4 across two distinct OCP clusters separated by distance. In addition to these two cluster called managed clusters, there is currently a requirement to have a third OCP cluster that will be the Advanced Cluster Management (ACM) hub cluster.
These steps are considered Tech Preview in ODF 4.9 and are provided for POC (Proof of Concept) purposes. OpenShift Regional Disaster Recovery will be supported for production usage in a future ODF release.
|
-
Install the ACM operator on the hub cluster.
After creating the OCP hub cluster, install from OperatorHub the ACM operator. After the operator and associated pods are running, create the MultiClusterHub resource. -
Create or import managed OCP clusters into ACM hub.
Import or create the two managed clusters with adequate resources (compute nodes, memory, cpu) to deploy ODF 4.9 using the RHACM console. -
Ensure clusters have unique private network address ranges.
Ensure the primary and secondary OCP clusters have unique private network address ranges. -
Connect the private networks using Submariner add-ons.
Connect the managed OCP private networks (cluster and service) using the RHACM Submariner add-ons. -
Install ODF 4.9 on managed clusters.
Install ODF 4.9 on primary and secondary OCP managed clusters and validate deployment. -
Create new CSI side-cars in each managed OCP cluster.
Using CLI, manually add the volume-replication and omap-generator side-car containers to rbd-provisioning pod(s). -
Install ODF Multicluster-orchestrator operator on ACM hub cluster.
Using OperatorHub on ACM hub cluster install the multicluster orchestrator operator. -
Install Mirror Peer resource on ACM hub cluster.
Using the multicluster orchestrator operator install the MirrorPeer resource using CLI or the operator wizard. -
Enable Ceph mirroring on managed OCP clusters.
Using CLI, patch the ODF StorageCluster on each managed cluster to enable Ceph RBD mirroring. -
Validate Ceph mirroring is active between managed OCP clusters.
Using CLI, validate the new rbd-mirroring pods are created in each managed cluster and that the default CephBlockPool has healthy mirroring status in both directions. -
Create VolumeReplicationClass resource.
Using CLI, create the VolumeReplicationClass to configure the replication schedule (i.e. replicate between peers every 5 minutes). -
Create new mirroring StorageClass resource.
Using CLI, create new StorageClass with correct image features for block volumes enabled for mirroring. -
Install ODR Cluster Operator on managed clusters.
Install from OperatorHub on both managed clusters the ODR Cluster Operator. -
Configure SSL access between managed clusters.
For each managed cluster extract the ingress certificate and inject into the alternate cluster for MCG object bucket secure access. -
Configure S3 secrets and ODR configmaps for managed clusters.
Create the required secrets and add the s3StoreProfiles to the ODR configmap on each managed cluster. -
Install ODR Hub Operator on the hub cluster.
Install from OperatorHub on the hub cluster the ODR Hub Operator. -
Configure S3 secrets and ODR configmap for hub cluster.
Using the same MCG S3 access/secret keys and S3 endpoints, create the required secrets as those created on managed clusters and add the same s3StoreProfiles to the ODR configmap on the hub cluster. -
Create the DRPolicy resource on the hub cluster.
DRPolicy is an API available after the ODR Hub Operator is installed. It is used to deploy, failover, and relocate, workloads across managed clusters. -
Create the Sample Application namespace on the hub cluster.
Because the ODR Hub Operator APIs are namespace scoped, the sample application namespace must be created first. -
Create the DRPlacementControl resource on the hub cluster.
DRPlacementControl is an API available after the ODR Hub Operator is installed. -
Create the PlacementRule resource on the hub cluster.
Placement rules define the target clusters where resource templates can be deployed. -
Create the Sample Application using ACM console.
Use the sample app example from github.com/RamenDR/ocm-ramen-samples to create a busybox deployment for failover and failback testing. -
Validate Sample Application deployment and alternate cluster replication
Using CLI commands on both managed clusters validate that the application is running and that the volume was replicated to the alternate cluster. -
Failover Sample Application to secondary managed cluster.
Using the application DRPlacementControl resource on the Hub Cluster, add the action of Failover and specify the failoverCluster to trigger the failover. -
Failback Sample Application to primary managed cluster.
Using the application DRPlacementControl resource on the Hub Cluster, modify the action to Relocate and trigger failover to the preferredCluster.
2. Deploy and Configure ACM for Multisite connectivity
This installation method requires you have three OpenShift clusters that have network reachability between them. For the purposes of this document we will use this reference for the clusters:
-
Hub cluster is where ACM, ODF Multisite-orchestrator and ODR Hub controllers are installed.
-
Primary managed cluster is where ODF, ODR Cluster controller, and Applications are installed.
-
Secondary managed cluster is where ODF, ODR Cluster controller, and Applications are installed.
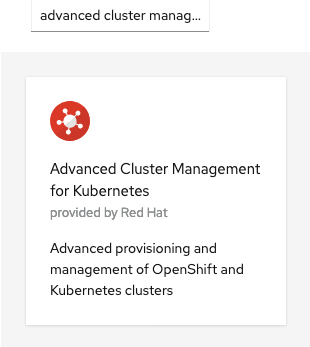
2.1. Install ACM and MultiClusterHub
Find ACM in OperatorHub on the Hub cluster and follow instructions to install this operator.
Verify that the operator was successfully installed and that the MultiClusterHub is ready to be installed.
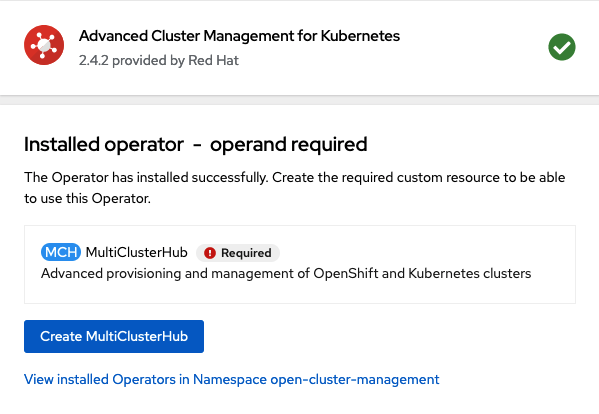
Select MultiClusterHub and use either Form view or YAML view to configure the deployment and select Create.
Most MultiClusterHub deployments can use default settings in the Form view.
|
Once the deployment is complete you can logon to the ACM console using your OpenShift credentials.
First, find the Route that has been created for the ACM console:
oc get route multicloud-console -n open-cluster-management -o jsonpath --template="https://{.spec.host}/multicloud/clusters{'\n'}"This will return a route similar to this one.
https://multicloud-console.apps.perf3.example.com/multicloud/clustersAfter logging in you should see your local cluster imported.
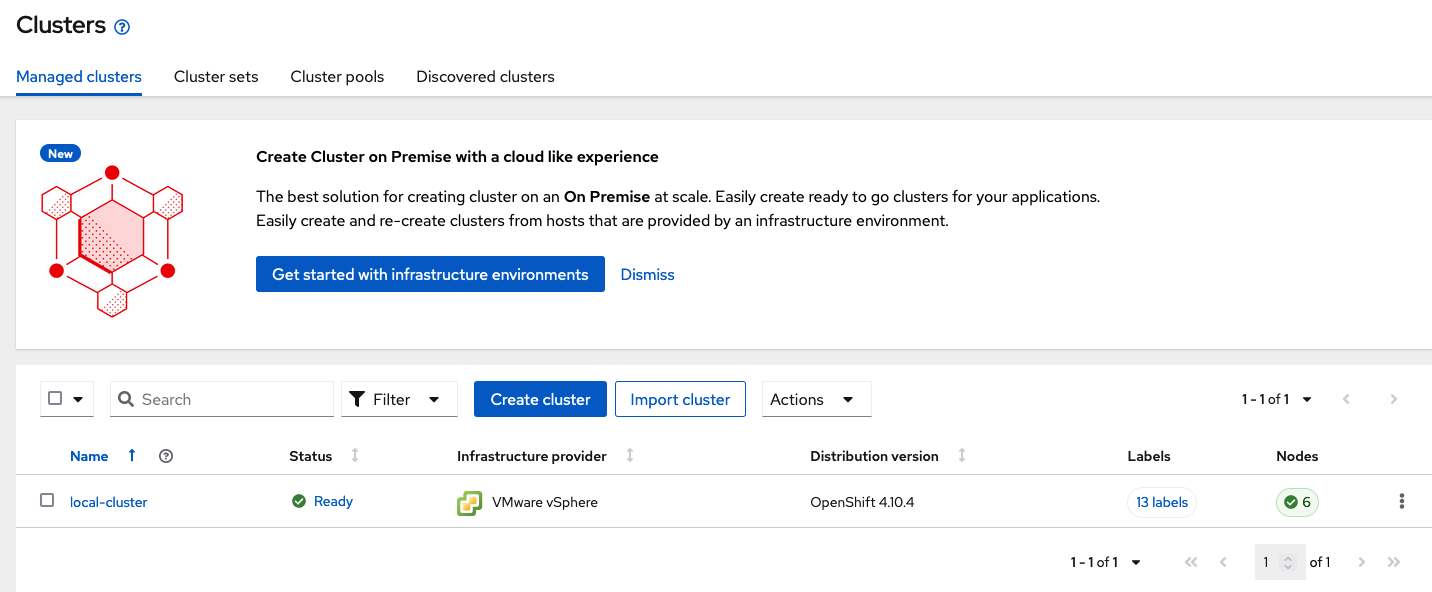
2.2. Import or Create Managed clusters
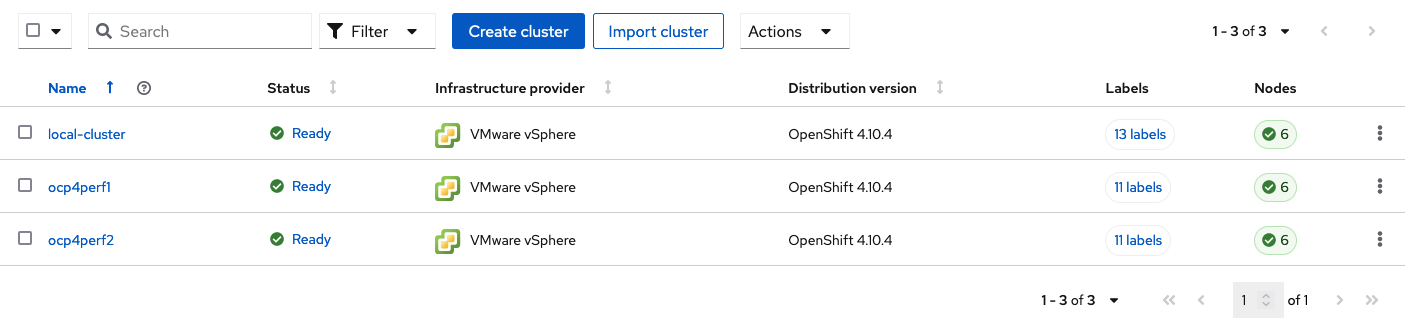
Now that ACM is installed on the Hub cluster it is time to either create or import the Primary managed cluster and the Secondary managed cluster. You should see selections (as in above diagram) for Create cluster and Import cluster. Chose the selection appropriate for your environment. After the managed clusters are successfully created or imported you should see something similar to below.
2.3. Verify Managed clusters have non-overlapping networks
In order to connect the OpenShift cluster and service networks using the Submariner add-ons, it is necessary to validate the two clusters have non-overlapping networks. This can be done by running the following command for each of the managed clusters.
oc get networks.config.openshift.io cluster -o json | jq .spec{
"clusterNetwork": [
{
"cidr": "10.5.0.0/16",
"hostPrefix": 23
}
],
"externalIP": {
"policy": {}
},
"networkType": "OpenShiftSDN",
"serviceNetwork": [
"10.15.0.0/16"
]
}{
"clusterNetwork": [
{
"cidr": "10.6.0.0/16",
"hostPrefix": 23
}
],
"externalIP": {
"policy": {}
},
"networkType": "OpenShiftSDN",
"serviceNetwork": [
"10.16.0.0/16"
]
}These outputs show that the two example managed clusters have non-overlapping clusterNetwork and serviceNetwork ranges so it is safe to proceed.
2.4. Connect the Managed clusters using Submariner add-ons
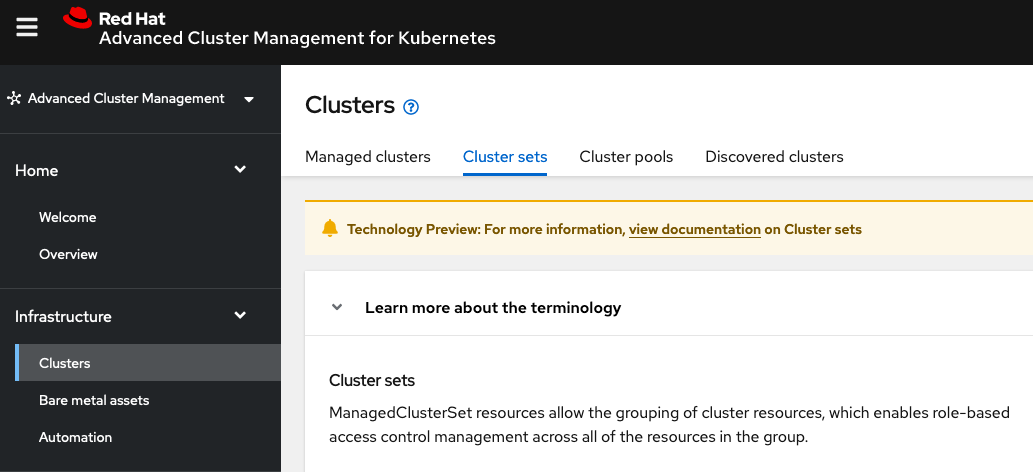
Now that we know the cluster and service networks have non-overlapping ranges, it is time to move on to installing the Submariner add-ons for each managed cluster. This is done by using the ACM console and Cluster sets.
Navigate to selection shown below and at the bottom of the same page, select Create cluster set.
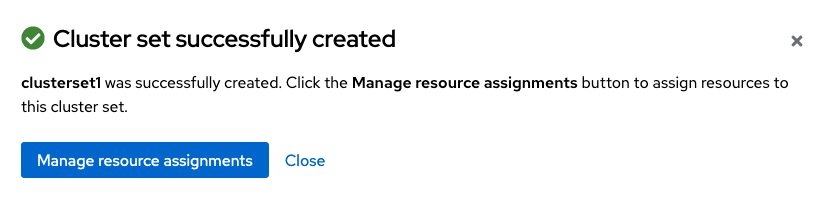
Once the new Cluster set is created select Manage resource assignments.
Follow the instructions and add the two managed clusters to the new Cluster set. Select Save and then navigate to Submariner add-ons.
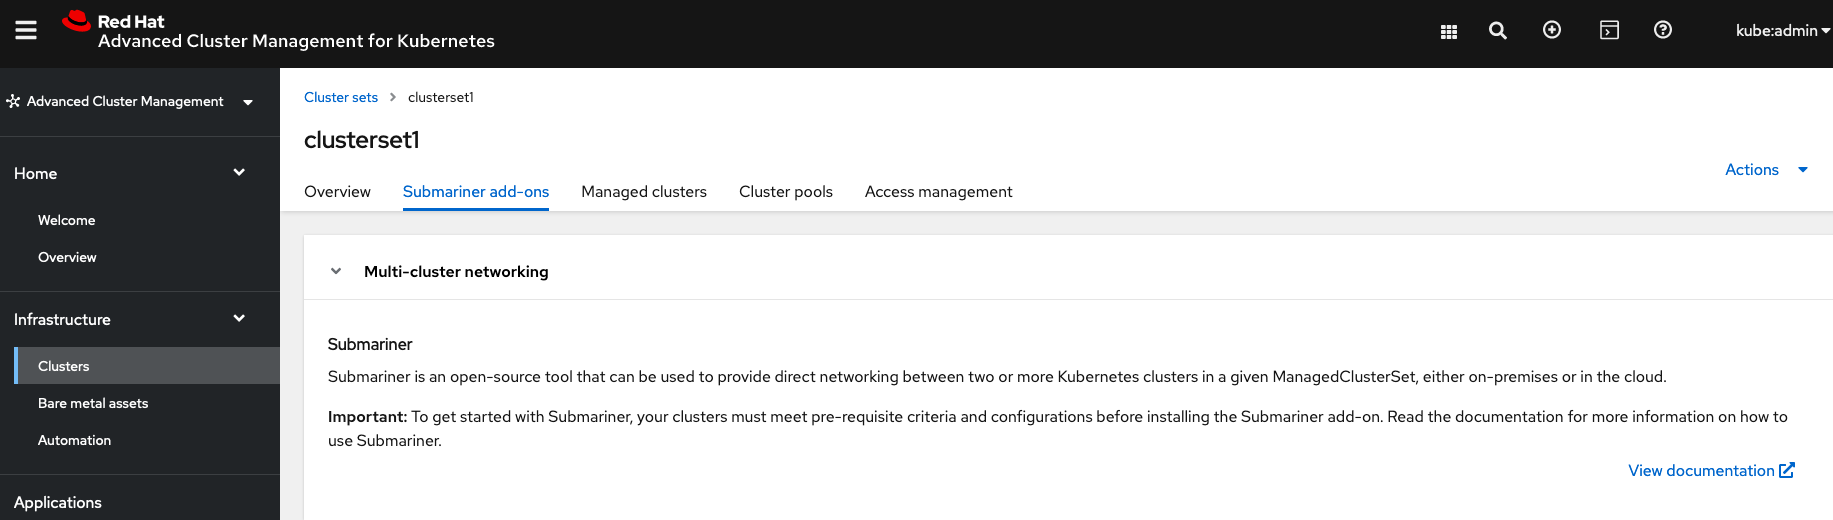
Select Install Submariner add-ons at the bottom of the page and add the two managed clusters. Click through the wizard selections and make changes as needed. After Review of your selections select Install.
It can take more than 5 minutes for the Submariner add-ons installation to finish on both managed clusters. Resources are installed in the submariner-operator project.
|
A successful deployment will show Connection status and Agent status as Healthy.

3. OpenShift Data Foundation Installation
In order to configure storage replication between the two OCP clusters OpenShift Data Foundation (ODF) must be installed first on each managed cluster. ODF deployment guides and instructions are specific to your infrastructure (i.e. AWS, VMware, BM, Azure, etc.). Install ODF version 4.9 or greater on both OCP managed clusters.
You can validate the successful deployment of ODF on each managed OCP cluster with the following command:
oc get storagecluster -n openshift-storage ocs-storagecluster -o jsonpath='{.status.phase}{"\n"}'If the result is Ready on the Primary managed cluster and the Secondary managed cluster continue on to configuring mirroring.
The successful installation of ODF can also be validated in the OCP Web Console by navigating to Storage and then Overview. The Block and File and Object dashboards should show green status.
|
4. Configuring Multisite Storage Replication
Mirroring or replication is enabled on a per CephBlockPool basis within peer managed clusters and can then be configured on a specific subset of images within the pool. The rbd-mirror daemon is responsible for replicating image updates from the local peer cluster to the same image in the remote cluster.
These instructions detail how to create the mirroring relationship between two ODF managed clusters.
4.1. Enable OMAP Generator & Volume Replication on the managed clusters
Execute the following steps on the Primary managed cluster and the Secondary managed cluster to enable the OMAP and Volume-Replication CSI sidecar containers in the csi-rbdplugin-provisioner Pods.
Edit the rook-ceph-operator-config ConfigMap and add CSI_ENABLE_OMAP_GENERATOR set to true.
oc patch cm rook-ceph-operator-config -n openshift-storage --type json --patch '[{ "op": "add", "path": "/data/CSI_ENABLE_OMAP_GENERATOR", "value": "true" }]'configmap/rook-ceph-operator-config patchedEdit the rook-ceph-operator-config ConfigMap and add CSI_ENABLE_VOLUME_REPLICATION set to true.
oc patch cm rook-ceph-operator-config -n openshift-storage --type json --patch '[{ "op": "add", "path": "/data/CSI_ENABLE_VOLUME_REPLICATION", "value": "true" }]'configmap/rook-ceph-operator-config patchedValidate that the there are the two new CSI sidecar containers per csi-rbdplugin-provisioner Pod.
for l in $(oc get pods -n openshift-storage -l app=csi-rbdplugin-provisioner -o jsonpath={.items[*].spec.containers[*].name}) ; do echo $l ; done | egrep "csi-omap-generator|volume-replication"csi-omap-generator
volume-replication
csi-omap-generator
volume-replication| The new containers will be repeated because there are two csi-rbdplugin-provisioner pods for redundancy. |
4.2. Install ODF Multicluster Orchestrator
This is a new controller that will be installed from OCP OperatorHub on the Hub cluster. The job of this Multicluster Orchestrator controller, along with the MirrorPeer Custom Resource, is to create a bootstrap token and exchanges this token between the managed clusters.
Navigate to OperatorHub on the Hub cluster and filter for odf multicluster orchestrator.
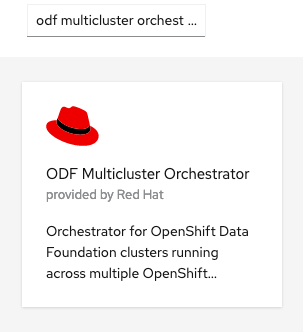
Keep all default settings and Install this operator.

The operator resources will be installed in openshift-operators and available to all namespaces.
|
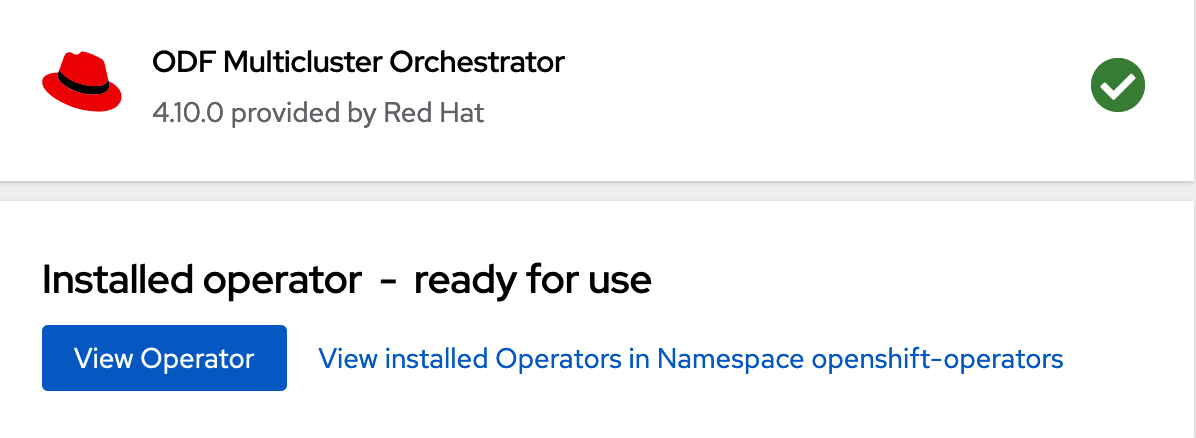
Validate successful installation by having the ability to select View Operator. This means the installation has completed.
4.3. Create Mirror Peer on Hub cluster
Mirror Peer is a cluster-scoped resource to hold information about the managed clusters that will have a peering relationship.
Requirements:
-
Must be installed on
Hub clusterafter theODF Multicluster Orchestratoris installed onHub cluster. -
There can only be two clusters per Mirror Peer.
-
Each cluster should be uniquely identifiable by cluster name (i.e., ocp4perf1).
After selecting View Operator in prior step you should see the Mirror Peer API. Select Create instance and then select YAML view.
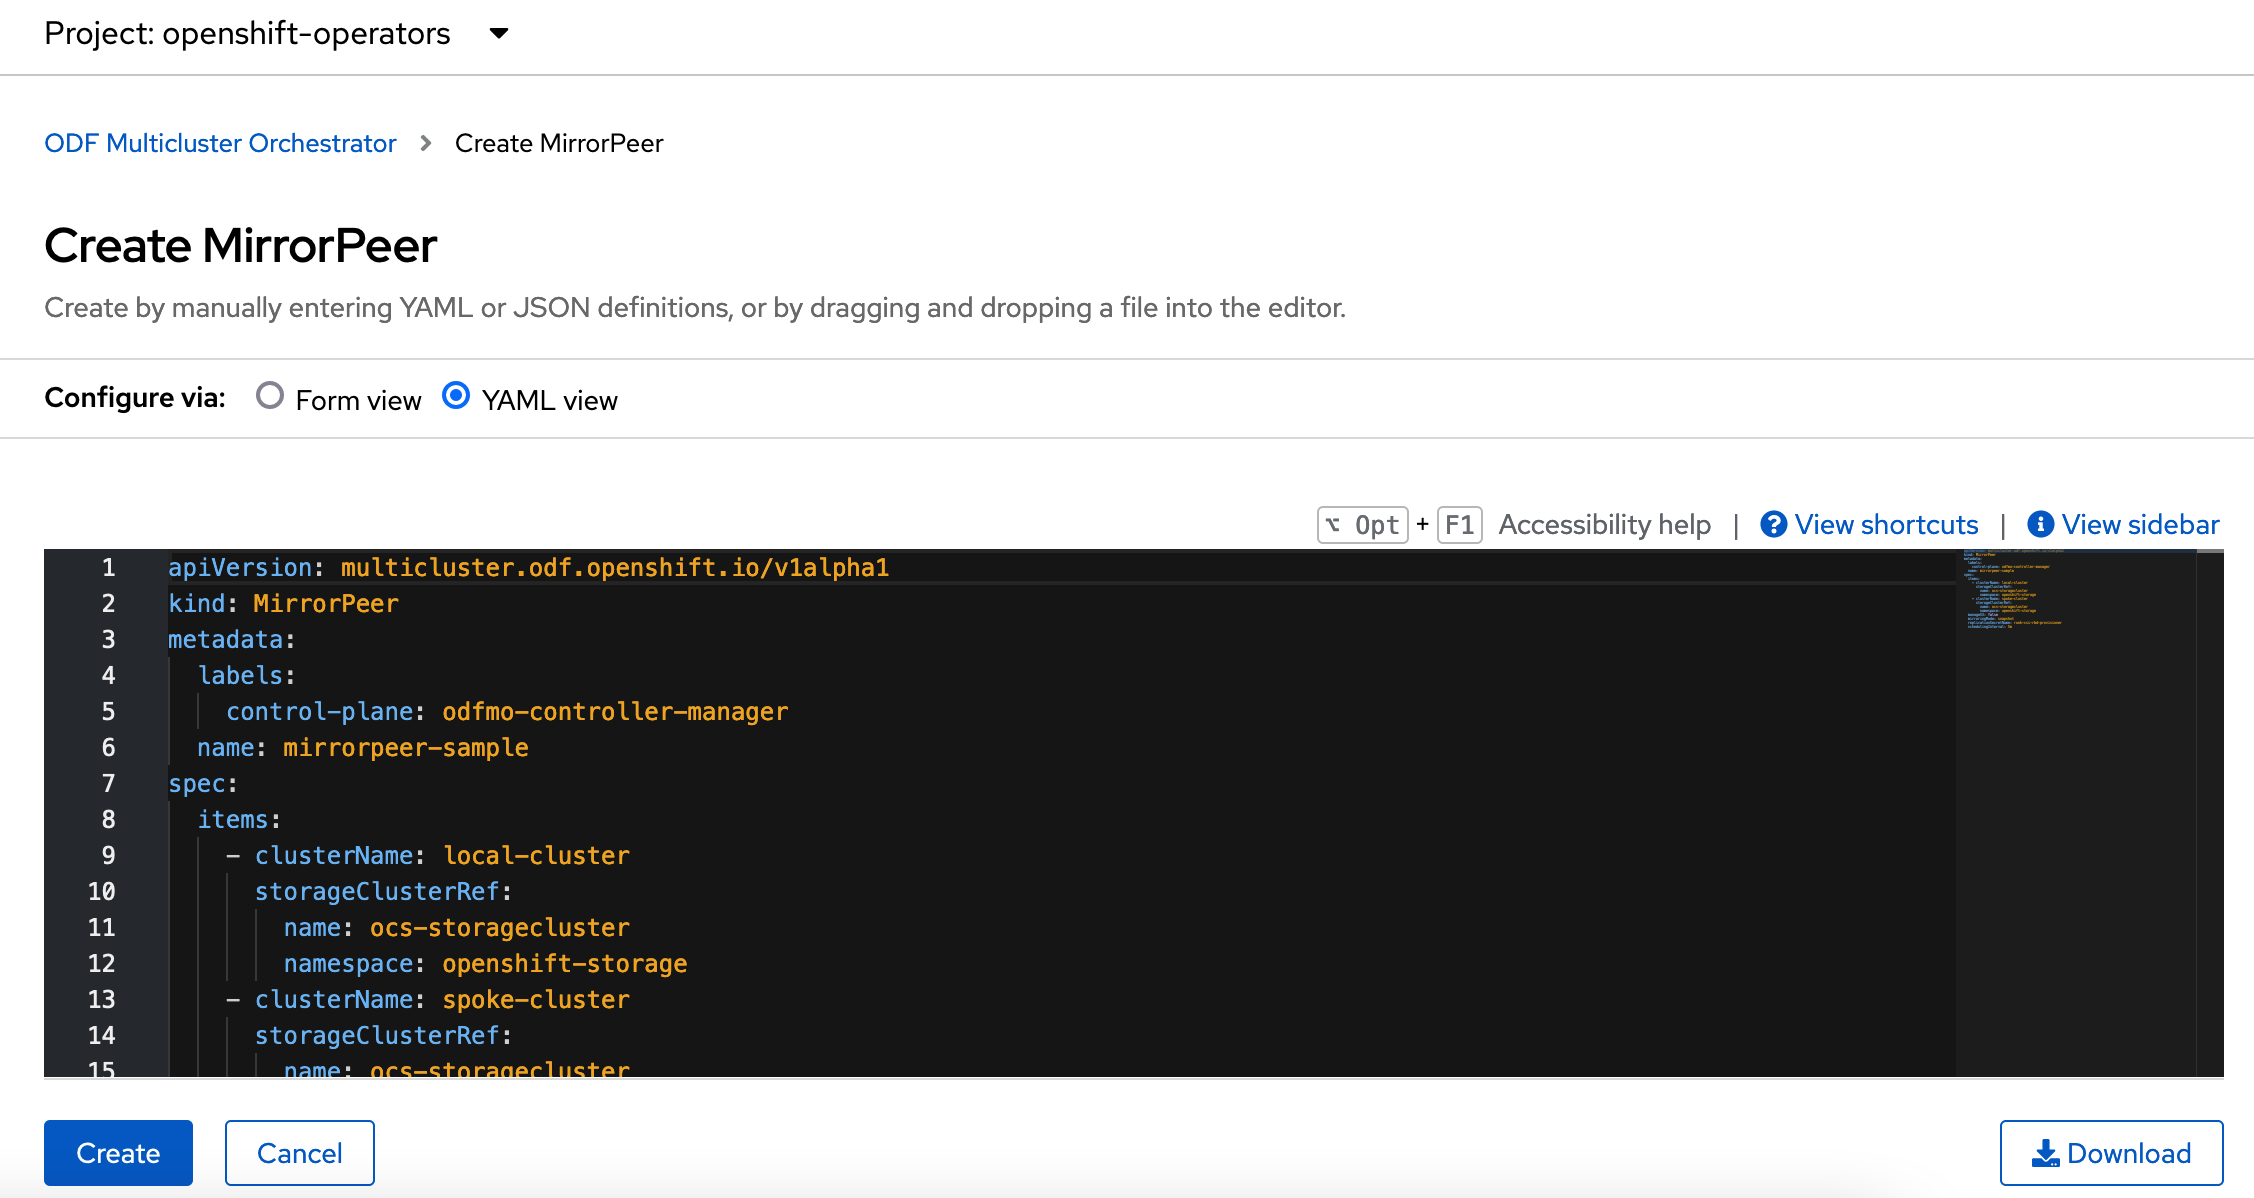
Save the following YAML (below) to filename mirror-peer.yaml after replacing <cluster1> and <cluster2> with the correct names of your managed clusters in ACM.
There is no need to specify a namespace to create this resource because MirrorPeer is a cluster-scoped resource.
|
apiVersion: multicluster.odf.openshift.io/v1alpha1
kind: MirrorPeer
metadata:
  name: mirrorpeer-<cluster1>-<cluster2>
spec:
  items:
  - clusterName: <cluster1>
    storageClusterRef:
      name: ocs-storagecluster
      namespace: openshift-storage
  - clusterName: <cluster2>
    storageClusterRef:
      name: ocs-storagecluster
      namespace: openshift-storage
Now create the Mirror Peer resource by copying the contents of your unique mirror-peer.yaml file into the YAML view (completely replacing original content). Select Create at the bottom of the YAML view screen.
You can also create this resource using CLI.
oc create -f mirror-peer.yamlmirrorpeer.multicluster.odf.openshift.io/mirrorpeer-ocp4perf1-ocp4perf2 createdYou can validate the secret (created from token) has been exchanged with this validation command.
| Before executing the command replace <cluster1> and <cluster2> with your correct values. |
oc get mirrorpeer mirrorpeer-<cluster1>-<cluster2> -o jsonpath='{.status.phase}{"\n"}'ExchangedSecret
The output for the validation can also be ExchangingSecret which is also an acceptable result.
|
4.4. Enable Mirroring on Managed clusters
Currently to enable mirroring the StorageCluster for each managed cluster will need to have the mirroring setting changed to enabled. This is a manual step using CLI and the oc patch command.
Make sure to run the oc patch storagecluster command on the Primary managed cluster and the Secondary managed cluster as well as the follow-on validation commands after the StorageCluster has mirroring enabled.
|
oc patch storagecluster $(oc get storagecluster -n openshift-storage -o=jsonpath='{.items[0].metadata.name}') -n openshift-storage --type json --patch '[{ "op": "replace", "path": "/spec/mirroring", "value": {"enabled": true} }]'storagecluster.ocs.openshift.io/ocs-storagecluster patchedValidate mirroring is enabled on default CephBlockPool.
oc get cephblockpool -n openshift-storage -o=jsonpath='{.items[?(@.metadata.ownerReferences[*].kind=="StorageCluster")].spec.mirroring.enabled}{"\n"}'trueValidate rbd-mirror Pod is up and running.
oc get pods -o name -l app=rook-ceph-rbd-mirror -n openshift-storagepod/rook-ceph-rbd-mirror-a-6486c7d875-56v2vValidate the status of the daemon health.
oc get cephblockpool ocs-storagecluster-cephblockpool -n openshift-storage -o jsonpath='{.status.mirroringStatus.summary}{"\n"}'{"daemon_health":"OK","health":"OK","image_health":"OK","states":{}}
It could take up to 10 minutes for the daemon_health and health to go from Warning to OK. If the status does not become OK eventually then use the ACM console to verify that the submariner add-ons connection is still in a healthy state.
|
5. Create VolumeReplicationClass resource
The VolumeReplicationClass is used to specify the mirroringMode for each volume to be replicated as well as how often a volume or image is replicated (i.e., every 5 minutes) from the local cluster to the remote cluster.
| This resource must be created on the Primary managed cluster and the Secondary managed cluster. |
Save this YAML to filename rbd-volumereplicationclass.yaml.
apiVersion: replication.storage.openshift.io/v1alpha1
kind: VolumeReplicationClass
metadata:
  name: odf-rbd-volumereplicationclass
spec:
  provisioner: openshift-storage.rbd.csi.ceph.com
  parameters:
    mirroringMode: snapshot
    schedulingInterval: "5m"  # <-- Must be the same as scheduling interval in the DRPolicy
    replication.storage.openshift.io/replication-secret-name: rook-csi-rbd-provisioner
    replication.storage.openshift.io/replication-secret-namespace: openshift-storage
oc create -f rbd-volumereplicationclass.yamlvolumereplicationclass.replication.storage.openshift.io/odf-rbd-volumereplicationclass created6. Create Mirroring StorageClass resource
The block volumes with mirroring enabled must be created using a new StorageClass that has additional imageFeatures required to enable faster image replication between managed clusters. The new features are exclusive-lock, object-map, and fast-diff. The default ODF StorageClass ocs-storagecluster-ceph-rbd does not include these features.
| This resource must be created on the Primary managed cluster and the Secondary managed cluster. |
Save this YAML to filename ocs-storagecluster-ceph-rbdmirror.yaml.
allowVolumeExpansion: true
apiVersion: storage.k8s.io/v1
kind: StorageClass
metadata:
  name: ocs-storagecluster-ceph-rbdmirror
parameters:
  clusterID: openshift-storage
  csi.storage.k8s.io/controller-expand-secret-name: rook-csi-rbd-provisioner
  csi.storage.k8s.io/controller-expand-secret-namespace: openshift-storage
  csi.storage.k8s.io/fstype: ext4
  csi.storage.k8s.io/node-stage-secret-name: rook-csi-rbd-node
  csi.storage.k8s.io/node-stage-secret-namespace: openshift-storage
  csi.storage.k8s.io/provisioner-secret-name: rook-csi-rbd-provisioner
  csi.storage.k8s.io/provisioner-secret-namespace: openshift-storage
  imageFeatures: layering,exclusive-lock,object-map,fast-diff
  imageFormat: "2"
  pool: ocs-storagecluster-cephblockpool
provisioner: openshift-storage.rbd.csi.ceph.com
reclaimPolicy: Delete
volumeBindingMode: Immediate
oc create -f ocs-storagecluster-ceph-rbdmirror.yamlstorageclass.storage.k8s.io/ocs-storagecluster-ceph-rbdmirror created7. Install ODR Cluster Operator on Managed clusters
On each managed cluster navigate to OperatorHub and filter for ODR Cluster Operator. Follow instructions to Install the operator into the project openshift-dr-system.
The ODR Cluster Operator must be installed on both the Primary managed cluster and Secondary managed cluster.
|
ODR requires one or more S3 stores to store relevant cluster data of a workload from the managed clusters and to orchestrate a recovery of the workload during failover or relocate actions.
These instructions are applicable for creating the necessary object bucket(s) using the Multi-Cloud Gateway or MCG. MCG should already be installed as a result of installing ODF.
7.1. Configure SSL access between s3 endpoints
These steps are necessary so that metadata can be stored on the alternate cluster in a MCG object bucket using a secure transport protocol and in addition the Hub cluster needs to verify access to the object buckets.
| If all of your OpenShift clusters are deployed using signed and trusted set of certificates for your environment then this section can be skipped. |
Extract the ingress certificate for the Primary managed cluster and save the output to primary.crt.
oc get cm default-ingress-cert -n openshift-config-managed -o jsonpath="{['data']['ca-bundle\.crt']}" > primary.crtExtract the ingress certificate for the Secondary managed cluster and save the output to secondary.crt.
oc get cm default-ingress-cert -n openshift-config-managed -o jsonpath="{['data']['ca-bundle\.crt']}" > secondary.crtCreate a new YAML file cm-clusters-crt.yaml to hold the certificate bundle for both the Primary managed cluster and the Secondary managed cluster.
| There could be more or less than three certificates for each cluster as shown in this example file. |
apiVersion: v1
data:
  ca-bundle.crt: |
    -----BEGIN CERTIFICATE-----
    <copy contents of cert1 from primary.crt here>
    -----END CERTIFICATE-----

    -----BEGIN CERTIFICATE-----
    <copy contents of cert2 from primary.crt here>
    -----END CERTIFICATE-----

    -----BEGIN CERTIFICATE-----
    <copy contents of cert3 primary.crt here>
    -----END CERTIFICATE----

    -----BEGIN CERTIFICATE-----
    <copy contents of cert1 from secondary.crt here>
    -----END CERTIFICATE-----

    -----BEGIN CERTIFICATE-----
    <copy contents of cert2 from secondary.crt here>
    -----END CERTIFICATE-----

    -----BEGIN CERTIFICATE-----
    <copy contents of cert3 from secondary.crt here>
    -----END CERTIFICATE-----
kind: ConfigMap
metadata:
  name: user-ca-bundle
  namespace: openshift-config
This ConfigMap needs to be created on the Primary managed cluster, Secondary managed cluster, and the Hub cluster.
oc create -f cm-clusters-crt.yamlconfigmap/user-ca-bundle created
The Hub cluster needs to verify access to the object buckets using the DRPolicy resource. Therefore the same ConfigMap, cm-clusters-crt.yaml, needs to be created on the Hub cluster.
|
After all the user-ca-bundle ConfigMaps are created, the default Proxy cluster resource needs to be modified.
Patch the default Proxy resource on the Primary managed cluster, Secondary managed cluster, and the Hub cluster.
oc patch proxy cluster --type=merge --patch='{"spec":{"trustedCA":{"name":"user-ca-bundle"}}}'proxy.config.openshift.io/cluster patched7.2. Create Object Bucket and Retrieve access keys
Before starting this section check that MCG is installed on Primary managed cluster and the Secondary managed cluster and that the Phase is Ready.
oc get noobaa -n openshift-storageNAME MGMT-ENDPOINTS S3-ENDPOINTS IMAGE PHASE AGE
noobaa ["https://10.70.56.161:30145"] ["https://10.70.56.84:31721"] quay.io/rhceph-dev/mcg-core@sha256:c4b8857ee9832e6efc5a8597a08b81730b774b2c12a31a436e0c3fadff48e73d Ready 27hThe first step is to create an MCG object bucket or OBC (Object Bucket Claim) to be used to store persistent volume metadata on the Primary managed cluster and the Secondary managed cluster.
Copy the following YAML file to filename odrbucket.yaml
apiVersion: objectbucket.io/v1alpha1
kind: ObjectBucketClaim
metadata:
  name: odrbucket
  namespace: openshift-dr-system
spec:
  generateBucketName: "odrbucket"
  storageClassName: openshift-storage.noobaa.io
oc create -f odrbucket.yamlobjectbucketclaim.objectbucket.io/odrbucket created
Make sure to create the OBC odrbucket on both the Primary managed cluster and the Secondary managed cluster.
|
Extract the odrbucket OBC access key and secret key for each managed cluster as their base-64 encoded values. This can be done using these commands:
oc get secret odrbucket -n openshift-dr-system -o jsonpath='{.data.AWS_ACCESS_KEY_ID}{"\n"}'cFpIYTZWN1NhemJjbEUyWlpwN1E=oc get secret odrbucket -n openshift-dr-system -o jsonpath='{.data.AWS_SECRET_ACCESS_KEY}{"\n"}'V1hUSnMzZUoxMHRRTXdGMU9jQXRmUlAyMmd5bGwwYjNvMHprZVhtNw==
The access key and secret key must be retrieved for the odrbucket OBC on both the Primary managed cluster and Secondary managed cluster.
|
7.3. Create S3 Secrets for MCG object buckets
Now that the necessary MCG information has been extracted for the object buckets there must be new Secrets created on the Primary managed cluster and the Secondary managed cluster. These new Secrets will store the MCG object bucket access key and secret key for both managed clusters.
The S3 secret YAML format for the Primary managed cluster is similar to the following:
apiVersion: v1
data:
  AWS_ACCESS_KEY_ID: <primary cluster base-64 encoded access key>
  AWS_SECRET_ACCESS_KEY: <primary cluster base-64 encoded secret access key>
kind: Secret
metadata:
  name: odr-s3secret-primary
  namespace: openshift-dr-system
Create this secret on the Primary managed cluster and the Secondary managed cluster.
oc create -f odr-s3secret-primary.yamlsecret/odr-s3secret-primary createdThe S3 secret YAML format for the Secondary managed cluster is similar to the following:
apiVersion: v1
data:
  AWS_ACCESS_KEY_ID: <secondary cluster base-64 encoded access key>
  AWS_SECRET_ACCESS_KEY: <secondary cluster base-64 encoded secret access key>
kind: Secret
metadata:
  name: odr-s3secret-secondary
  namespace: openshift-dr-system
Create this secret on the Primary managed cluster and the Secondary managed cluster.
oc create -f odr-s3secret-secondary.yamlsecret/odr-s3secret-secondary created| The values for the access key and secret key must be base-64 encoded. The encoded values for the keys were retrieved in the prior section. |
7.4. Configure ODR cluster operator ConfigMaps
On each managed cluster the ConfigMap ramen-dr-cluster-operator-config will be edited and new content added.
To find the s3CompatibleEndpoint or route for MCG on each managed cluster execute the following command:
oc get route s3 -n openshift-storage -o jsonpath --template="https://{.spec.host}{'\n'}"https://s3-openshift-storage.apps.perf1.example.com
The unique s3CompatibleEndpoint route or s3-openshift-storage.apps.<primary clusterID>.<baseDomain> and s3-openshift-storage.apps.<secondary clusterID>.<baseDomain> must be retrieved for both the Primary managed cluster and Secondary managed cluster respectively.
|
To find the s3Bucket for the odrbucket OBC exact bucket name execute the following command:
oc get configmap odrbucket -n openshift-dr-system -o jsonpath='{.data.BUCKET_NAME}{"\n"}'odrbucket-2f2d44e4-59cb-4577-b303-7219be809dcd
The unique s3Bucket name odrbucket-<your value1> and odrbucket-<your value2> must be retrieved on both the Primary managed cluster and Secondary managed cluster respectively.
|
Edit the ConfigMap to add the new content starting at s3StoreProfiles on the Primary managed cluster and the Secondary managed cluster after replacing the variables with correct values for your environment.
oc edit configmap ramen-dr-cluster-operator-config -n openshift-dr-system[...]
data:
ramen_manager_config.yaml: |
apiVersion: ramendr.openshift.io/v1alpha1
kind: RamenConfig
[...]
ramenControllerType: "dr-cluster"
### Start of new content to be added
s3StoreProfiles:
- s3ProfileName: s3-primary
s3CompatibleEndpoint: https://s3-openshift-storage.apps.<primary clusterID>.<baseDomain>
s3Region: primary
s3Bucket: odrbucket-<your value1>
s3SecretRef:
name: odr-s3secret-primary
namespace: openshift-dr-system
- s3ProfileName: s3-secondary
s3CompatibleEndpoint: https://s3-openshift-storage.apps.<secondary clusterID>.<baseDomain>
s3Region: secondary
s3Bucket: odrbucket-<your value2>
s3SecretRef:
name: odr-s3secret-secondary
namespace: openshift-dr-system
[...]8. Install ODR Hub Operator on Hub cluster
On the Hub cluster navigate to OperatorHub and filter for ODR Hub Operator. Follow instructions to Install the operator into the project openshift-dr-system.
8.1. Create S3 secrets for the Hub cluster
The values for the access and secret key must be base-64 encoded.The encoded values for the keys were retrieved in the prior section and the resulting Secrets are exactly the same as those created already on the managed clusters.
The S3 secret YAML format for the Primary managed cluster is similar to the following:
apiVersion: v1
data:
  AWS_ACCESS_KEY_ID: <primary cluster base-64 encoded access key>
  AWS_SECRET_ACCESS_KEY: <primary cluster base-64 encoded secret access key>
kind: Secret
metadata:
  name: odr-s3secret-primary
  namespace: openshift-dr-system
Create this secret on the Hub cluster.
oc create -f odr-s3secret-primary.yamlsecret/odr-s3secret-primary createdThe S3 secret YAML format for the Secondary managed cluster is similar to the following:
apiVersion: v1
data:
  AWS_ACCESS_KEY_ID: <secondary cluster base-64 encoded access key>
  AWS_SECRET_ACCESS_KEY: <secondary cluster base-64 encoded secret access key>
kind: Secret
metadata:
  name: odr-s3secret-secondary
  namespace: openshift-dr-system
Create this secret on the Hub cluster.
oc create -f odr-s3secret-secondary.yamlsecret/odr-s3secret-secondary created8.2. Configure ODR hub operator ConfigMap
After the operator is successfully created there will be a new ConfigMap called ramen-hub-operator-config.
oc edit configmap ramen-hub-operator-config -n openshift-dr-systemThe following new content starting at s3StoreProfiles needs to be added to the ConfigMap on the Hub cluster.
Make sure to replace <primary clusterID>, <secondary clusterID>, baseDomain, odrbucket-<your value1>, and odrbucket-<your value2> variables with the exact same values as used for the ramen-cluster-operator-config ConfigMap on the managed clusters.
|
[...]
apiVersion: v1
data:
  ramen_manager_config.yaml: |
    apiVersion: ramendr.openshift.io/v1alpha1
    kind: RamenConfig
[...]
    ramenControllerType: "dr-hub"
    ### Start of new content to be added
    s3StoreProfiles:
    - s3ProfileName: s3-primary
      s3CompatibleEndpoint: https://s3-openshift-storage.apps.<primary clusterID>.<baseDomain>
      s3Region: primary
      s3Bucket: odrbucket-<your value1>
      s3SecretRef:
        name: odr-s3secret-primary
        namespace: openshift-dr-system
    - s3ProfileName: s3-secondary
      s3CompatibleEndpoint: https://s3-openshift-storage.apps.<secondary clusterID>.<baseDomain>
      s3Region: secondary
      s3Bucket: odrbucket-<your value2>
      s3SecretRef:
        name: odr-s3secret-secondary
        namespace: openshift-dr-system
[...]
9. Create DRPolicy on Hub cluster
ODR uses DRPolicy resources (cluster scoped) on the ACM hub cluster to deploy, failover, and relocate, workloads across managed clusters. A DRPolicy requires a set of two clusters, which are peered for storage level replication and CSI VolumeReplication is enabled. This CSI sidecar container was enabled in the prior section Configuring Multisite Storage Replication.
Furthermore, DRPolicy requires a scheduling interval that determines at what frequency data replication will be performed and also serves as a coarse grained RPO (Recovery Point Objective) for the workload using the DRPolicy.
DRPolicy also requires that each cluster in the policy be assigned a S3 profile name, which is configured via the ConfigMap of the ODR cluster and hub operators.
On the Hub cluster navigate to Installed Operators in the openshift-dr-system project and select ODR Hub Operator. You should see two available APIs, DRPolicy and DRPlacementControl.
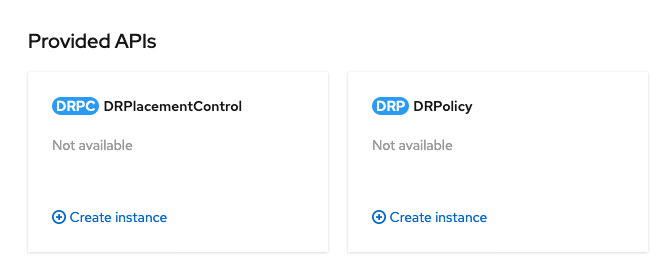
Create instance for DRPolicy and then go to YAML view.
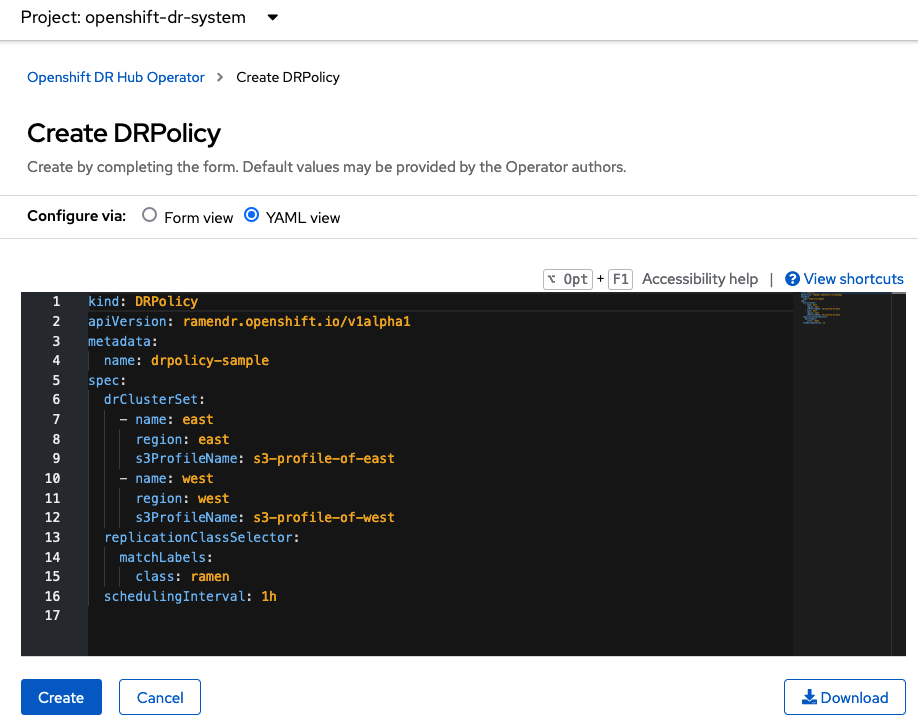
Save the following YAML (below) to filename drpolicy.yaml after replacing <cluster1> and <cluster2> with the correct names of your managed clusters in ACM.
There is no need to specify a namespace to create this resource because DRPolicy is a cluster-scoped resource.
|
apiVersion: ramendr.openshift.io/v1alpha1
kind: DRPolicy
metadata:
  name: odr-policy-5m
spec:
  drClusterSet:
  - name: <cluster1>
    s3ProfileName: s3-primary
  - name: <cluster2>
    s3ProfileName: s3-secondary
  schedulingInterval: 5m
Now create the DRPolicy resource by copying the contents of your unique drpolicy.yaml file into the YAML view (completely replacing original content). Select Create at the bottom of the YAML view screen.
You can also create this resource using CLI
oc create -f drpolicy.yamldrpolicy.ramendr.openshift.io/odr-policy-5m created| The DRPolicy scheduling interval must match that configured in the Create VolumeReplicationClass resource section. |
To validate that the DRPolicy is created successfully run this command.
oc get drpolicy odr-policy-5m -n openshift-dr-system -o jsonpath='{.status.conditions[].reason}{"\n"}'Succeeded10. Create Sample Application for DR testing
In order to test failover from the Primary managed cluster to the Secondary managed cluster and back again we need a simple application. The sample application used for this example with be busybox.
The first step is to create a namespace or project on the Hub cluster for busybox sample application.
oc new-project busybox-sample
A different project name other than busybox-sample can be used if desired. Make sure when deploying the sample application via the ACM console to use the same project name as what is created in this step.
|
10.1. Create DRPlacementControl resource
DRPlacementControl is an API available after the ODR Hub Operator is installed on the Hub cluster. It is broadly an ACM PlacementRule reconciler that orchestrates placement decisions based on data availability across clusters that are part of a DRPolicy.
On the Hub cluster navigate to Installed Operators in the busybox-sample project and select ODR Hub Operator. You should see two available APIs, DRPolicy and DRPlacementControl.
Create instance for DRPlacementControl and then go to YAML view. Make sure the busybox-sample namespace is selected at the top.
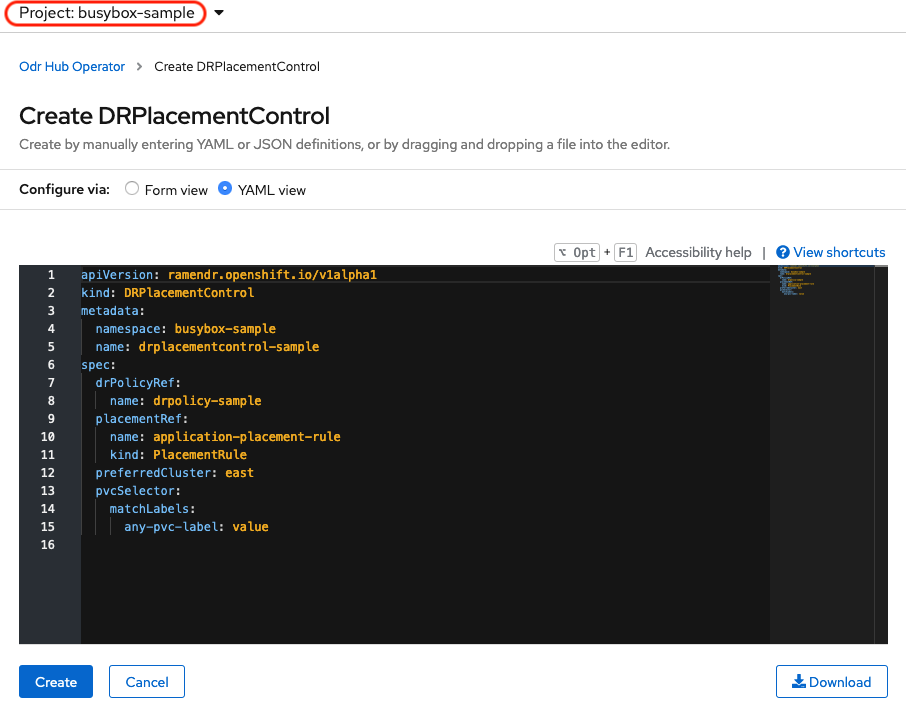
Save the following YAML (below) to filename busybox-drpc.yaml after replacing <cluster1> with the correct name of your managed cluster in ACM.
apiVersion: ramendr.openshift.io/v1alpha1
kind: DRPlacementControl
metadata:
  labels:
    app: busybox-sample
  name: busybox-drpc
spec:
  drPolicyRef:
    name: odr-policy-5m
  placementRef:
    kind: PlacementRule
    name: busybox-placement
  preferredCluster: <cluster1>
  pvcSelector:
    matchLabels:
      appname: busybox
Now create the DRPlacementControl resource by copying the contents of your unique busybox-drpc.yaml file into the YAML view (completely replacing original content). Select Create at the bottom of the YAML view screen.
You can also create this resource using CLI.
This resource must be created in the busybox-sample namespace (or whatever namespace you created earlier).
|
oc create -f busybox-drpc.yaml -n busybox-sampledrplacementcontrol.ramendr.openshift.io/busybox-drpc created10.2. Create PlacementRule resource
Placement rules define the target clusters where resource templates can be deployed. Use placement rules to help you facilitate the multicluster deployment of your applications.
Save the following YAML (below) to filename busybox-placementrule.yaml.
apiVersion: apps.open-cluster-management.io/v1
kind: PlacementRule
metadata:
  labels:
    app: busybox-sample
  name: busybox-placement
spec:
  clusterConditions:
  - status: "True"
    type: ManagedClusterConditionAvailable
  clusterReplicas: 1
  schedulerName: ramen
Now create the PlacementRule resource for the busybox-sample application.
This resource must be created in the busybox-sample namespace (or whatever namespace you created earlier).
|
oc create -f busybox-placementrule.yaml -n busybox-sampleplacementrule.apps.open-cluster-management.io/busybox-placement created10.3. Creating Sample Application using ACM console
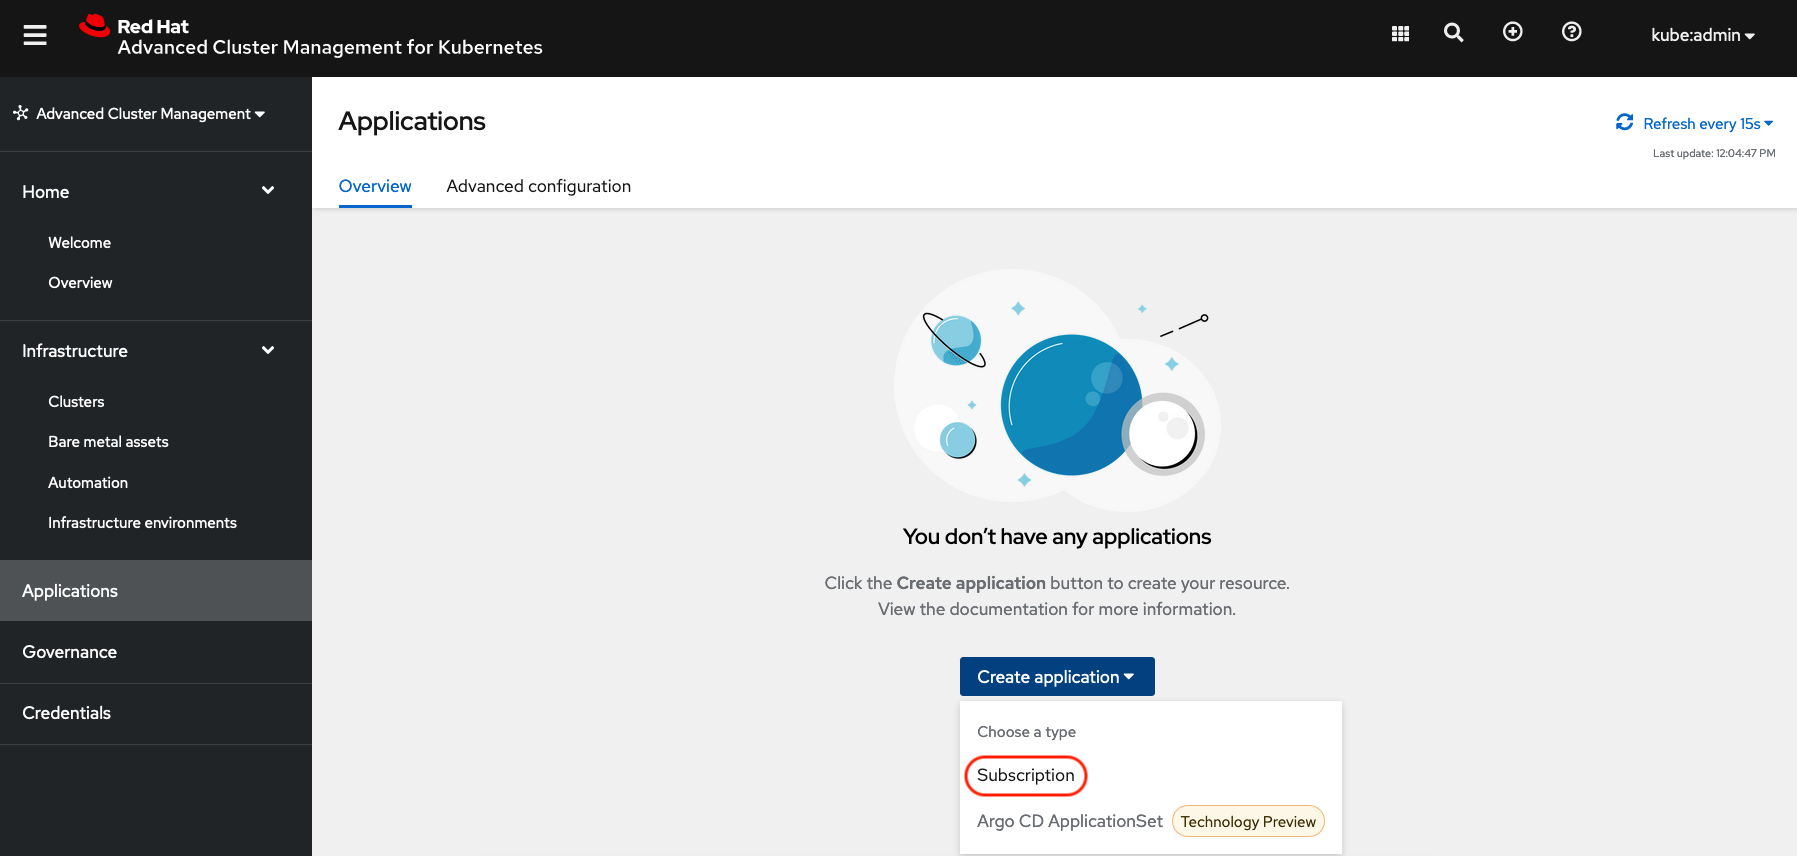
Start by loggin into the ACM console using your OpenShift credentials if not already logged in.
oc get route multicloud-console -n open-cluster-management -o jsonpath --template="https://{.spec.host}/multicloud/applications{'\n'}"This will return a route similar to this one.
https://multicloud-console.apps.perf3.example.com/multicloud/applicationsAfter logging in select Create application in the top right and choose Subscription.
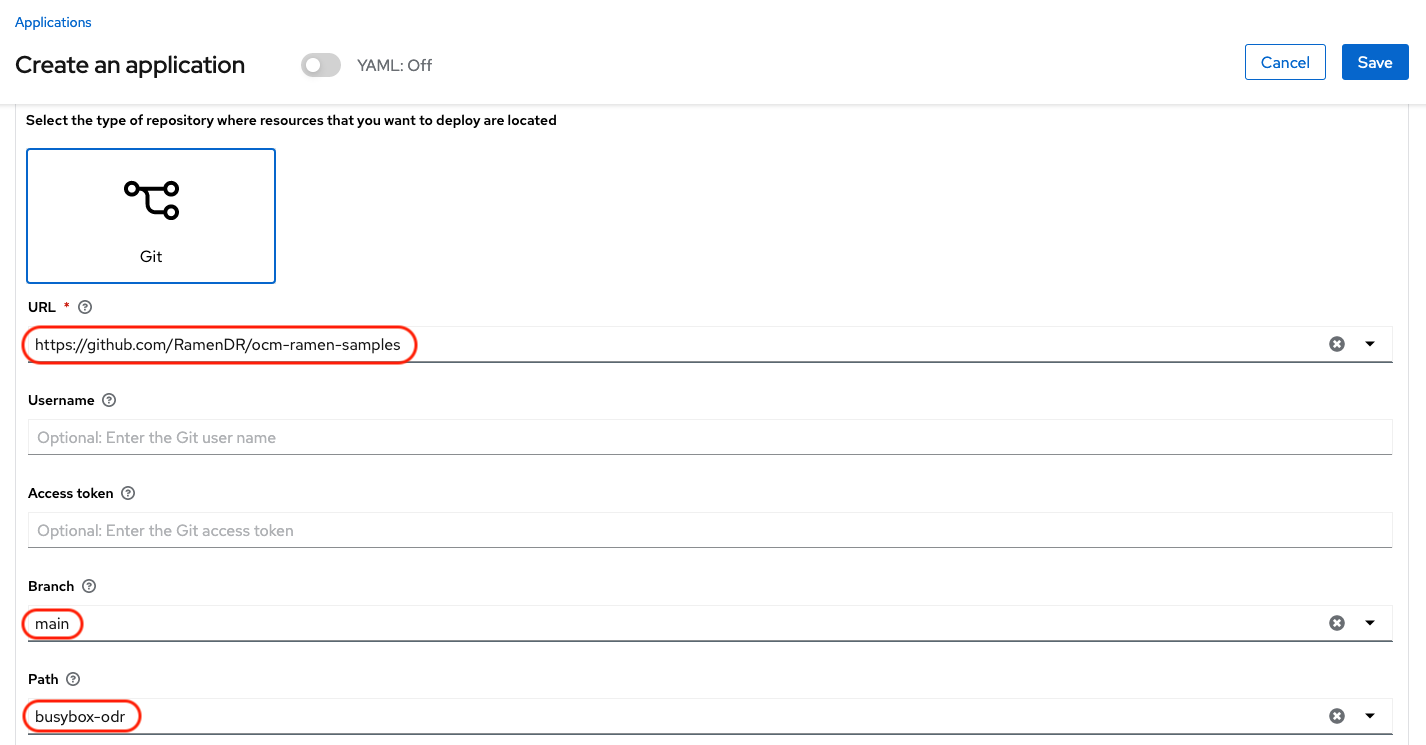
Fill out the top of the Create an application form as shown below and select repository type Git.

The next section to fill out is below the Git box and is the repository URL for the sample application, the github branch and path to resources that will be created, the busybox Pod and PVC.
|
Make sure that the new StorageClass Example Output:
|
Sample application repository github.com/RamenDR/ocm-ramen-samples. Branch is main and path is busybox-odr.
|
Scroll down in the form until you see Select an existing placement configuration and then put your cursor in the box below. You should see the PlacementRule created in prior section. Select this rule.
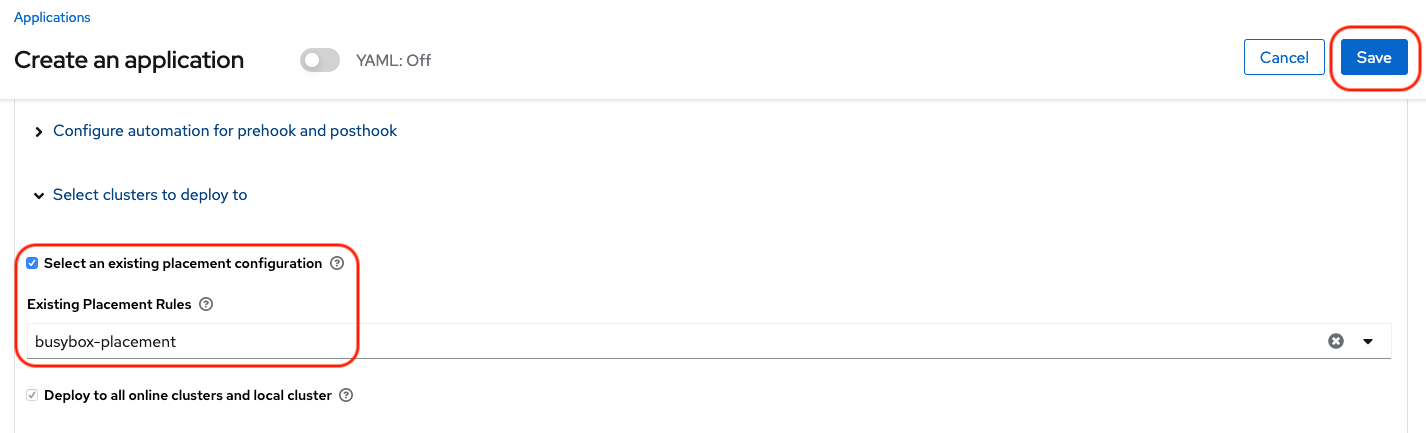
After selecting available rule then select Save in the upper right hand corner.
On the follow-on screen scroll to the bottom. You should see that there are all Green checkmarks on the application topology.
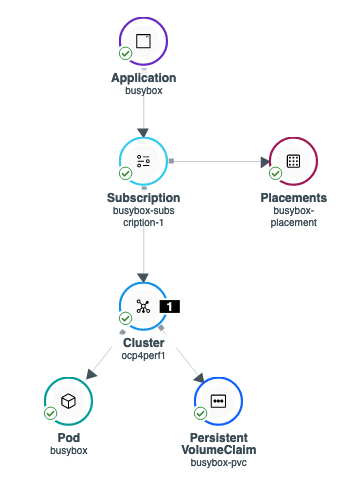
| To get more information click on any of the topology elements and a window will appear to right of the topology view. |
10.4. Validating Sample Application deployment and replication
Now that the busybox application has been deployed to your preferredCluster (specified in the DRPlacementControl) the deployment can be validated.
Logon to your managed cluster where busybox was deployed by ACM. This is most likely your Primary managed cluster.
oc get pods,pvc -n busybox-sampleNAME READY STATUS RESTARTS AGE
pod/busybox 1/1 Running 0 6m
NAME STATUS VOLUME CAPACITY ACCESS MODES STORAGECLASS AGE
persistentvolumeclaim/busybox-pvc Bound pvc-a56c138a-a1a9-4465-927f-af02afbbff37 1Gi RWO ocs-storagecluster-ceph-rbd 6mTo validate that the replication resources are also created for the busybox PVC do the following:
oc get volumereplication,volumereplicationgroup -n busybox-sampleNAME AGE VOLUMEREPLICATIONCLASS PVCNAME DESIREDSTATE CURRENTSTATE
volumereplication.replication.storage.openshift.io/busybox-pvc 6m odf-rbd-volumereplicationclass busybox-pvc primary Primary
NAME AGE
volumereplicationgroup.ramendr.openshift.io/busybox-drpc 6mTo validate that the busybox volume has been replicated to the alternate cluster run this command on both the Primary managed cluster and the Secondary managed cluster.
oc get cephblockpool ocs-storagecluster-cephblockpool -n openshift-storage -o jsonpath='{.status.mirroringStatus.summary}{"\n"}'{"daemon_health":"OK","health":"OK","image_health":"OK","states":{"replaying":2}}| Both managed clusters should have the exact same output with a new status of "states":{"replaying":2}. |
10.5. Deleting the Sample Application
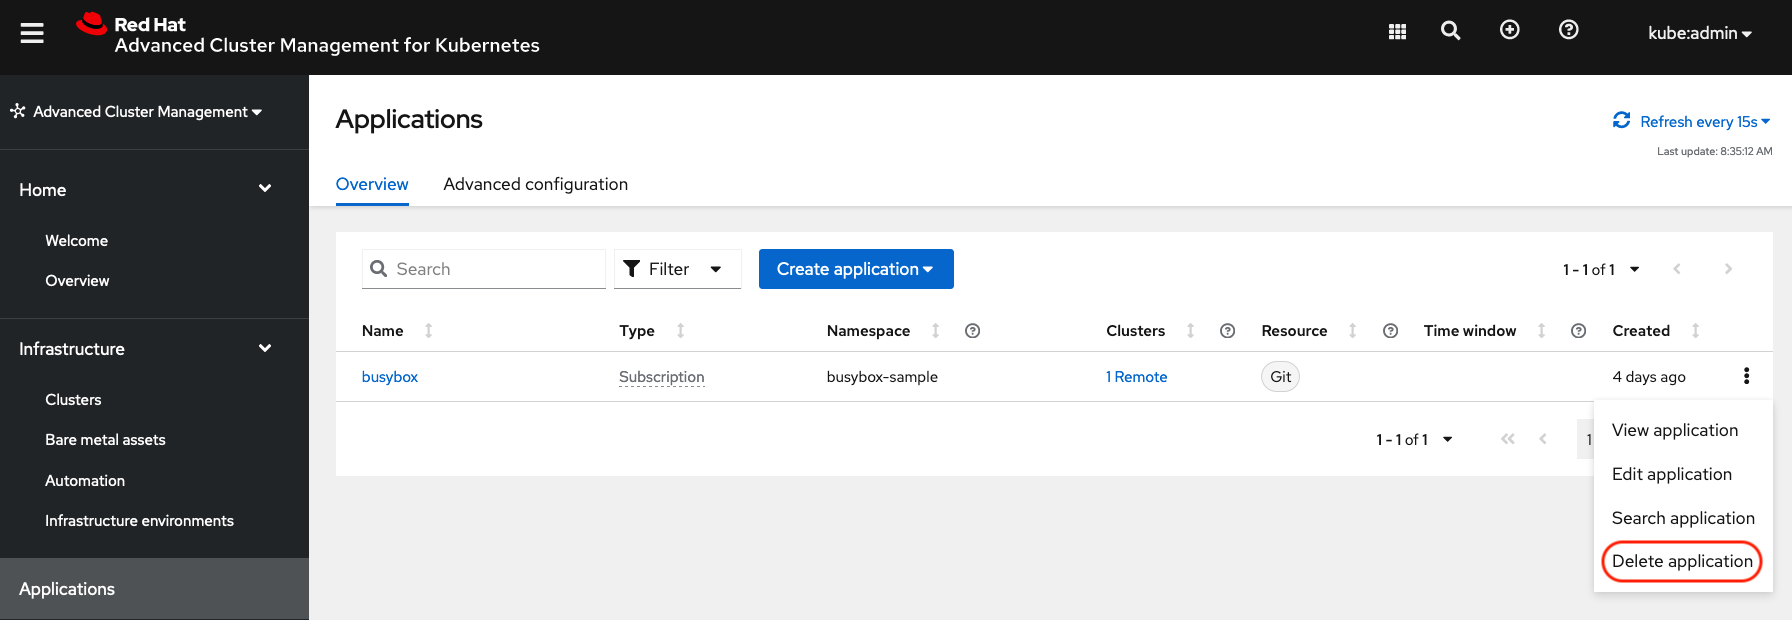
Deleting the busybox application can be done using the ACM console. Navigate to Applications and then find the application to be deleted (busybox in this case).
When Delete application is selected a new screen will appear asking if the application related resources should also be deleted. Make sure to check the box to delete the Subscription and PlacementRule.
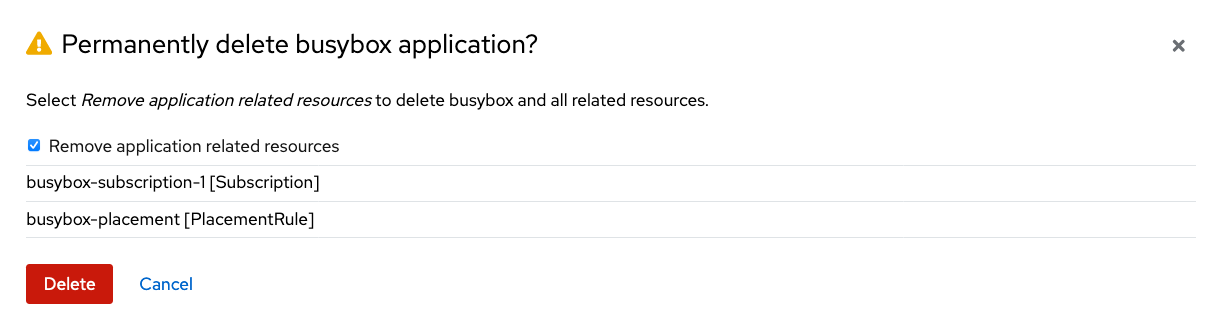
Select Delete in this screen. This will delete the busybox application on the Primary managed cluster (or whatever cluster the application was running on).
In addition to the resources deleted using the ACM console, the DRPlacementControl must also be deleted immediately after deleting the busybox application. Logon to the OpenShift Web console for the Hub cluster. Navigate to Installed Operators for the project busybox-sample. Choose OpenShift DR Hub Operator and the DRPlacementControl.
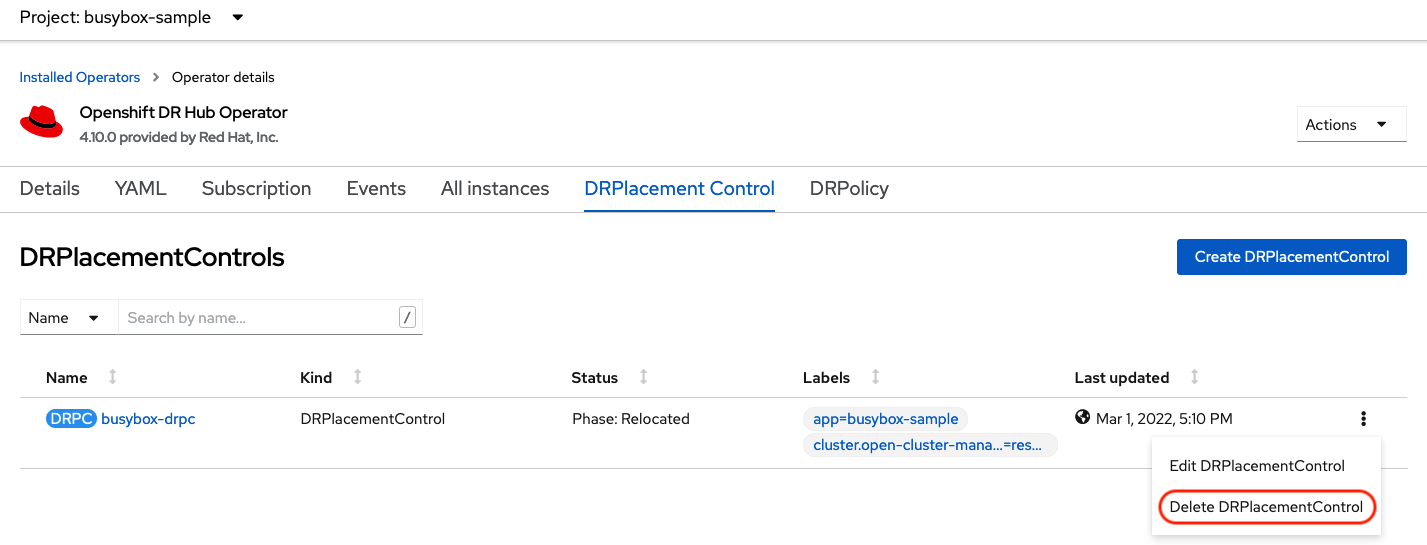
Select Delete DRPlacementControl.
If desired, the DRPlacementControl resource can also be deleted in the application namespace using CLI.
|
| This process can be used to delete any application with a DRPlacementControl resource. |
11. Application Failover between managed clusters
This section will detail how to failover the busybox sample application. The failover method for Regional Disaster Recovery is application based. Each application that is to be protected in this manner must have a corresponding DRPlacementControl resource and a PlacementRule resource created in the application namespace as shown in the Create Sample Application for DR testing section.
To failover requires modifying the DRPlacementControl YAML view. On the Hub cluster navigate to Installed Operators and then to Openshift DR Hub Operator. Select DRPlacementControl as show below.
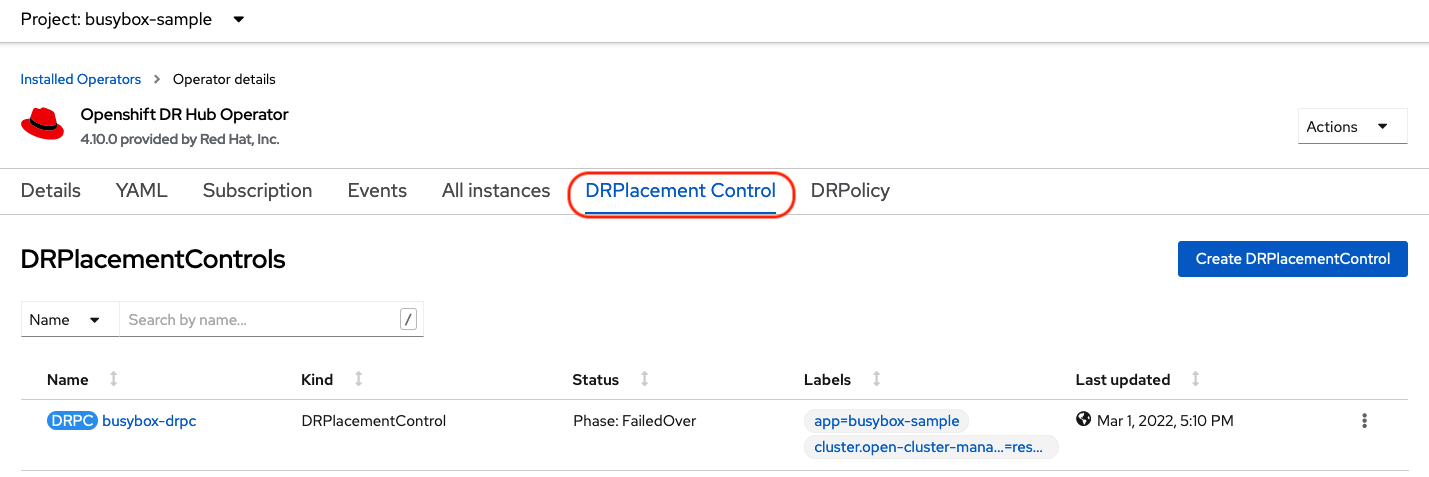
Select drpc-busybox and then the YAML view. Add the action and failoverCluster as shown below. The failoverCluster should be the ACM cluster name for the Secondary managed cluster.
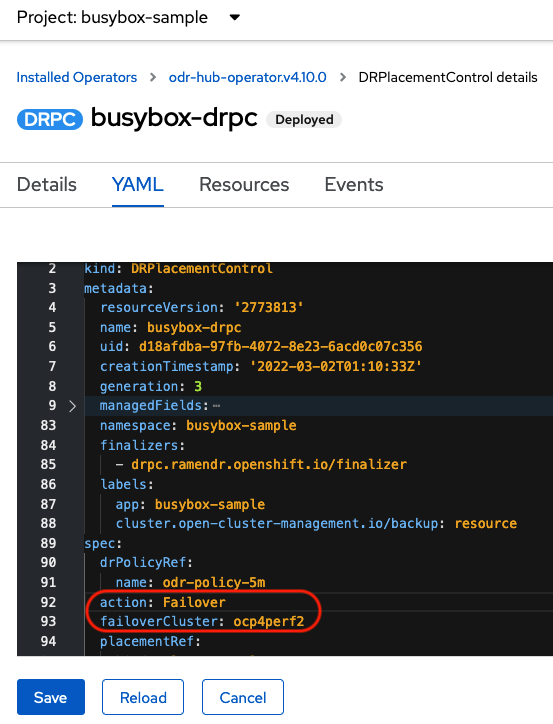
Select Save.
In the failoverCluster specified in the YAML file (i.e., ocp4perf2), see if the application busybox is now running in the Secondary managed cluster using the following command:
oc get pods,pvc -n busybox-sampleNAME READY STATUS RESTARTS AGE
pod/busybox 1/1 Running 0 35s
NAME STATUS VOLUME CAPACITY ACCESS MODES STORAGECLASS AGE
persistentvolumeclaim/busybox-pvc Bound pvc-79f2a74d-6e2c-48fb-9ed9-666b74cfa1bb 5Gi RWO ocs-storagecluster-ceph-rbd 35sNext, using the same command check if busybox is running in the Primary managed cluster. The busybox application should no longer be running on this managed cluster.
oc get pods,pvc -n busybox-sampleNo resources found in busybox-sample namespace.12. Application Failback between managed clusters
A failback operation is very similar to failover. The failback is application based and uses the DRPlacementControl to trigger the failback. The main difference for failback is that a resync is issued to make sure any new application data saved on the Secondary managed cluster is immediately, not waiting for the mirroring schedule interval, replicated to the Primary managed cluster.
To failback requires modifying the DRPlacementControl YAML view. On the Hub cluster navigate to Installed Operators and then to Openshift DR Hub Operator. Select DRPlacementControl as show below.
Select drpc-busybox and then the YAML form. Modify the action to Relocate as shown below.

Select Save.
Check if the application busybox is now running in the Primary managed cluster using the following command. The failback is to the preferredCluster which should be where the application was running before the failover operation.
oc get pods,pvc -n busybox-sampleNAME READY STATUS RESTARTS AGE
pod/busybox 1/1 Running 0 60s
NAME STATUS VOLUME CAPACITY ACCESS MODES STORAGECLASS AGE
persistentvolumeclaim/busybox-pvc Bound pvc-79f2a74d-6e2c-48fb-9ed9-666b74cfa1bb 5Gi RWO ocs-storagecluster-ceph-rbd 61sNext, using the same command, check if busybox is running in the Secondary managed cluster. The busybox application should no longer be running on this managed cluster.
oc get pods,pvc -n busybox-sampleNo resources found in busybox-sample namespace.