OpenShift Disaster Recovery using Stretch Cluster
- 1. Overview
- 2. OpenShift DR Stretch Cluster Prerequisites
- 3. Local Storage Operator
- 4. OpenShift Data Foundation Deployment
- 5. Install Zone Aware Sample Application
- 6. Data Zone Failure and Recovery
- 7. Appendix A: Resiliency for OpenShift Registry, Monitoring, Routing
- 8. Appendix B: OpenShift DR StorageCluster for CLI deployment
1. Overview
In order to provide a level of disaster recovery an OpenShift Container Platform (OCP) deployment can be stretched between two geographically different locations. To be resilient in the face of a disaster necessary OCP services, including storage, must be able to survive when one of the two locations is partially or totally not available. This solution sometimes is called OpenShift DR stretch cluster which means the distance between the sites needs to be limited so that OpenShift services and storage can operate with acceptable performance.
Currently OpenShift DR stretch cluster is tested to be deployed where latencies do not exceed 10 milliseconds round-trip time (RTT) between OCP nodes in different locations. Contact Red Hat Customer Support if you are planning to deploy with higher latencies.
|
The intent of this solution guide is to detail the steps and commands necessary to deploy OpenShift Data Foundation(ODF) along with Kubernetes zone topology labels to achieve a highly available storage infrastructure.
This is a general overview of the steps required to configure and execute OpenShift DR stretch cluster capabilities using ODF 4.7 or greater.
-
Ensure you have at least 3 OCP master nodes in 3 different locations
Ensure that there is a master node in each of the two locations and that the 3rd master node is in a 3rd location to act as the arbiter in the case of site outage. -
Ensure you have a minimum of 4 OCP worker nodes
Ensure you have at least 4 OCP worker nodes evenly dispersed across 2 different locations. -
Assign kubernetes topology zone labels to each master and worker node
Assign uniquetopology.kubernetes.io/zonelabels to each node to define failure domains as well as the arbiter zone. -
Install ODF operators and storage cluster
Install the OpenShift Container Storage operator and storage cluster using OperatorHub in the OpenShift Web console. -
Install a sample application for failure testing
Install an OCP application that can be configured to be highly available with critical components deployed in both data zones. -
Power off all OCP nodes in one location
Simulate a site outage by powering off all nodes (including master node) and validate sample application availability. -
Power on all OCP nodes in failed location
Simulate a recovery by powering back on all nodes and validate sample application availability.
2. OpenShift DR Stretch Cluster Prerequisites
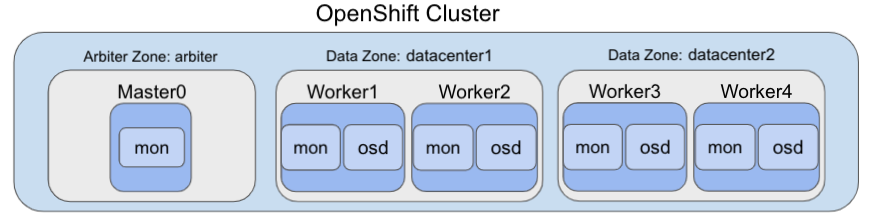
The diagram shows the most simple deployment for OpenShift DR stretch cluster. The ODF Monitor pod that is the arbiter in case of a site outage can be scheduled on a master node. The diagram does not show the master nodes in each Data Zone. They are required for a highly available OCP control plane. Also, it is critical that the OCP nodes in one location have network reachability to the OCP nodes in the other two locations.
| Refer to the planning guide for node and storage sizing for ODF. |
2.1. Apply topology zone labels to OCP nodes
Prior to installing ODF the nodes used for storage and the node used to host the arbiter function must be specifically labeled to define their function. In our case we will use the label datacenter1 for one location with storage nodes and datacenter2 for the other location. The zone that will have the arbiter function in the case of a site outage will use the arbiter label. These labels are arbitrary but they do need to be unique for the 3 locations.
For example, you can label the nodes and in Figure 1 as follows (including master nodes not shown in diagram):
-
topology.kubernetes.io/zone=arbiter for Master0
-
topology.kubernetes.io/zone=datacenter1 for Master1, Worker1, Worker2
-
topology.kubernetes.io/zone=datacenter2 for Master2, Worker3, Worker4
To apply the labels to the node using oc CLI do the following:
oc label node <NODENAME> topology.kubernetes.io/zone=<LABLE>To validate the labels run the following commands using the example labels for the 3 zones:
oc get nodes -l topology.kubernetes.io/zone=arbiter -o nameNAME
node/perf1-mz8bt-master-0oc get nodes -l topology.kubernetes.io/zone=datacenter1 -o nameNAME
node/perf1-mz8bt-master-1
node/perf1-mz8bt-worker-d2hdm
node/perf1-mz8bt-worker-k68rvoc get nodes -l topology.kubernetes.io/zone=datacenter2 -o nameNAME
node/perf1-mz8bt-master-2
node/perf1-mz8bt-worker-ntkp8
node/perf1-mz8bt-worker-qpwsrThe OpenShift DR stretch cluster topology zone labels are now applied to the appropriate OCP nodes to define the three locations. Next step is installing the storage operators from OCP OperatorHub.
3. Local Storage Operator
Now switch over to your Openshift Web Console. You can get your URL by
issuing command below to get the OCP 4 console route.
oc get -n openshift-console route consoleCopy the Openshift Web Console route to a browser tab and login using your cluster-admin username (i.e., kubeadmin) and password.
3.1. Installing the Local Storage Operator v4.7
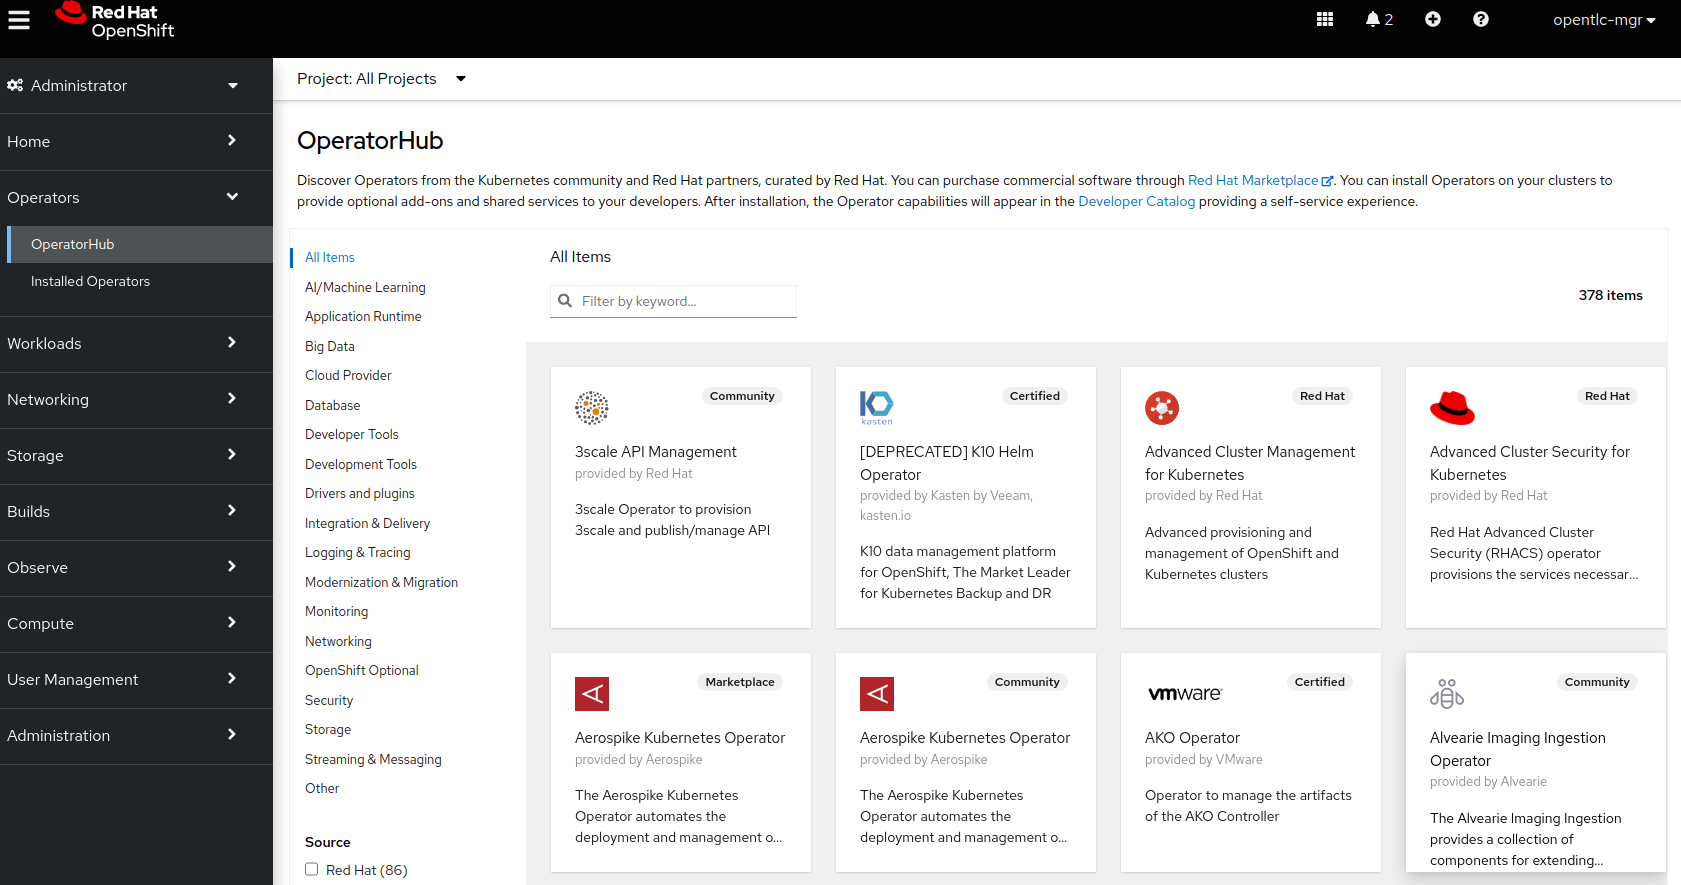
Once you are logged in, navigate to the Operators → OperatorHub menu.
Now type local storage in the Filter by keyword… box.
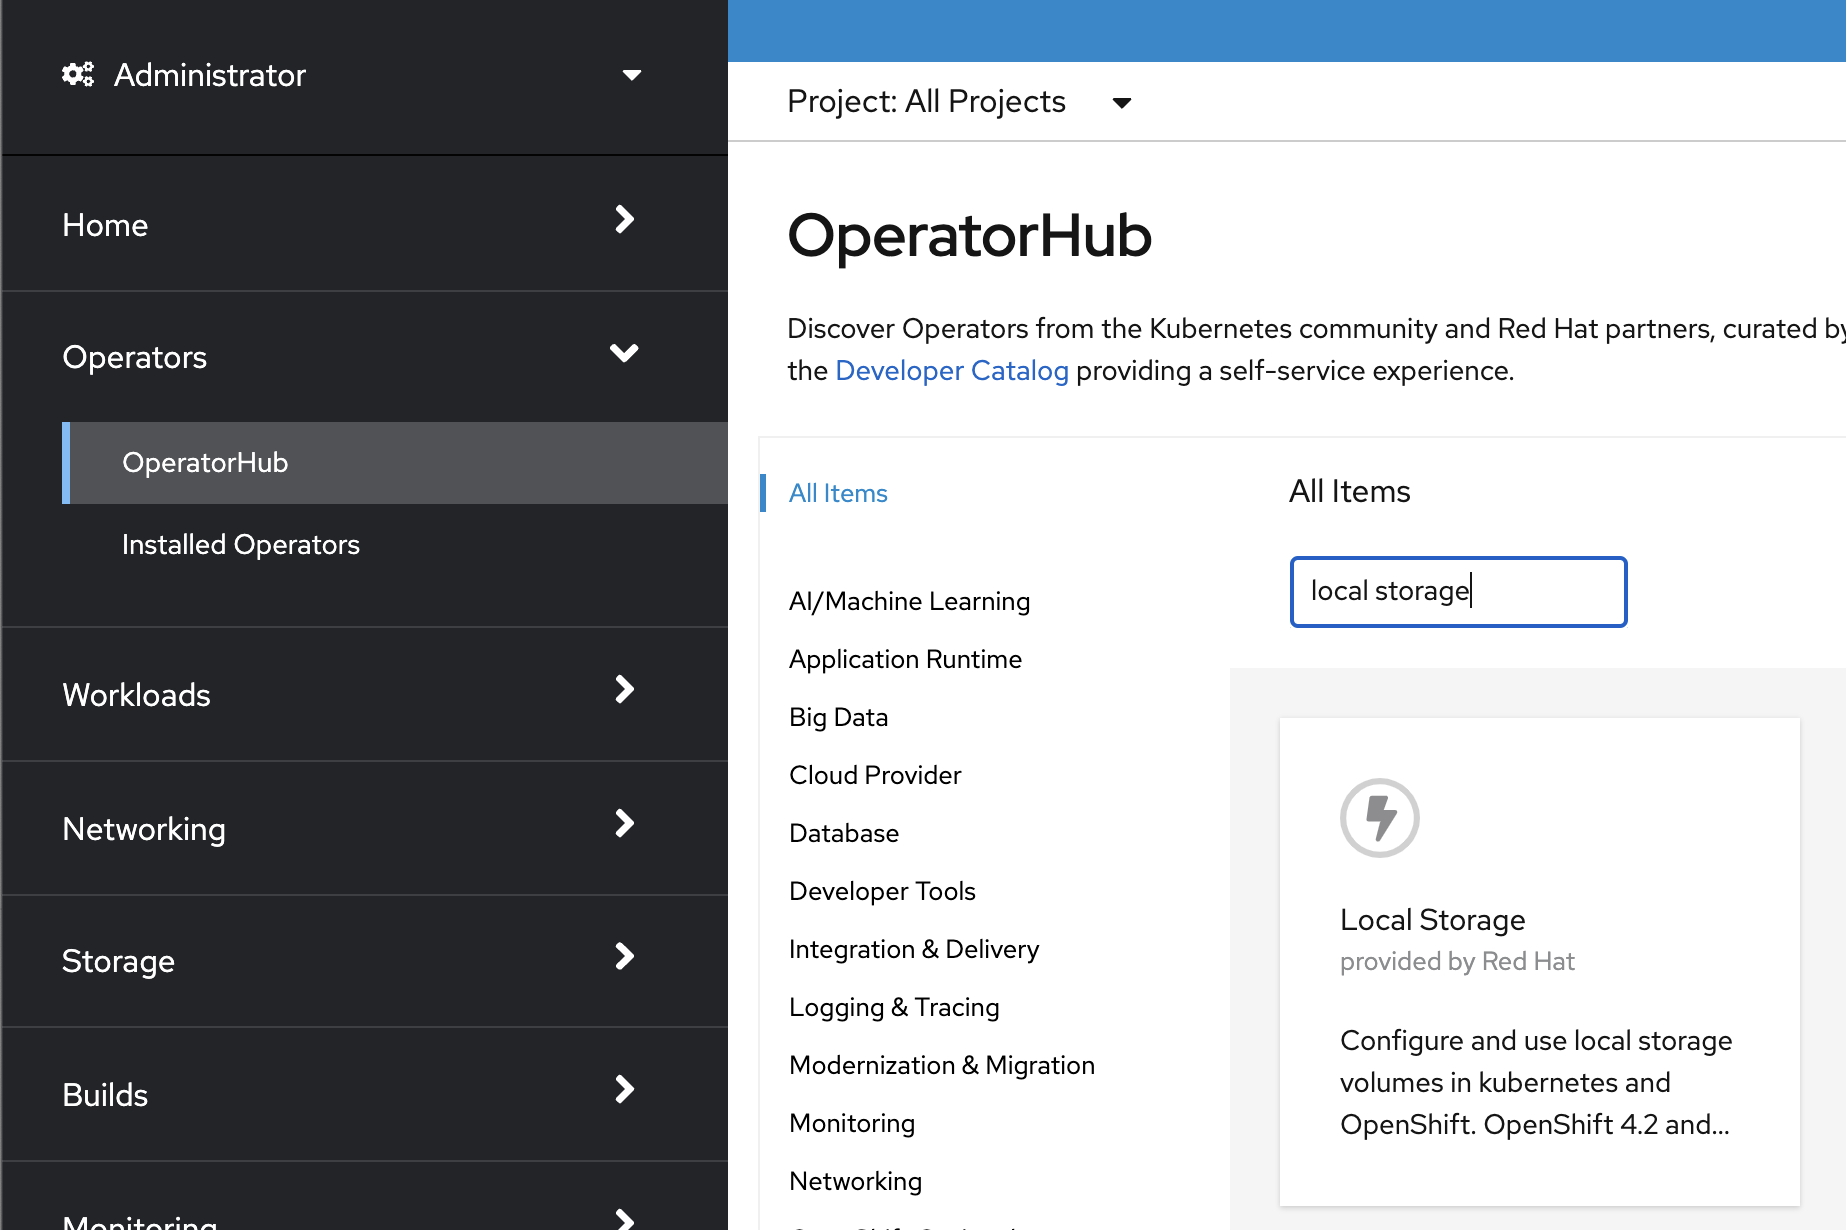
Select Local Storage and then select Install.
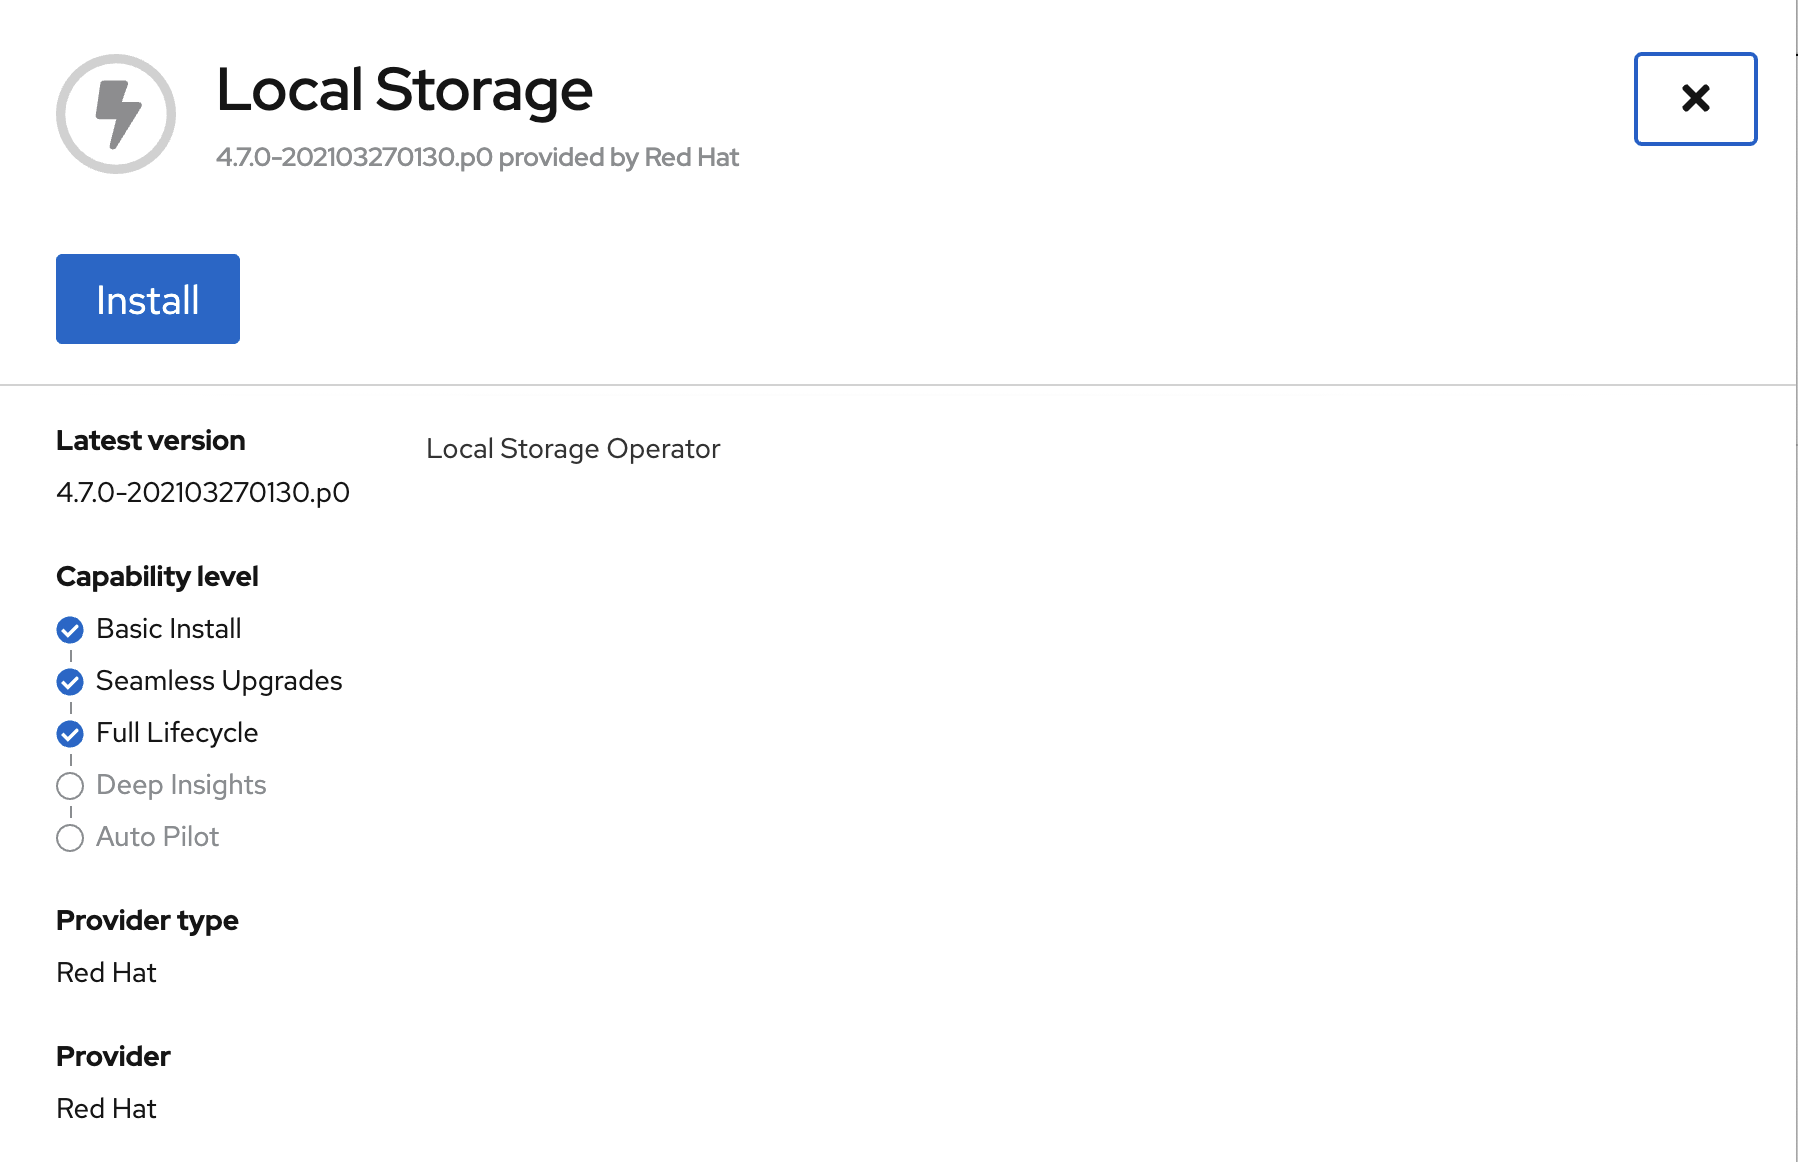
On the next screen make sure the settings are as shown in this figure.
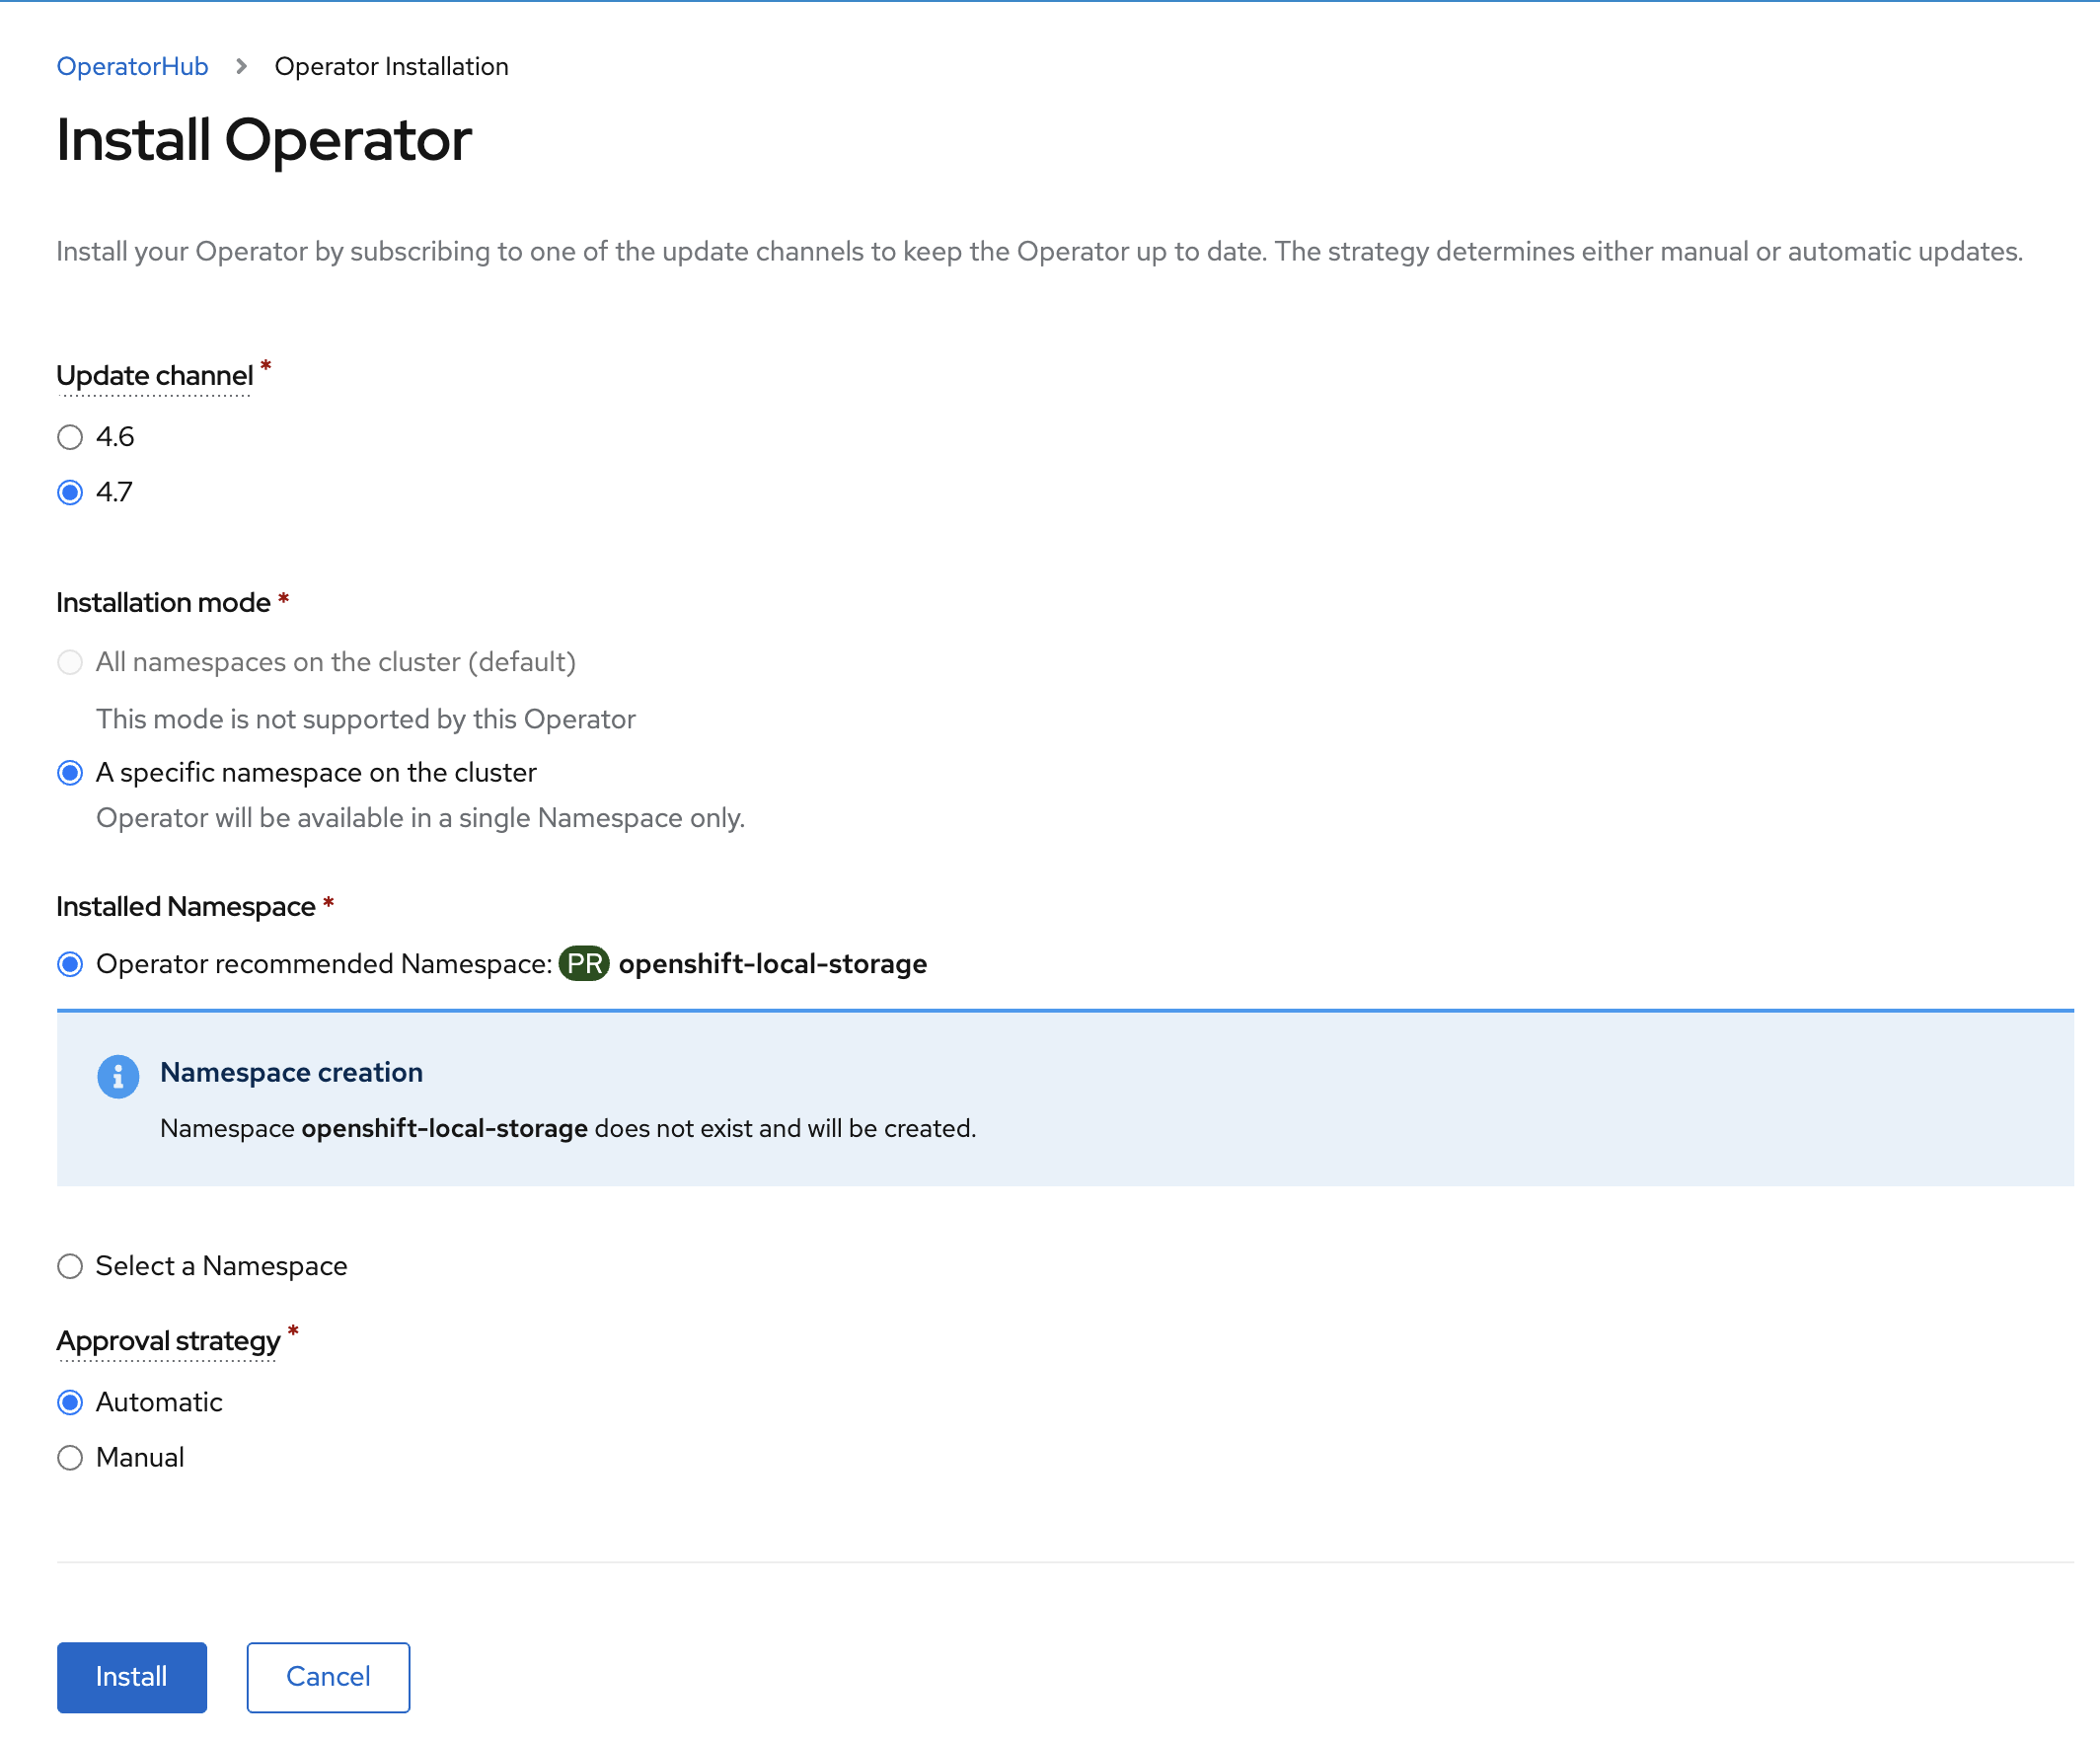
Click Install.
Verify the Local Storage Operator deployment is successful.
oc get csv,pod -n openshift-local-storageNAME DISPLAY VERSION REPLACES PHASE
clusterserviceversion.operators.coreos.com/local-storage-operator.4.7.0-202103270130.p0 Local Storage 4.7.0-202103270130.p0 Succeeded
NAME READY STATUS RESTARTS AGE
pod/local-storage-operator-5879cf9565-r5s7k 1/1 Running 0 31s| Do not proceed with the next instructions until the Local Storage Operator is deployed successfully. |
4. OpenShift Data Foundation Deployment
In this section you will be installing ODF and enabling arbiter mode. For instruction specific to you environment reference ODF documentation.
Currently the OpenShift DR stretch cluster solution is only designed for use on VMware and Bare Metal servers.
|
The following will be installed:
-
The ODF Operator (OCS Operator in OCP Web console)
-
All other ODF resources (Ceph Pods, NooBaa Pods, StorageClasses)
4.1. ODF Operator Deployment
Start with creating the openshift-storage namespace.
oc create namespace openshift-storageYou must add the monitoring label to this namespace. This is required to get
prometheus metrics and alerts for the OCP storage dashboards. To label the
openshift-storage namespace use the following command:
oc label namespace openshift-storage "openshift.io/cluster-monitoring=true"
The creation of the openshift-storage namespace, and the monitoring
label added to this namespace, can also be done during the OCS operator
installation using the Openshift Web Console.
|
Navigate to the Operators → OperatorHub menu again.
Now type openshift container storage in the Filter by keyword… box.
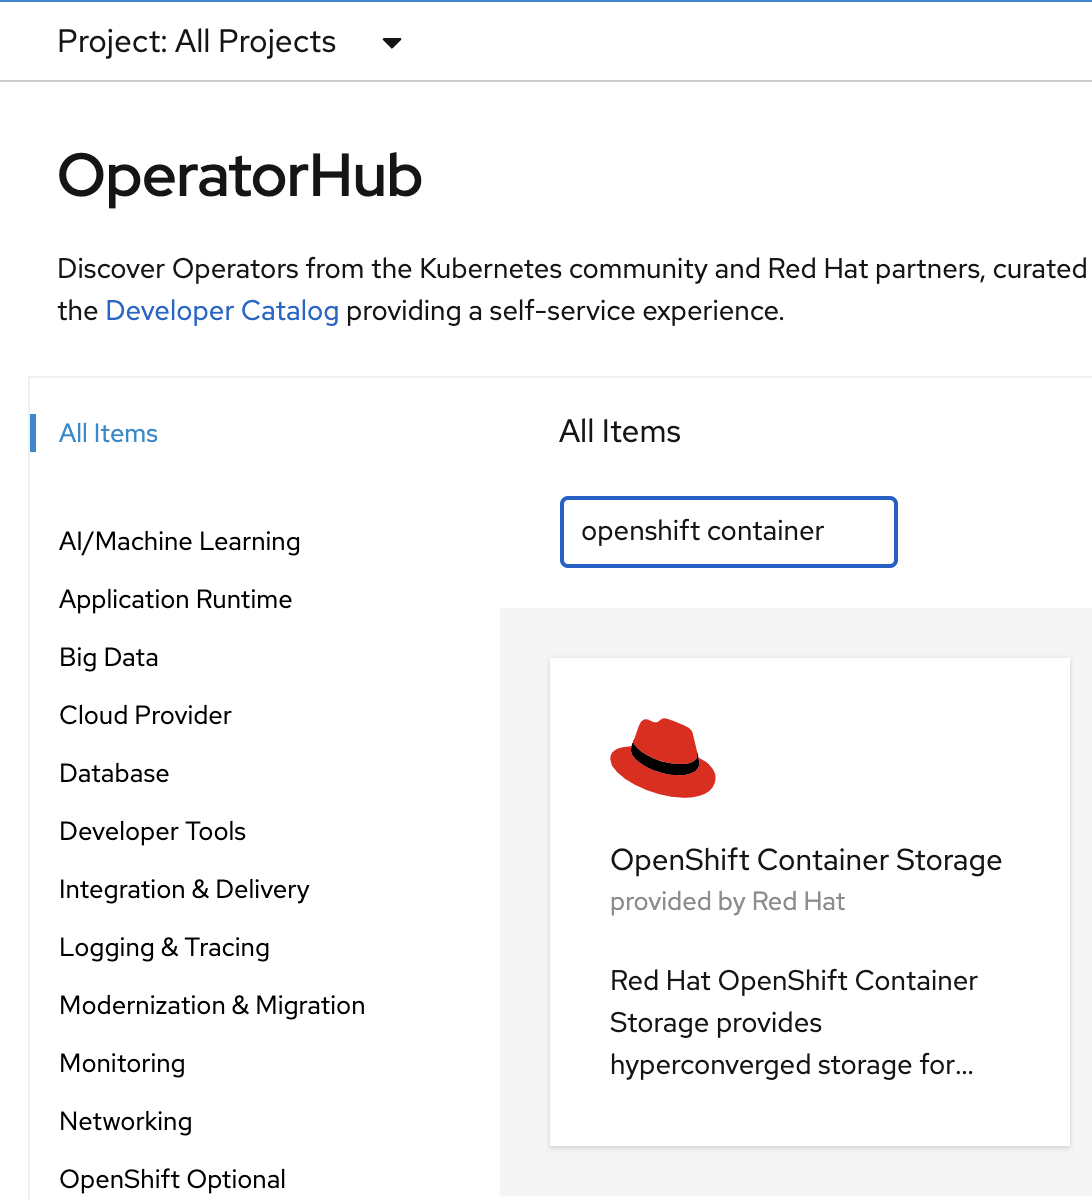
Select OpenShift Data Foundation Operator and then select Install.
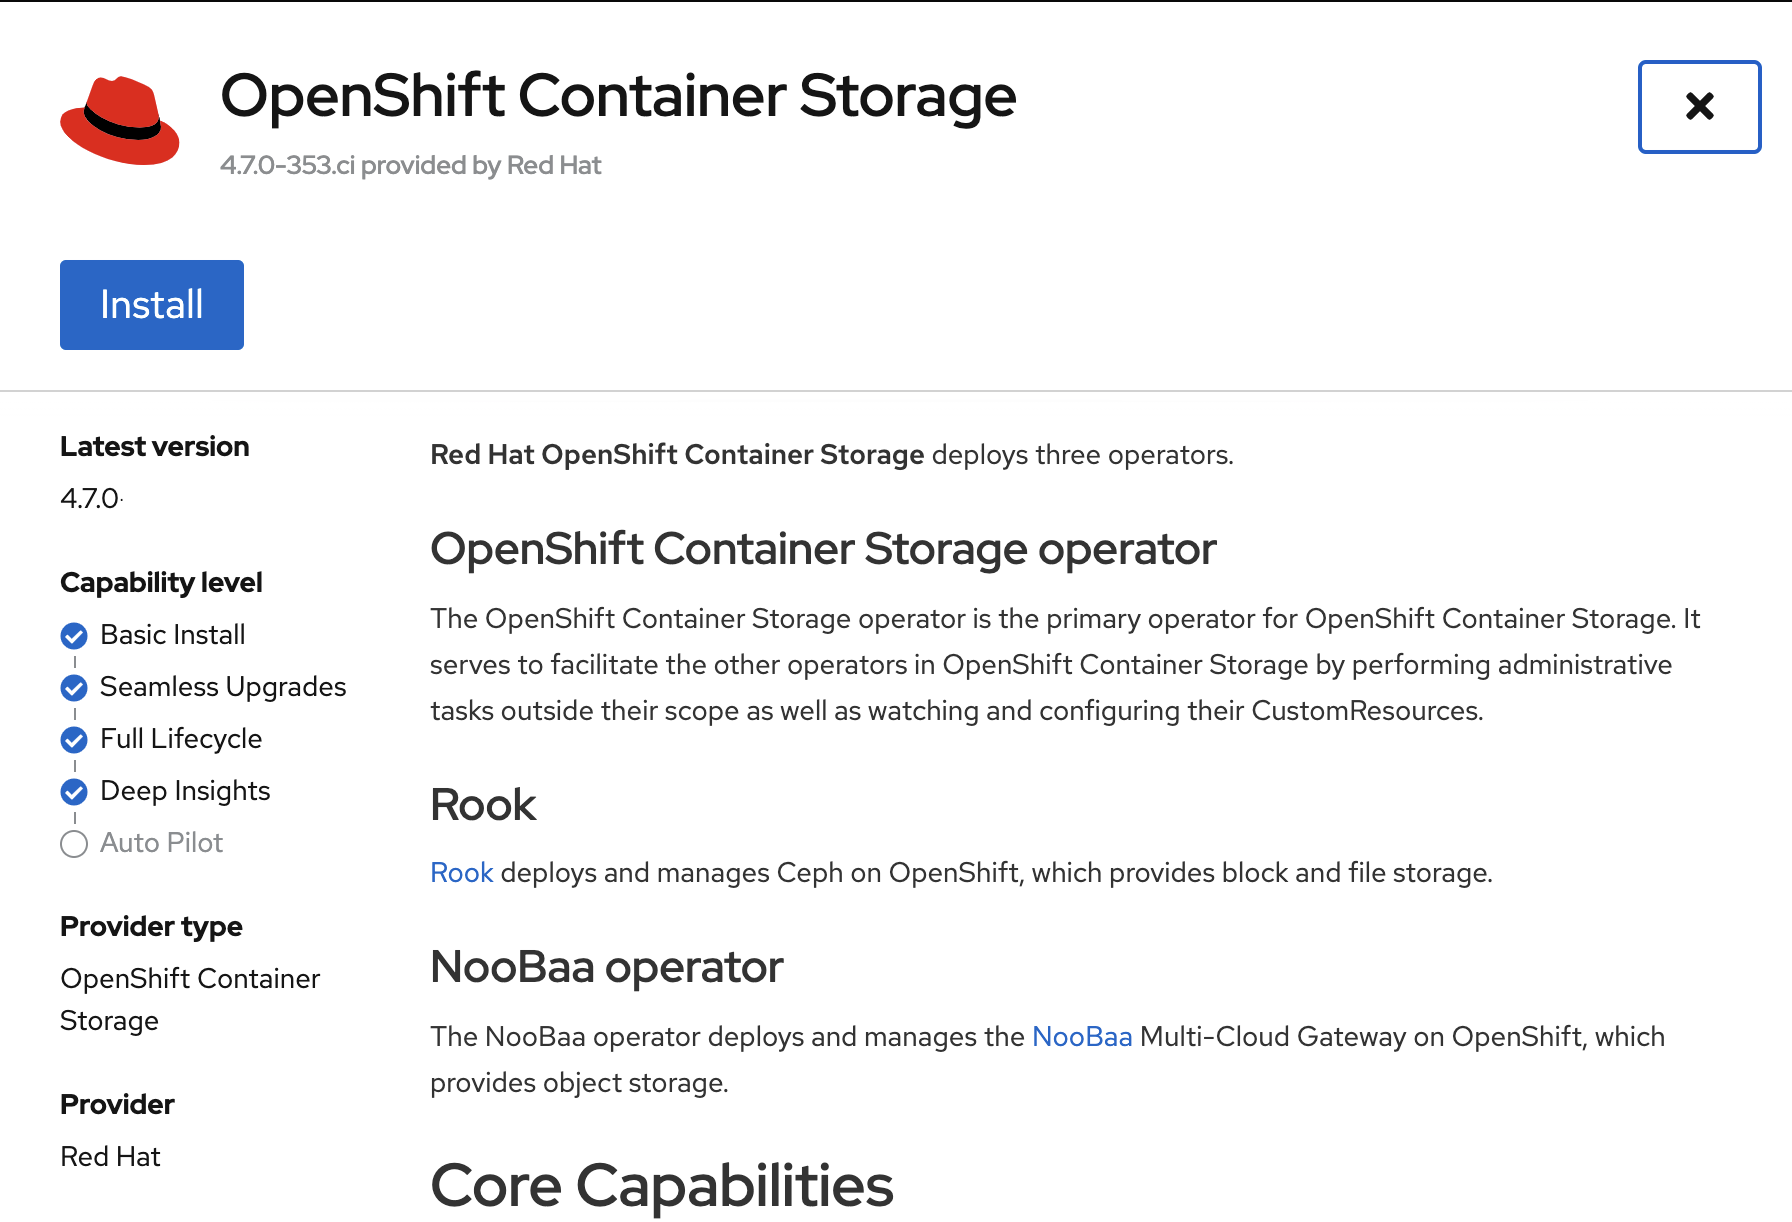
On the next screen make sure the settings are as shown in this figure.

Click Install.
Now you can go back to your terminal window to check the progress of the installation. Verify the operator is deployed successfully.
oc get pods,csv -n openshift-storageNAME READY STATUS RESTARTS AGE
pod/noobaa-operator-746ddfc79-fcrfz 1/1 Running 0 33s
pod/ocs-metrics-exporter-54b6d689f8-ltxvp 1/1 Running 0 32s
pod/ocs-operator-5bcdd97ff4-rgn7f 1/1 Running 0 33s
pod/rook-ceph-operator-7dd585bd97-sldkk 1/1 Running 0 33s
NAME DISPLAY VERSION REPLACES PHASE
clusterserviceversion.operators.coreos.com/ocs-operator.v4.7.0 OpenShift Container Storage 4.7.0 Succeeded| Reaching this status shows that the installation of your operator was successful. Reaching this state can take several minutes. |
4.2. ODF Storage Cluster Deployment
Navigate to the Operators → Installed Operators menu.
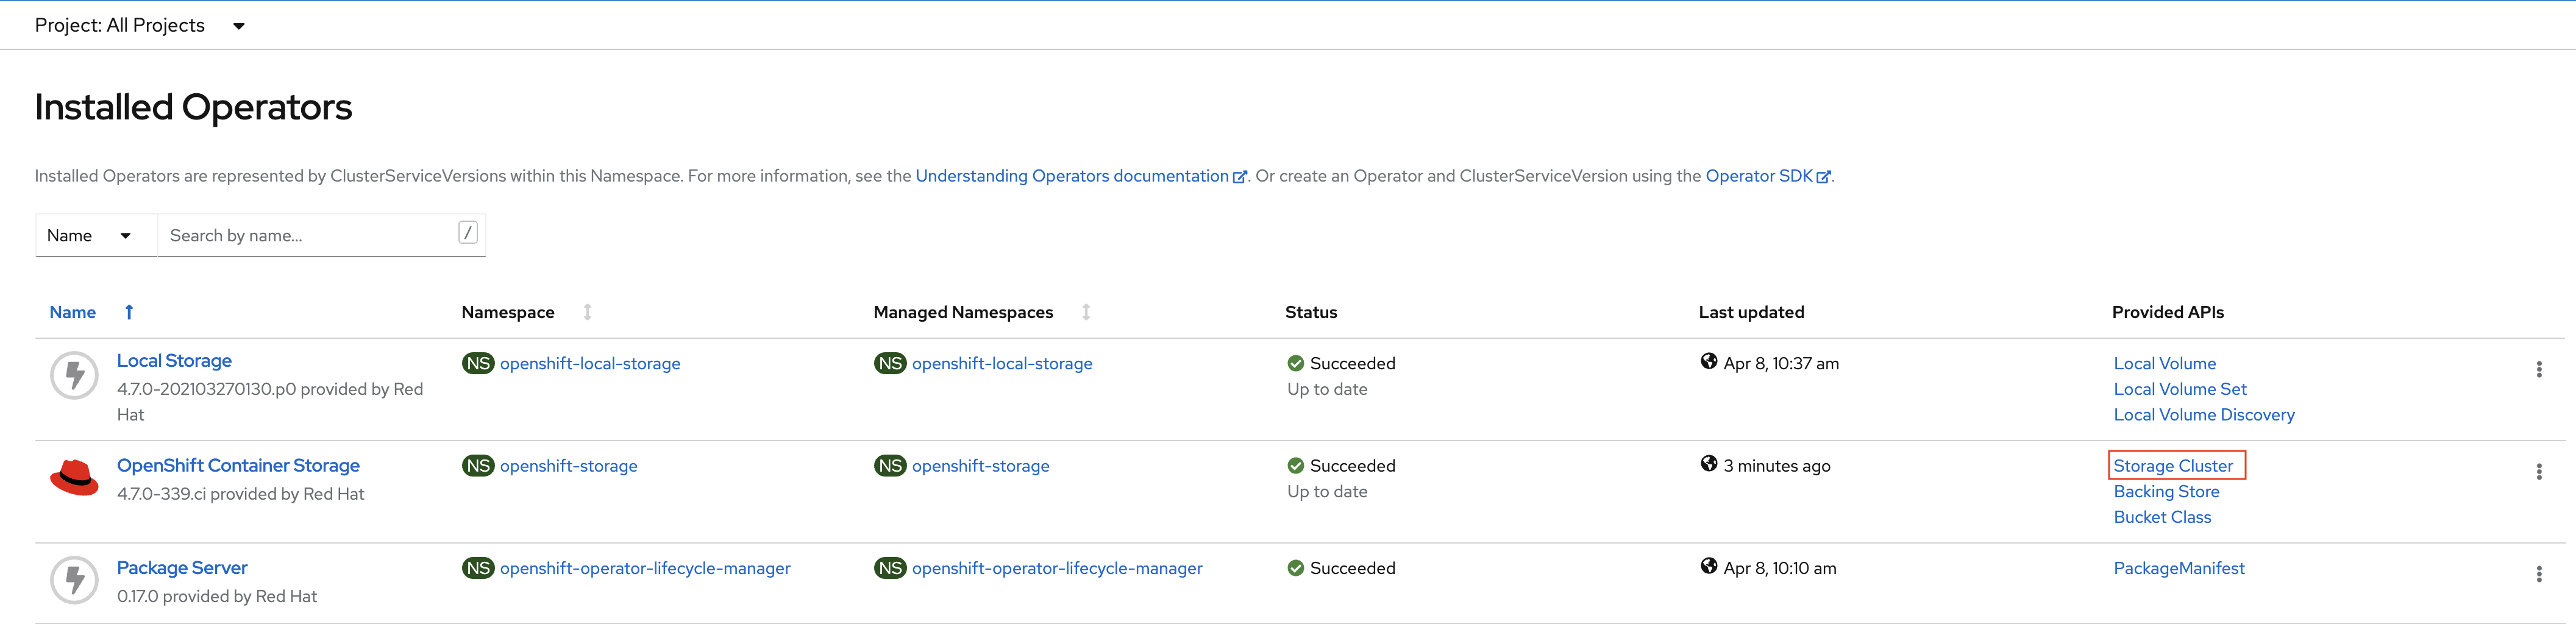
Click on Storage Cluster as indicated in the graphic above.

Click on Create Storage Cluster on the far right side.
Select the Internal - Attached Devices deployment option.
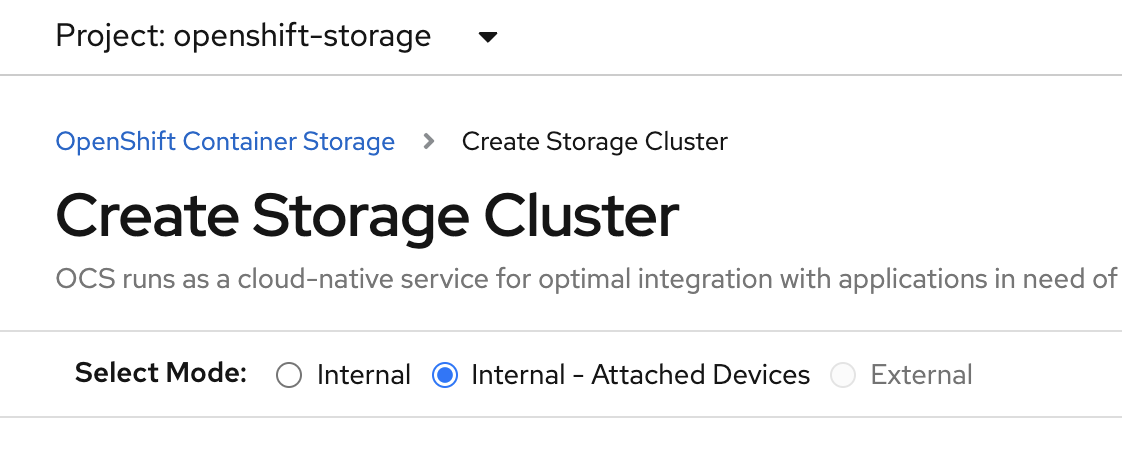
Provide storage cluster details.
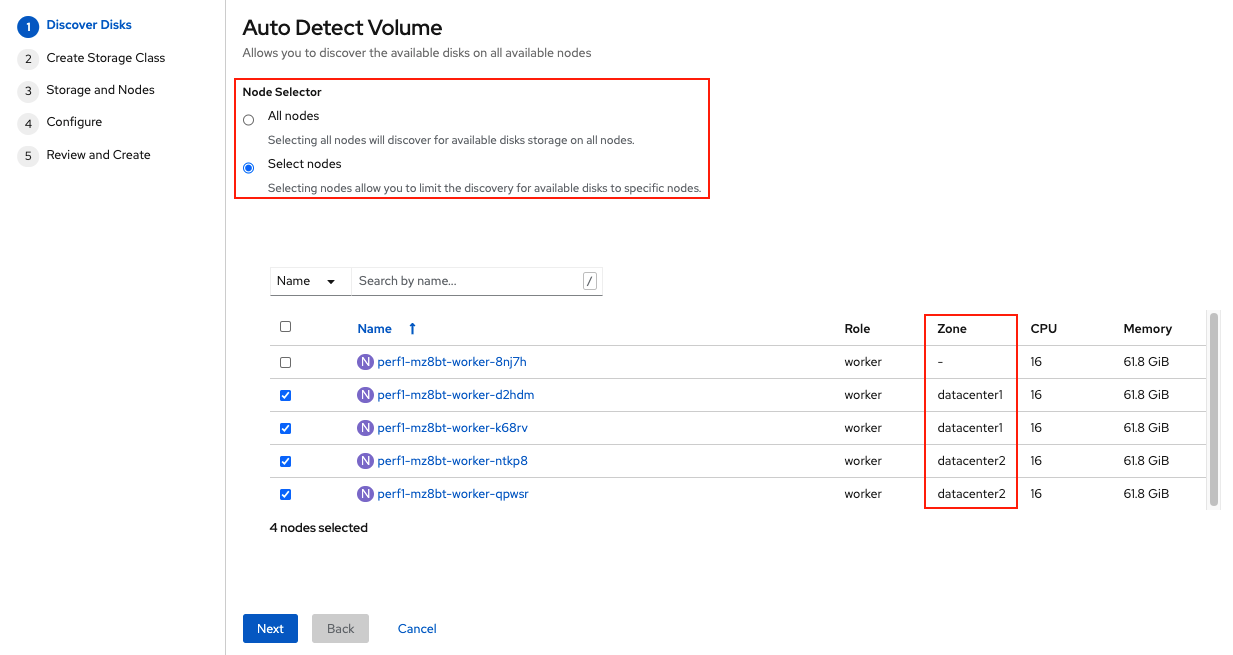
Click Next at the bottom of the screen.
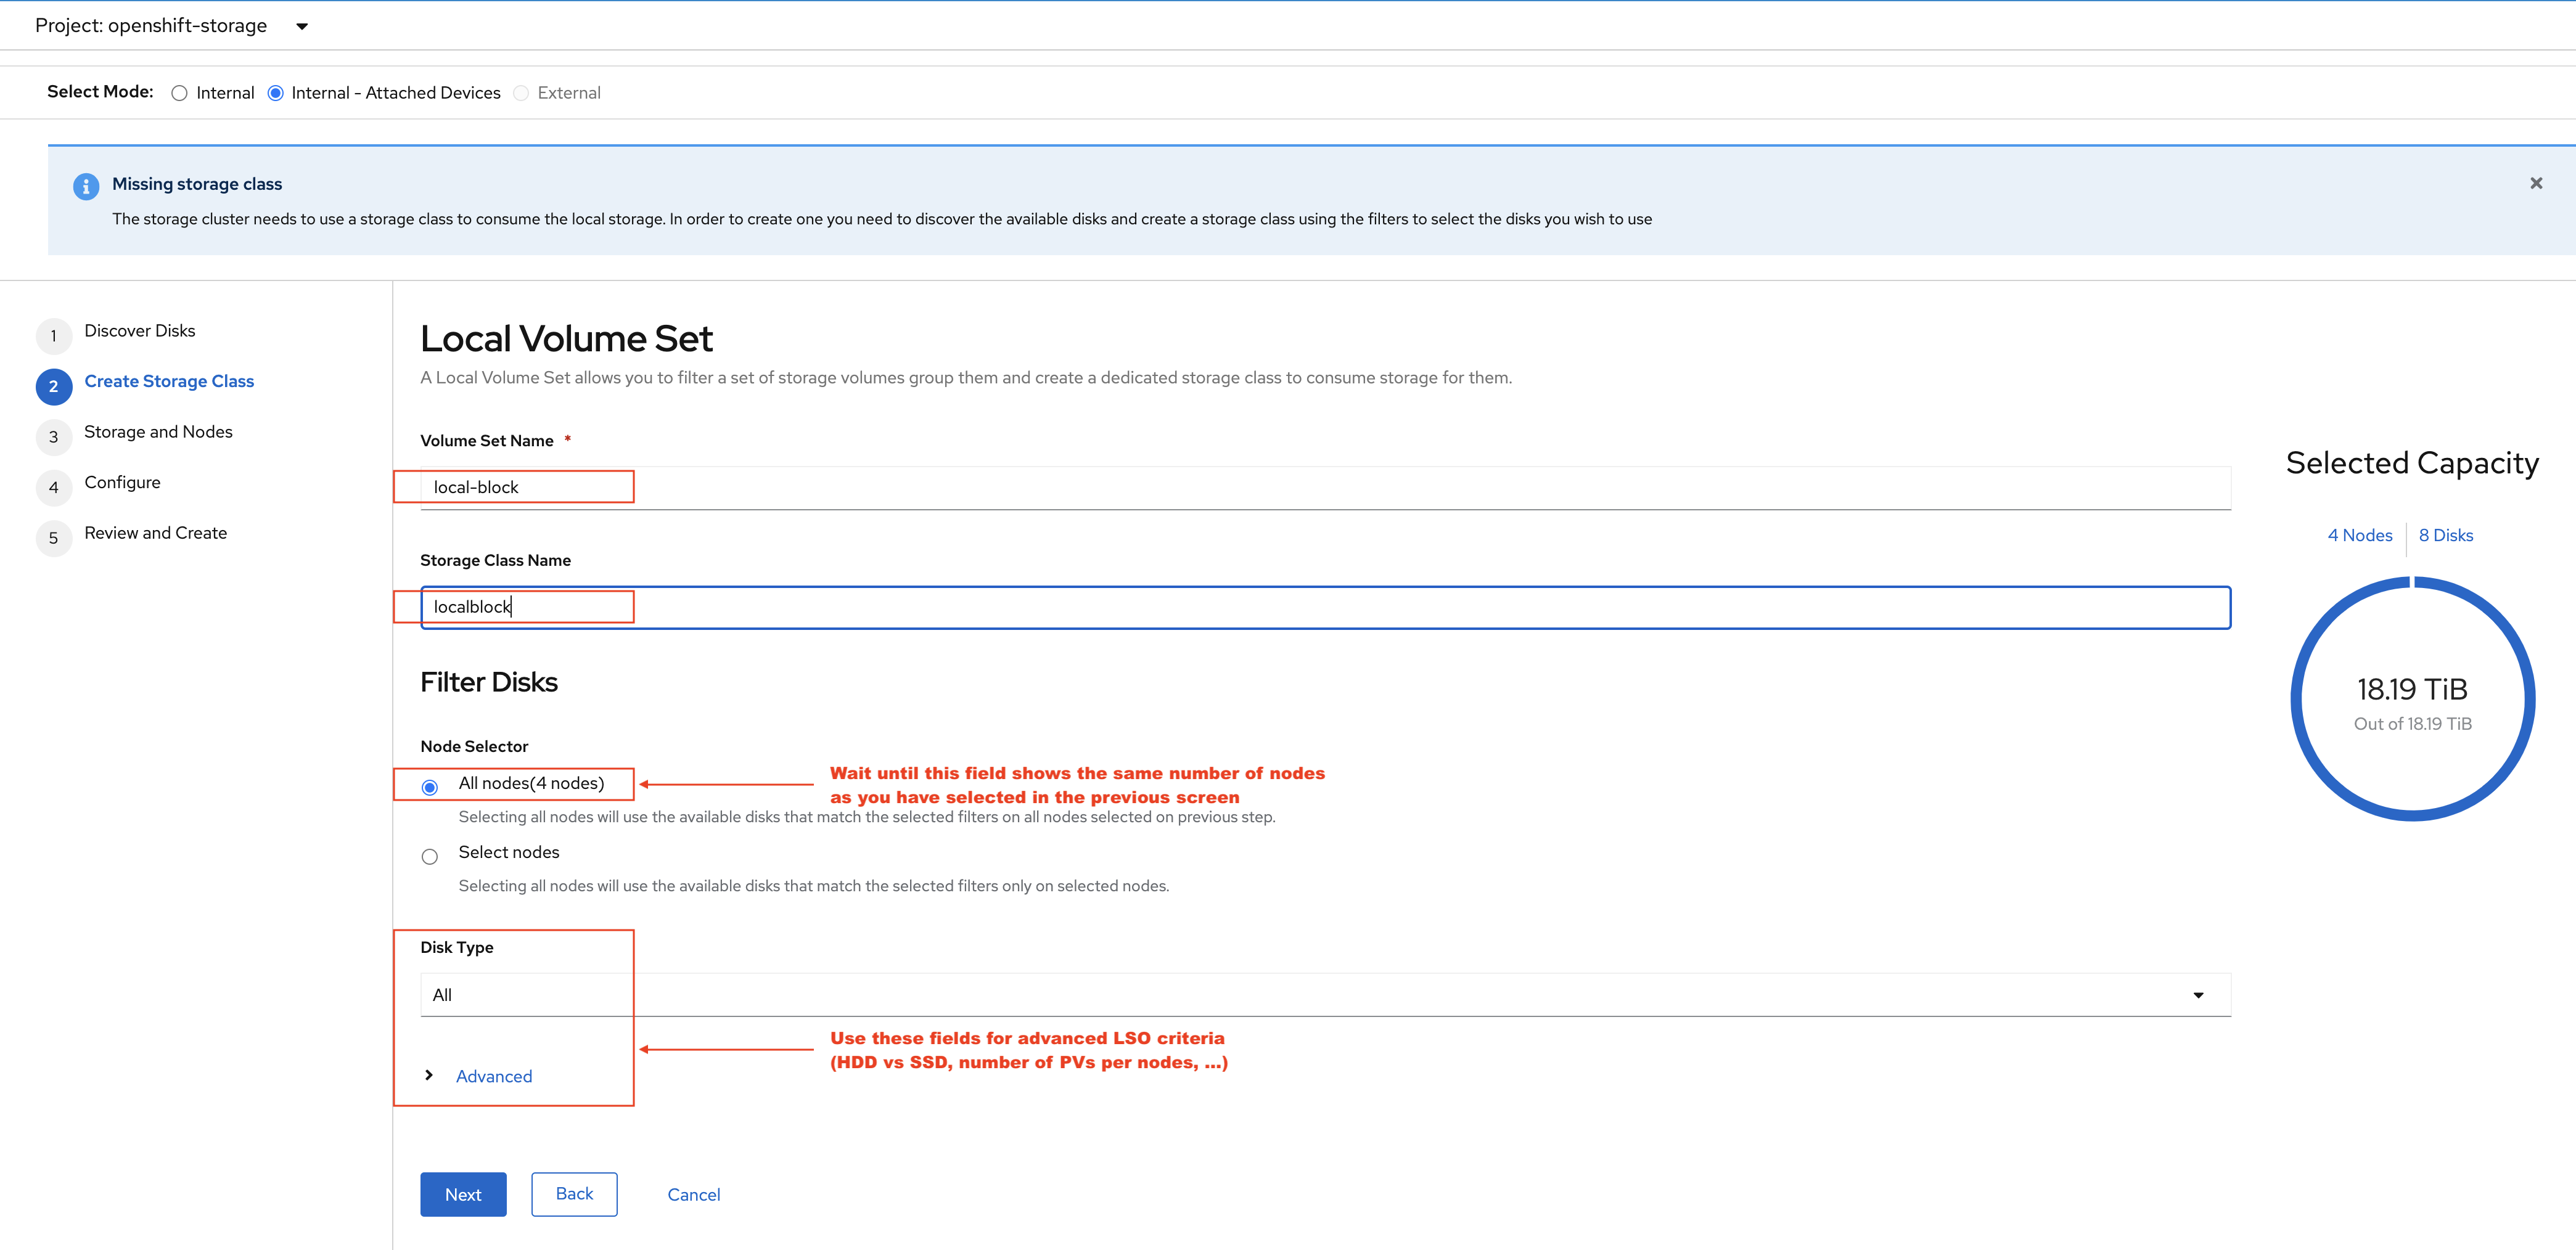
Enter the desired configuration for your Local Storage Operator and click Next.
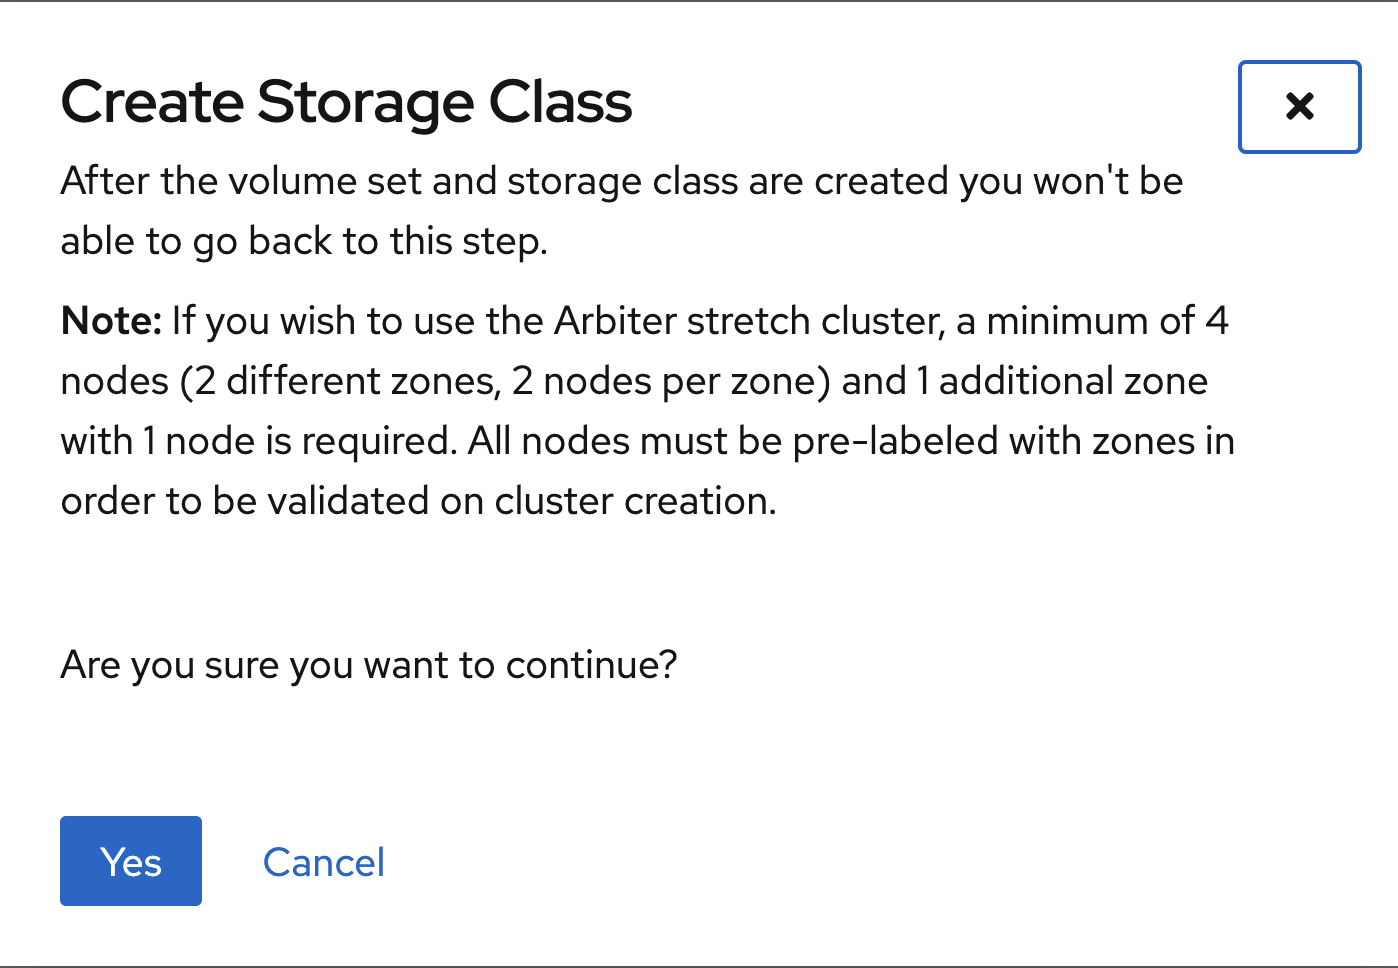
Click Yes when asked to confirm the storage class creation.
| The local storage (LSO) configuration will take a few minute. Please be patient. |
Next check the Enable arbiter checkbox. Select the correct topology zone
that is to receive the Arbiter Monitor. The zone label is arbiter in this case.
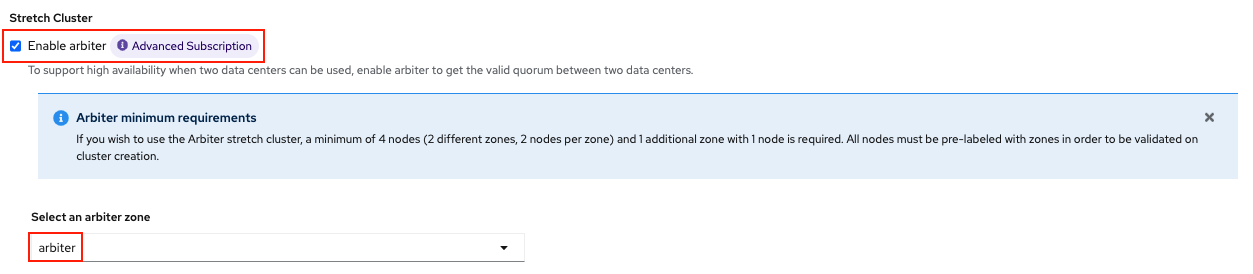
Select the LSO storage class you created as illustrated in the screen capture. Then click Next.

When asked if you want to enable encryption just click Next again.
| You can combine cluster wide encryption with Arbiter mode during a real deployment. It is not the topic of this particular exercise. |
Review parameters and create the cluster.
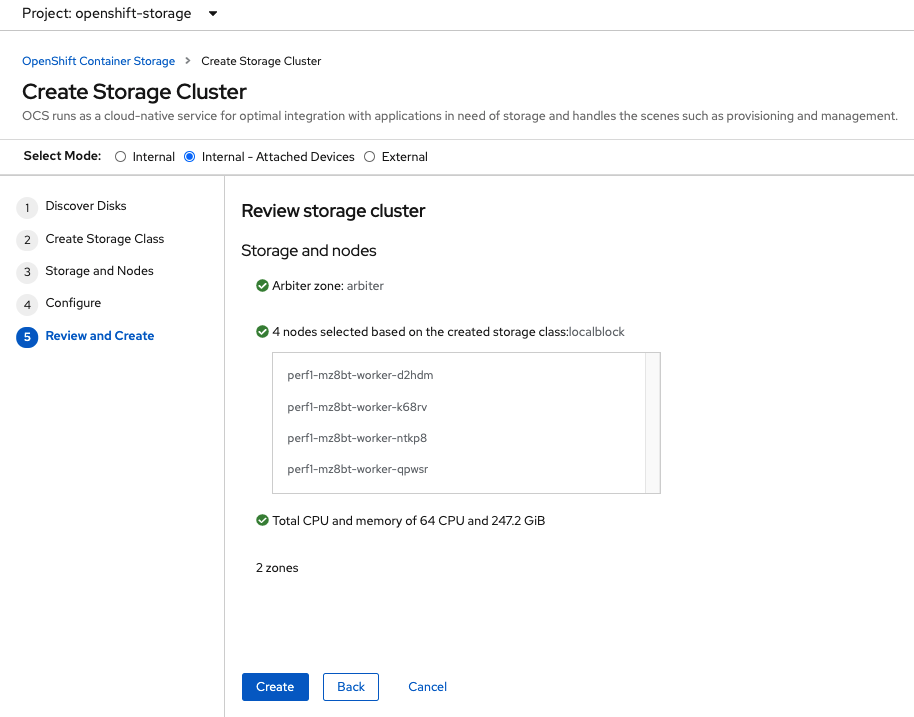
Click Create at the bottom of the Review storage cluster window.
4.2.1. Validate Cluster Deployment
Wait for your storage cluster to become operational. Do these steps to validate successful installation.
oc get cephcluster -n openshift-storageNAME DATADIRHOSTPATH MONCOUNT AGE PHASE MESSAGE HEALTH
ocs-storagecluster-cephcluster /var/lib/rook 5 4m55s Ready Cluster created successfully HEALTH_OKoc get pods -n openshift-storageNAME READY STATUS RESTARTS AGE
csi-cephfsplugin-28n69 3/3 Running 0 5m34s
csi-cephfsplugin-5qfrr 3/3 Running 0 5m34s
csi-cephfsplugin-provisioner-6976556bd7-5nvzz 6/6 Running 0 5m34s
csi-cephfsplugin-provisioner-6976556bd7-z2g7w 6/6 Running 0 5m34s
csi-cephfsplugin-qwzbs 3/3 Running 0 5m34s
csi-cephfsplugin-wrrm5 3/3 Running 0 5m34s
csi-rbdplugin-44bxs 3/3 Running 0 5m35s
csi-rbdplugin-lzc2x 3/3 Running 0 5m35s
csi-rbdplugin-mdm4n 3/3 Running 0 5m35s
csi-rbdplugin-provisioner-6b8557bd8b-54kvr 6/6 Running 0 5m35s
csi-rbdplugin-provisioner-6b8557bd8b-k24sd 6/6 Running 0 5m35s
csi-rbdplugin-v66cl 3/3 Running 0 5m35s
noobaa-core-0 1/1 Running 0 2m23s
noobaa-db-pg-0 1/1 Running 0 2m23s
noobaa-endpoint-cf67f6789-tlmmg 1/1 Running 0 43s
noobaa-operator-746ddfc79-fcrfz 1/1 Running 0 66m
ocs-metrics-exporter-54b6d689f8-ltxvp 1/1 Running 0 66m
ocs-operator-5bcdd97ff4-rgn7f 1/1 Running 0 66m
rook-ceph-crashcollector-ip-10-0-137-183-5859f89db8-56tzl 1/1 Running 0 4m20s
rook-ceph-crashcollector-ip-10-0-148-220-66d4b9868d-wpdgz 1/1 Running 0 4m37s
rook-ceph-crashcollector-ip-10-0-168-114-6dc89c87d8-l2ckg 1/1 Running 0 4m52s
rook-ceph-crashcollector-ip-10-0-172-31-58dd45f7b9-wfjjv 1/1 Running 0 5m8s
rook-ceph-crashcollector-ip-10-0-212-112-67bcbb8949-vpn6h 1/1 Running 0 4m5s
rook-ceph-mds-ocs-storagecluster-cephfilesystem-a-64f7cb6dhb68v 2/2 Running 0 2m4s
rook-ceph-mds-ocs-storagecluster-cephfilesystem-b-96fd85c5vcbhn 2/2 Running 0 2m3s
rook-ceph-mgr-a-55f6d78b6b-9nvzr 2/2 Running 0 3m4s
rook-ceph-mon-a-599568d496-cqfxb 2/2 Running 0 5m9s
rook-ceph-mon-b-5b56c99655-m69s2 2/2 Running 0 4m52s
rook-ceph-mon-c-5854699cbd-76lrv 2/2 Running 0 4m37s
rook-ceph-mon-d-765776ccfc-46qpn 2/2 Running 0 4m20s
rook-ceph-mon-e-6bdd6d6bb8-wxwkf 2/2 Running 0 4m5s
rook-ceph-operator-7dd585bd97-sldkk 1/1 Running 0 66m
rook-ceph-osd-0-d75955974-qk5l9 2/2 Running 0 2m43s
rook-ceph-osd-1-7f886fd54-bgjzp 2/2 Running 0 2m42s
rook-ceph-osd-2-546d7986d-n52px 2/2 Running 0 2m42s
rook-ceph-osd-3-666b86f659-sln5d 2/2 Running 0 2m34s
rook-ceph-osd-prepare-ocs-deviceset-localblock-0-data-0ptfjctn6 0/1 Completed 0 3m3s
rook-ceph-osd-prepare-ocs-deviceset-localblock-1-data-0ffsr9kf5 0/1 Completed 0 3m2s
rook-ceph-osd-prepare-ocs-deviceset-localblock-2-data-0mzrl7rrl 0/1 Completed 0 3m2s
rook-ceph-osd-prepare-ocs-deviceset-localblock-3-data-0j7md76tl 0/1 Completed 0 3m1s5. Install Zone Aware Sample Application
In this section the ocs-storagecluster-cephfs StorageClass will be used to
create a RWX (ReadWriteMany) PVC that can be used by multiple pods at the
same time. The application we will use is called File Uploader.
Because this application will share the same RWX volume for storing files we can demonstrate how an application can be spread across topology zones so that in the event of a site outage it is still available. This works for persistent data access as well because ODF storage configured for OpenShift DR stretch cluster is also zone aware and highly available.
Create a new project:
oc new-project my-shared-storageNext deploy the example PHP application called file-uploader:
oc new-app openshift/php:7.2-ubi8~https://github.com/christianh814/openshift-php-upload-demo --name=file-uploader--> Found image 4f2dcc0 (9 days old) in image stream "openshift/php" under tag "7.2-ubi8" for "openshift/php:7.2-
ubi8"
Apache 2.4 with PHP 7.2
-----------------------
PHP 7.2 available as container is a base platform for building and running various PHP 7.2 applications and f
rameworks. PHP is an HTML-embedded scripting language. PHP attempts to make it easy for developers to write dynam
ically generated web pages. PHP also offers built-in database integration for several commercial and non-commerci
al database management systems, so writing a database-enabled webpage with PHP is fairly simple. The most common
use of PHP coding is probably as a replacement for CGI scripts.
Tags: builder, php, php72, php-72
* A source build using source code from https://github.com/christianh814/openshift-php-upload-demo will be cr
eated
* The resulting image will be pushed to image stream tag "file-uploader:latest"
* Use 'oc start-build' to trigger a new build
--> Creating resources ...
imagestream.image.openshift.io "file-uploader" created
buildconfig.build.openshift.io "file-uploader" created
deployment.apps "file-uploader" created
service "file-uploader" created
--> Success
Build scheduled, use 'oc logs -f buildconfig/file-uploader' to track its progress.
Application is not exposed. You can expose services to the outside world by executing one or more of the comm
ands below:
'oc expose service/file-uploader'
Run 'oc status' to view your app.Watch the build log and wait for the application to be deployed:
oc logs -f bc/file-uploader -n my-shared-storageCloning "https://github.com/christianh814/openshift-php-upload-demo" ...
[...]
Generating dockerfile with builder image image-registry.openshift-image-regis
try.svc:5000/openshift/php@sha256:d97466f33999951739a76bce922ab17088885db610c
0e05b593844b41d5494ea
STEP 1: FROM image-registry.openshift-image-registry.svc:5000/openshift/php@s
ha256:d97466f33999951739a76bce922ab17088885db610c0e05b593844b41d5494ea
STEP 2: LABEL "io.openshift.build.commit.author"="Christian Hernandez <christ
ian.hernandez@yahoo.com>" "io.openshift.build.commit.date"="Sun Oct 1 1
7:15:09 2017 -0700" "io.openshift.build.commit.id"="288eda3dff43b02f7f7
b6b6b6f93396ffdf34cb2" "io.openshift.build.commit.ref"="master" "
io.openshift.build.commit.message"="trying to modularize" "io.openshift
.build.source-location"="https://github.com/christianh814/openshift-php-uploa
d-demo" "io.openshift.build.image"="image-registry.openshift-image-regi
stry.svc:5000/openshift/php@sha256:d97466f33999951739a76bce922ab17088885db610
c0e05b593844b41d5494ea"
STEP 3: ENV OPENSHIFT_BUILD_NAME="file-uploader-1" OPENSHIFT_BUILD_NAMESP
ACE="my-shared-storage" OPENSHIFT_BUILD_SOURCE="https://github.com/christ
ianh814/openshift-php-upload-demo" OPENSHIFT_BUILD_COMMIT="288eda3dff43b0
2f7f7b6b6b6f93396ffdf34cb2"
STEP 4: USER root
STEP 5: COPY upload/src /tmp/src
STEP 6: RUN chown -R 1001:0 /tmp/src
STEP 7: USER 1001
STEP 8: RUN /usr/libexec/s2i/assemble
---> Installing application source...
=> sourcing 20-copy-config.sh ...
---> 17:24:39 Processing additional arbitrary httpd configuration provide
d by s2i ...
=> sourcing 00-documentroot.conf ...
=> sourcing 50-mpm-tuning.conf ...
=> sourcing 40-ssl-certs.sh ...
STEP 9: CMD /usr/libexec/s2i/run
STEP 10: COMMIT temp.builder.openshift.io/my-shared-storage/file-uploader-1:3
b83e447
Getting image source signatures
[...]
Writing manifest to image destination
Storing signatures
Successfully pushed image-registry.openshift-image-registry.svc:5000/my-share
d-storage/file-uploader@sha256:929c0ce3dcc65a6f6e8bd44069862858db651358b88065
fb483d51f5d704e501
Push successfulThe command prompt returns out of the tail mode once you see Push successful.
This use of the new-app command directly asked for application code to
be built and did not involve a template. That is why it only created a single
Pod deployment with a Service and no Route.
|
Let’s make our application production ready by exposing it via a Route and
scale to 4 instances for high availability:
oc expose svc/file-uploader -n my-shared-storageoc scale --replicas=4 deploy/file-uploader -n my-shared-storageoc get pods -n my-shared-storageYou should have 4 file-uploader Pods in a few minutes. Repeat the command
above until there are 4 file-uploader Pods in Running STATUS.
You can create a PersistentVolumeClaim and attach it into an application with
the oc set volume command. Execute the following
oc set volume deploy/file-uploader --add --name=my-shared-storage \
-t pvc --claim-mode=ReadWriteMany --claim-size=10Gi \
--claim-name=my-shared-storage --claim-class=ocs-storagecluster-cephfs \
--mount-path=/opt/app-root/src/uploaded \
-n my-shared-storage
This command will:
-
create a PersistentVolumeClaim
-
update the Deployment to include a
volumedefinition -
update the Deployment to attach a
volumemountinto the specifiedmount-path -
cause a new deployment of the 3 application Pods
Now, let’s look at the result of adding the volume:
oc get pvc -n my-shared-storageNAME STATUS VOLUME CAPACITY ACCESS MODES STORAGECLASS AGE
my-shared-storage Bound pvc-5402cc8a-e874-4d7e-af76-1eb05bd2e7c7 10Gi RWX ocs-storagecluster-cephfs 52sNotice the ACCESSMODE being set to RWX (short for ReadWriteMany).
All 4 file-uploaderPods are using the same RWX volume. Without this
ACCESSMODE, OpenShift will not attempt to attach multiple Pods to the
same PersistentVolume reliably. If you attempt to scale up deployments that
are using RWO or ReadWriteOnce storage, the Pods will actually all
become co-located on the same node.
5.1. Modify Deployment to be Zone Aware
Currently the file-upoader Deployment is not zone aware and could schedule all of the Pods in the same zone. If this happened and there was a site outage then the application would be unavailable.
oc get deployment file-uploader -o yaml -n my-shared-storage | lessSearch for containers and repeat the search a few times until your output is similar. There is currently no pod placement rules in the default Deployment file-uploader.
[...]
spec:
  progressDeadlineSeconds: 600
  replicas: 4
  revisionHistoryLimit: 10
  selector:
    matchLabels:
      deployment: file-uploader
  strategy:
    rollingUpdate:
      maxSurge: 25%
      maxUnavailable: 25%
    type: RollingUpdate
  template:
    metadata:
      annotations:
        openshift.io/generated-by: OpenShiftNewApp
      creationTimestamp: null
      labels:
        deployment: file-uploader
      spec:  # <-- Start inserted lines after here
        containers:  # <-- End inserted lines before here
        - image: image-registry.openshift-image-registry.svc:5000/my-shared-storage/file-uploader@sha256:a458ea62f990e431ad7d5f84c89e2fa27bdebdd5e29c5418c70c56eb81f0a26b
          imagePullPolicy: IfNotPresent
          name: file-uploader
[...]
Currently the deployment is not configured to be zone aware. The Deployment needs to be modified to use the topology zone labels as shown below. Edit the deployment and add the new lines below between the start and end point.
oc edit deployment file-uploader -n my-shared-storage[...]
spec:
topologySpreadConstraints:
- labelSelector:
matchLabels:
deployment: file-uploader
maxSkew: 1
topologyKey: topology.kubernetes.io/zone
whenUnsatisfiable: DoNotSchedule
- labelSelector:
matchLabels:
deployment: file-uploader
maxSkew: 1
topologyKey: kubernetes.io/hostname
whenUnsatisfiable: ScheduleAnyway
nodeSelector:
node-role.kubernetes.io/worker: ""
containers:
[...]deployment.apps/file-uploader editedNow scale the deployment to zero Pods. and then back to 4 Pods. This is needed because the deployment changed in terms of Pod placement.
oc scale deployment file-uploader --replicas=0 -n my-shared-storagedeployment.apps/file-uploader scaledAnd then back to 4 Pods.
oc scale deployment file-uploader --replicas=4 -n my-shared-storagedeployment.apps/file-uploader scaledValidate now that the 4 Pods are spread across the 4 nodes in datacenter1 and datacenter2 zones.
oc get pods -o wide -n my-shared-storage | egrep '^file-uploader'| grep -v build | awk '{print $7}' | sort | uniq -c 1 perf1-mz8bt-worker-d2hdm
1 perf1-mz8bt-worker-k68rv
1 perf1-mz8bt-worker-ntkp8
1 perf1-mz8bt-worker-qpwsroc get nodes -L topology.kubernetes.io/zone | grep datacenter | grep -v masterperf1-mz8bt-worker-d2hdm Ready worker 35d v1.20.0+5fbfd19 datacenter1
perf1-mz8bt-worker-k68rv Ready worker 35d v1.20.0+5fbfd19 datacenter1
perf1-mz8bt-worker-ntkp8 Ready worker 35d v1.20.0+5fbfd19 datacenter2
perf1-mz8bt-worker-qpwsr Ready worker 35d v1.20.0+5fbfd19 datacenter2Now let’s use the file uploader web application using your browser to upload new files.
First, find the Route that has been created:
oc get route file-uploader -n my-shared-storage -o jsonpath --template="http://{.spec.host}{'\n'}"This will return a route similar to this one.
http://file-uploader-my-shared-storage.apps.cluster-ocs4-abdf.ocs4-abdf.sandbox744.opentlc.comPoint your browser to the web application using your route above. Your route
will be different.
The web app simply lists all uploaded files and offers the ability to upload new ones as well as download the existing data. Right now there is nothing.
Select an arbitrary file from your local machine and upload it to the app.
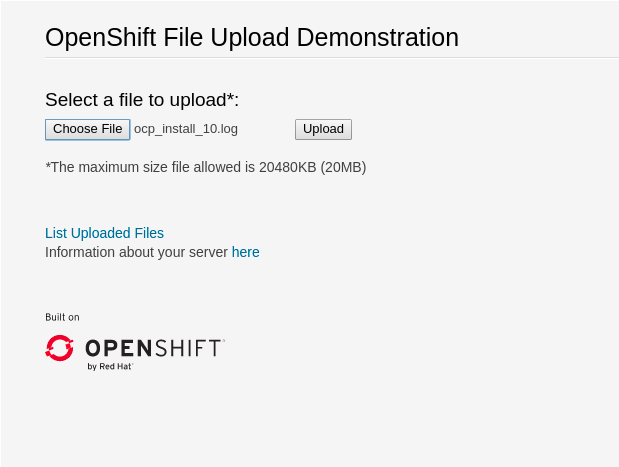
Once done click List uploaded files to see the list of all currently uploaded files.
6. Data Zone Failure and Recovery
Given one of the important goals of the OpenShift DR stretch cluster is to provide resiliency in the face of a complete or partial site outage, it is important to understand the different methods of recovery for applications and their storage.
How the application is architected will determine how soon it can be available again on the active zone.
6.1. Zone Failure
For purposes of this section we will consider a zone failure to be a failure where all OCP nodes, masters and workers, in a zone are no longer communicating with the resources in the second data zone (e.g., nodes powered down). If communication between data zones is partially still working (intermittent down/up), steps should be taken by cluster, storage, network admins to sever the communication path between the data zones for disaster recovery to succeed.
6.2. Recovery for zone-aware HA applications with RWX storage
Applications that are deployed with topologyKey: topology.kubernetes.io/zone, have one or more replicas scheduled in each data zone, and are using shared storage (i.e., RWX cephfs volume) will recover on the active zone within 30-60 seconds for new connections. The short pause is for HAProxy to refresh connections if a router pod is now offline in the failed data zone. An example of this type of application is detailed in the Install Zone Aware Sample Application section.
If you installed the Sample Application it is recommended to test the failure of a data zone by powering off the OCP nodes (at least the nodes with ODF storage devices) to validate that your file-uploader application is available and that new files can be uploaded.
|
6.3. Recovery for HA applications with RWX storage
Applications that are using topologyKey: kubernetes.io/hostname or no topology configuration whatsoever, have no protection against all of the application replicas being in the same zone.
| This can happen even with podAntiAffinity and topologyKey: kubernetes.io/hostname in the Pod spec because this anti-affinity rule is host-based and not zone-based. |
If this happens, all replicas in the same zone, and there is a zone failure the application using RWX storage will take 6-8 minutes to recover on the active zone. This pause is for the OCP nodes in the failed zone to become NotReady (60 seconds) and then for the default pod eviction timeout to expire (300 seconds).
6.4. Recovery for applications with RWO storage
Applications that use RWO storage (ReadWriteOnce) have a know behavior described in this Kubernetes issue. Because of this issue, if there is a data zone failure any application Pods in that zone mounting RWO volumes (i.e., cephrbd) are stuck in Terminating after 6-8 minutes and will not be recreated on the active zone without manual intervention.
To get the Terminating Pods to recreate on the active zone do one of these two actions:
-
Force delete the pod
Force deletions do not wait for confirmation from the kubelet that the Pod has been terminated.
oc delete pod <PODNAME> --grace-period=0 --force --namespace <NAMESPACE>-
Delete the finalizer on the associated PV
Find the associated PV for the PVC that is mounted by theTerminatingpod and delete the finalizer usingoc editoroc patchcommand. An easy way to find the associated PV is to describe theTerminatingpod. If you see aMulti-Attachwarning it should have the PV names in the warning (i.e., pvc-0595a8d2-683f-443b-aee0-6e547f5f5a7c).
oc describe pod <PODNAME> --namespace <NAMESPACE>[...]
Events:
Type Reason Age From Message
---- ------ ---- ---- -------
Normal Scheduled 4m5s default-scheduler Successfully assigned openshift-storage/noobaa-db-pg-0 to perf1-mz8bt-worker-d2hdm
Warning FailedAttachVolume 4m5s attachdetach-controller Multi-Attach error for volume "pvc-0595a8d2-683f-443b-aee0-6e547f5f5a7c" Volume is already exclusively attached to one node and can't be attached to another
OCP nodes with a status of NotReady may have an issue that prevents them from communicating with the OpenShift control plane. They may still be performing IO against persistent volumes in spite of this communication issue. If two pods are concurrently writing to the same RWO volume, there is a risk of data corruption. Some measure must be taken to ensure that processes on the NotReady node are terminated or blocked until they can be terminated. Using an out of band management system to power off a node, with confirmation, would be an example of ensuring process termination. Withdrawing a network route that is used by nodes at a failed site to communicate with storage would be an example of blocking. Note that before restoring service to the failed zone or nodes, there must be confirmation that all pods with persistent volumes have terminated successfully.
|
Once one of these two actions are done the application Pod should recreate on the active zone and mount its RWO storage.
6.5. Recovery for StatefulSet pods
Pods that are part of a stateful set have a similar issue as Pods mounting RWO volumes. Reference Kubernetes resource StatefulSet considerations for more information. To get the Pods part of a StatefulSet to recreate on the active zone after 6-8 minutes, the Pod needs to be force deleted with the same requirements (i.e., OCP node powered off or communication severed) as Pods with RWO volumes.
7. Appendix A: Resiliency for OpenShift Registry, Monitoring, Routing
As of OpenShift version 4.7 the out-of-the box services for the image registry, ingress routing, and monitoring (prometheus, alertmanger) are not configured for zone anti-affinity. They are configured in Deployments and StatefulSets to use podAntiAffinity with topologyKey: kubernetes.io/hostname. Also, given the anti-affinity is preferredDuringSchedulingIgnoredDuringExecution vs requiredDuringSchedulingIgnoredDuringExecution, that is no guarantee that Pods will even be scheduled on different hosts.
7.1. OpenShift Registry using topologySpreadConstraints
As was described for our sample application the OCP image-registry can use topologySpreadConstraints in the Deployment to spread Pods between zones equally and then between nodes in a zone.
The configs.imageregistry.operator.openshift.io must be edited to use shared storage (i.e., RWX cephfs volume) to scale the number of image-registry Pods.
Create the ocs4registry PVC of the desired size using the ocs-storagecluster-cephfs StorageClass.
|
oc edit configs.imageregistry.operator.openshift.io[...]
storage:
managementState: Managed
pvc:
claim: ocs4registry
[...]Now the configs.imageregistry.operator.openshift.io must be configured to be Unmanaged so the Deployment changes will not reconcile immediately back to default configuration.
oc patch configs.imageregistry.operator.openshift.io cluster --type merge --patch '{"spec":{"managementState":"Unmanaged"}}'Once this is done, delete everything under affinity: between spec and containers in the image-registry deployment and replace with the following:
oc edit deployment image-registry -n openshift-image-registry[...]
spec:
topologySpreadConstraints:
- labelSelector:
matchLabels:
docker-registry: default
maxSkew: 1
topologyKey: topology.kubernetes.io/zone
whenUnsatisfiable: DoNotSchedule
- labelSelector:
matchLabels:
docker-registry: default
maxSkew: 1
topologyKey: kubernetes.io/hostname
whenUnsatisfiable: ScheduleAnyway
nodeSelector:
node-role.kubernetes.io/worker: ""
containers:
[...]To schedule the Pods equally between zones you will need to scale the replicas for the image-registry Deployment to 1 and then back to the desired number of Pods. Verify the Pods are equally scheduled between zones.
7.2. OpenShift Monitoring using label placement
The prometheus and alertmanager Pods are both created with a StatefulSet.
oc get statefulset -n openshift-monitoringNAME READY AGE
alertmanager-main 3/3 54d
prometheus-k8s 2/2 54dBecause of the reconciling back to default configuration (shown for prometheus) that uses host-based placement, this configuration cannot be deleted from the StatefulSet and replaced with topologySpreadConstraints as was done for the image-registry Deployment. The same podAntiAffinity is used in the alertmanager Statefulset which does not guarantee that the Pods will be scheduled in both zones.
oc edit statefulset prometheus-k8s -n openshift-monitoring[...]
spec:
affinity:
podAntiAffinity:
preferredDuringSchedulingIgnoredDuringExecution:
- podAffinityTerm:
labelSelector:
matchExpressions:
- key: prometheus
operator: In
values:
- k8s
namespaces:
- openshift-monitoring
topologyKey: kubernetes.io/hostname
weight: 100
containers:
[...]Therefore a different solution is needed to make monitoring resources highly available across zones. The method is to use node labeling and create a new (or modify existing) ConfigMap named cluster-monitoring-config for placement via a nodeSelector configuration.
First add the labels to the nodes in the different zones.
oc label node {nodename1; zone1} prometheusk8s=true
oc label node {nodename2; zone2} prometheusk8s=true
oc label node {nodename1; zone1} alertmanager=true
oc label node {nodename2; zone2} alertmanager=true
A node is labeled in each zone. This is done so if a node in a zone fails there is node in a different zone for the Pods to schedule on after the pod-eviction-timeout.
|
Now create and then modify the ConfigMap cluster-monitoring-config.
oc -n openshift-monitoring create configmap cluster-monitoring-configPatch the ConfigMap with the labels for prometheus and alertmanager Pod placement.
oc patch -n openshift-monitoring --type=merge --patch='{"data":{"config.yaml":"alertmanagerMain:\n nodeSelector:\n alertmanager: true\nprometheusK8s:\n nodeSelector:\n prometheusk8s: true\nk8sPrometheusAdapter:\n nodeSelector:\n prometheusk8s: true\n"}}' cm/cluster-monitoring-configScale the replicas for both alertmanager and prometheus StatefulSet to 1 and then back to 3 and 2 respectively. Verify the Pods scheduled on the OCP nodes with the new labels.
| If there is a zone failure or even a node failure that has the new label, the prometheus and/or alertmanager Pods can end up all in the same zone. Once all labeled nodes are restored to a healthy state delete the prometheus and/or alertmanager Pods one by one until you they are spread across both zones again on the labeled nodes. |
7.3. OpenShift Routers using label placement
The OCP routers have a similar issue as the monitoring StatefulSets for prometheus and alertmanager. In the case of the routers it is the Deployment that reconciles back to default host-based placement.
oc get deployment -n openshift-ingressNAME READY UP-TO-DATE AVAILABLE AGE
router-default 2/2 2 2 54dGiven the Deployment can not be edited (and have the edits stay) the same method can be used for Pod placement as was done for prometheus and alertmanager Pods. Label the nodes in each zone and then patch the IngressController default to use the label as a nodeSelector.
First add the labels to the nodes in the different zones.
oc label node {nodename1; zone1} routerplacement=true
oc label node {nodename2; zone2} routerplacement=true| A node is labeled in each zone. This is because there are two ingress router Pods and they must schedule on unique nodes (contrary to monitoring Pods that can schedule on the same node). |
Now patch the IngressController default with the labels for the router Pod placement.
oc patch -n openshift-ingress-operator ingresscontroller.operator.openshift.io default --type json --patch '[{ "op": "add", "path": "/spec/nodePlacement", value: { "nodeSelector": { "matchLabels": { "routerplacement": "true" }}}}]'Scale the replicas for the router-default Deployment to 1 and then back to 2. Verify the router Pods are scheduled on the OCP nodes with the new labels.
8. Appendix B: OpenShift DR StorageCluster for CLI deployment
Example StorageCluster CR for OpenShift DR stretch cluster. For each set of 4 OSDs increment the count by 1. Creating the ODF StorageCluster using oc CLI is a replacement for the method described earlier in this document using the OpenShift Web Console UI to do the deployment.
Under the managedResources section is the default setting of manage for OCS services (i.e., block, file, object using RGW, object using NooBaa). This means any changes to OCS CustomResources (CRs) will always reconcile back to default values. The other choices instead of manage are init and ignore. The setting of init for the service (i.e., cephBlockPools) will not reconcile back to default if changes are made to the CR. The setting of ignore will not deploy the particular service.
|
apiVersion: ocs.openshift.io/v1
kind: StorageCluster
metadata:
  name: ocs-storagecluster
  namespace: openshift-storage
spec:
  arbiter:
    enable: true  # <-- Enable arbiter mode for OpenShift Dr stretch cluster
  nodeTopologies:
    arbiterLocation: arbiter  # <-- Modify to label for arbiter zone
  manageNodes: false
  resources: {}
  monDataDirHostPath: /var/lib/rook
  managedResources:
    cephBlockPools:
      reconcileStrategy: manage
    cephFilesystems:
      reconcileStrategy: manage
    cephObjectStoreUsers:
      reconcileStrategy: manage
    cephObjectStores:
      reconcileStrategy: manage
    snapshotClasses:
      reconcileStrategy: manage
    storageClasses:
      reconcileStrategy: manage
  multiCloudGateway:
    reconcileStrategy: manage
  storageDeviceSets:
  - count: 1  # <-- For each set of 4 disks increment the count by 1
    dataPVCTemplate:
      spec:
        accessModes:
        - ReadWriteOnce
        resources:
          requests:
            storage: "100Gi"  # <-- Use value smaller than actual disk size
        storageClassName: localblock  # <-- Modify to correct LSO storageclass
        volumeMode: Block
    name: ocs-deviceset
    placement: {}
    portable: false
    replica: 4  # <-- Replica = 4 for volume and object storage
    resources: {}
Save contents above to storagecluster-metrodr.yaml file.
oc create -f storagecluster-metrodr.yaml -n openshift-storage