Deploying OpenShift Container Storage using Local Devices
Overview
Building high performance storage services for OpenShift requires taking a holistic look at the overall architecture of the software defined storage stack. Eliminating unnecessary layers can pay dividends, and this is why we’ve been working hard to get OpenShift Container Storage as close to the hardware as possible. In VMware environments, this translates to local disks surfaced as VMDKs, as RDMs, or with DirectPath I/O. In Amazon EC2, this translates to instance storage or local storage in the form of SSD or NVMe devices. Also, the same methodology detailed in this article can be used for Bare Metal servers with physical disks.
|
Installing OpenShift Container Storage using AWS EC2 instance storage (SSD or NVMe) is a Technology Preview feature. Technology Preview features are not supported with Red Hat production service level agreements (SLAs) and might not be functionally complete. Red Hat does not recommend using them in production. These features provide early access to upcoming product features, enabling customers to test functionality and provide feedback during the development process. |
Installing OpenShift Container Storage Operator using Operator Hub
Start with creating the openshift-storage namespace.
oc create namespace openshift-storageYou must add the monitoring label to this namespace. This is required to get prometheus metrics and alerts for the OCP storage dashboards. To label the openshift-storage namespace use the following command:
oc label namespace openshift-storage "openshift.io/cluster-monitoring=true"Now switch over to your Openshift Web Console. You can get your URL by issuing command below to get the OCP 4 console route.
oc get -n openshift-console route consoleOnce you are logged in, navigate to the OperatorHub menu.
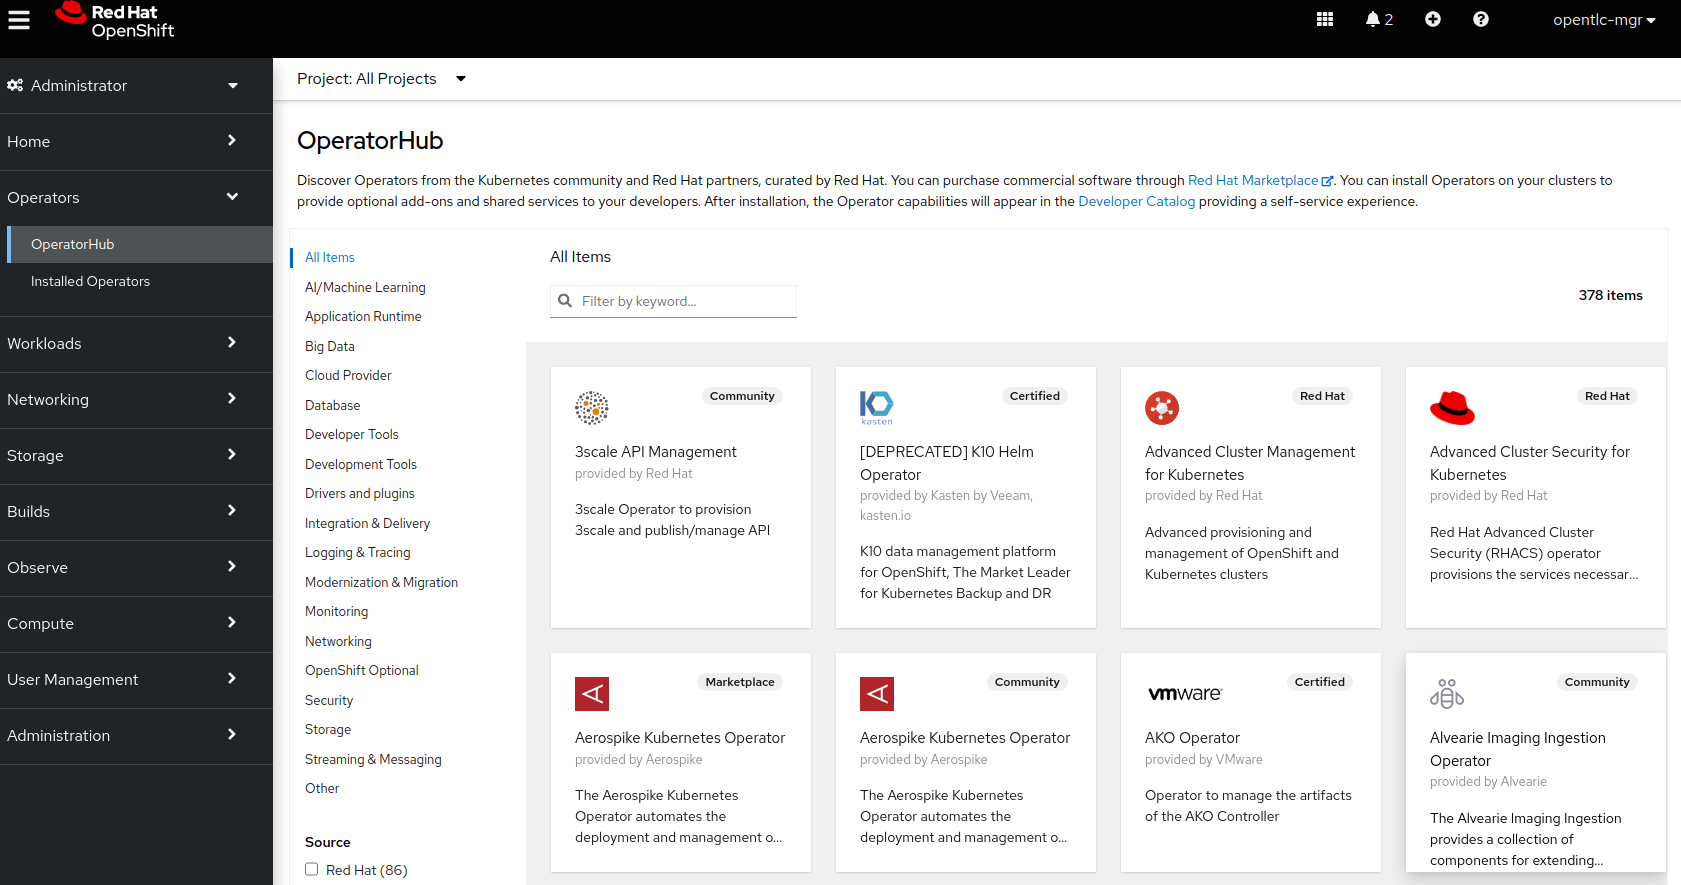
Now type openshift container storage in the Filter by keyword… box.
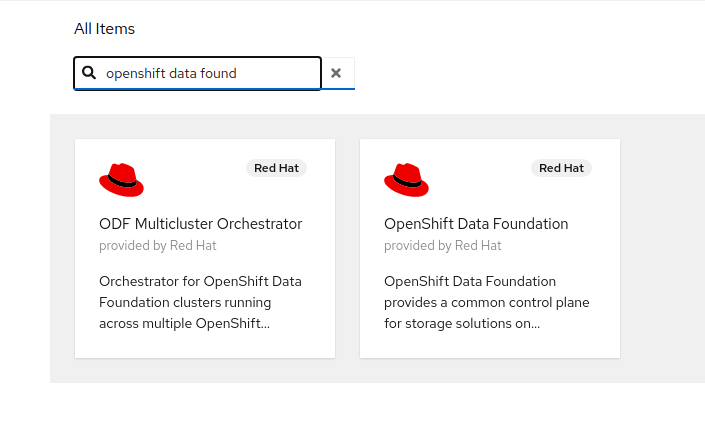
Select OpenShift Container Storage Operator and then select Install.
On the next screen make sure the settings are as shown in this figure. Also, make sure to change to A specific namespace on the cluster and chose namespace openshift-storage.
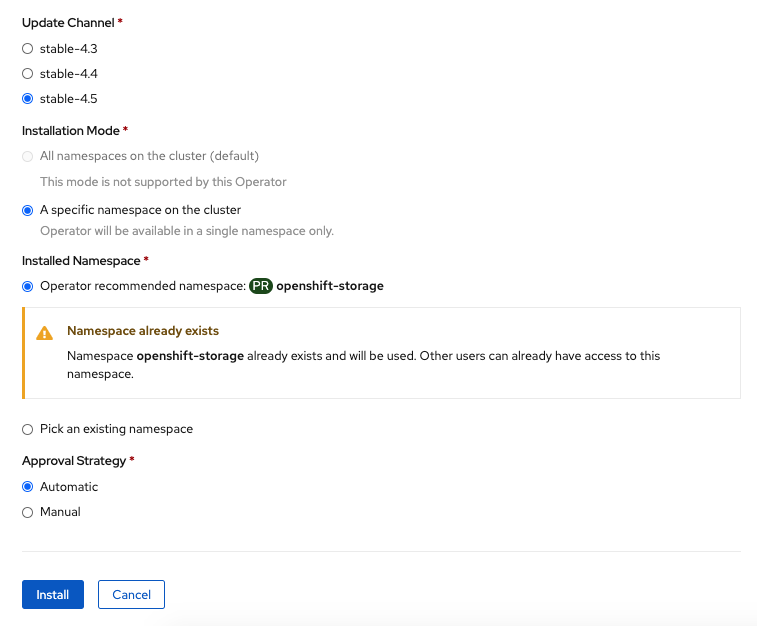
| Do not change any configuration other than the namespace as shown above. |
Click Subscribe.
Now you can go back to your terminal window to check the progress of the installation.
watch oc -n openshift-storage get csvNAME DISPLAY VERSION REPLACES PHASE ocs-operator.v4.5.0 OpenShift Container Storage 4.5.0 Succeeded
You can exit by pressing Ctrl+C
The resource csv is a shortened word for clusterserviceversions.operators.coreos.com.
|
Please wait until the operator
Reaching this state can take several minutes.
PHASE changes to Succeeded |
You will now also see operator pods have been started in the openshift-storage namespace:
oc -n openshift-storage get podsNAME READY STATUS RESTARTS AGE noobaa-operator-68c8fbdff5-kgxxt 1/1 Running 0 3m41s ocs-operator-78d98758db-dwc8h 1/1 Running 0 3m41s rook-ceph-operator-55cb44fcfc-wxppc 1/1 Running 0 3m41s
Navigate to the Operators menu on the left and select Installed Operators. Make sure the selected project at the top of the UI pane is set to openshift-storage. What you see should be similar to the following example:

Now that the operator pods are running, you can create a Storage Cluster.
OpenShift Container Storage on AWS Instance Store
Use this procedure to install OpenShift Container Storage (OCS) Amazon EC2 instances with Instance Storage. Instance Storage is the most performant category of block storage available in EC2. For example, larger instances from the I3en family of instances are capable of servicing 2 million random IOPs at 4KB block sizes via directly attached NVMe devices. Instance Storage devices are always directly attached to the host system.
|
The following sections use YAML files and CLI to create resources used to deploy OCS 4 on local storage devices. In future releases of OCP 4 and OCS 4 these operations will have the option of being done using the Openshift Web Console UI making using local storage easier and less error prone. |
Prerequisites
-
You must have at least 3 OCP worker nodes in the cluster with locally attached storage devices on each of them.
-
Each worker node must have a minimum of 12 CPUs and 64 GB Memory.
-
Each of the 3 worker nodes must have at least one available raw block device available to be used by OCS (e.g., 100 GB size).
-
You must have a minimum of three labeled worker nodes.
-
Each OCP worker node must have a specific label to deploy OCS Pods. To label the nodes use the following command:
-
oc label node <NodeName> cluster.ocs.openshift.io/openshift-storage=''| Make sure to add this label to all OCP workers that have local storage devices to be used by OCS. |
-
No other storage providers managing locally mounted storage on the storage nodes should be present that will conflict with the Local Storage Operator (LSO).
Label Verification
Amazon EC2 zone and region topology labels are dynamically applied to OCP nodes by the AWS Cloud Provider. In VMware or bare metal environments, rack topology labels can be applied by a cluster administrator prior to OCS being deployed. OCS inspects zone and rack topology labels and uses them to inform placement policies for data availability and durability.
|
OCS requires at least three failure domains for data safety and the domains should be symmetrical in terms of node quantity. If the OCP nodes used for the OCS deployment do not have preexisting topology labels OCS will generate three virtual racks using |
The following command will output a list of nodes with the OCS label, and print a column for each of the topology labels OCS takes into consideration.
oc get nodes -L failure-domain.beta.kubernetes.io/zone,failure-domain.beta.kubernetes.io/rack,failure-domain.kubernetes.io/zone,failure-domain.kubernetes.io/rack -l cluster.ocs.openshift.io/openshift-storage=''If the output from this command does not print any topology labels, then it is safe to proceed.
If the output from this command shows at least three existing unique topology labels (eg. three different racks, or three different zones), then it is safe to proceed.
If there are existing rack labels and there are less than 3 different values (e.g., 2 nodes in rack1 and 1 node in rack2 only), then different nodes should be labeled for OCS.
Installing the Local Storage Operator
Start with creating the local-storage namespace.
oc new-project local-storageNow switch over to your Openshift Web Console and select OperatorHub. Type local storage in the Filter by keyword… box.
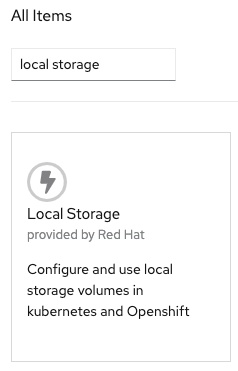
Select Local Storage Operator and then select Install.
On the next screen make sure the settings are as shown in this figure. Also, make sure to change to A specific namespace on the cluster and chose namespace local-storage.
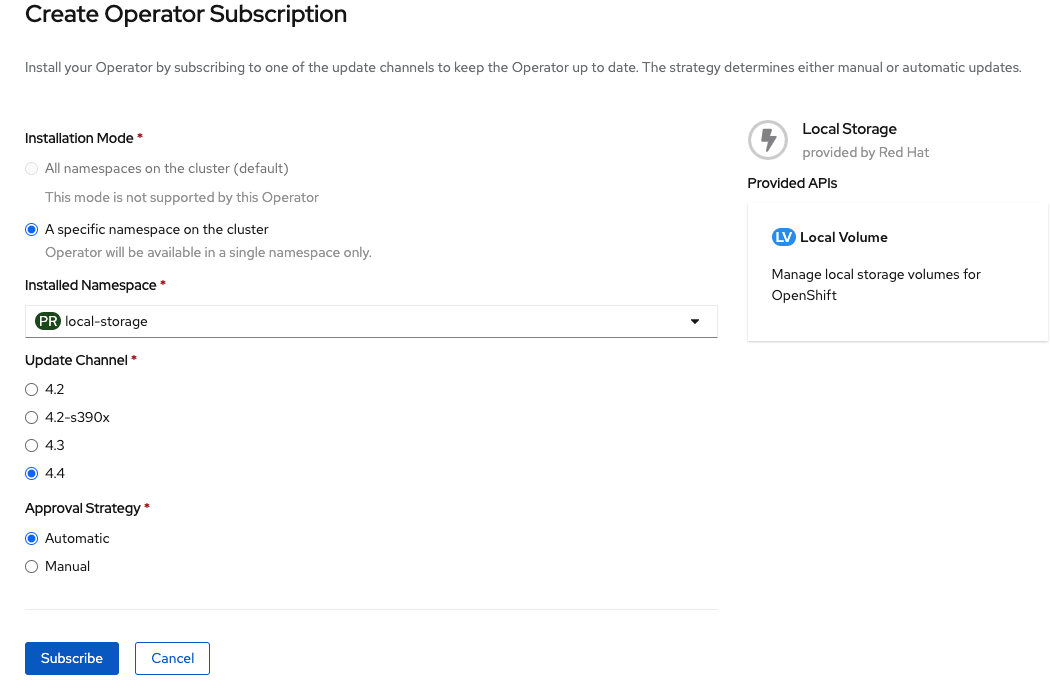
| Do not change any configuration other than the namespace as shown above. |
Click Subscribe.
Now you can go back to your terminal window to check the progress of the installation.
oc -n local-storage get podsNAME READY STATUS RESTARTS AGE local-storage-operator-765dc5b87-vfh69 1/1 Running 0 23s
The Local Storage Operator (LSO) has been successfully installed. Now move on to creating local persistent volumes (PVs) on the storage nodes using LocalVolume Custom Resource (CR) files.
Finding Available Storage Devices
Using LSO to create PVs can be done for bare metal, Amazon EC2, or VMware storage devices. What you must know is the exact device name on each of the 3 or more OCP worker nodes you labeled with OCS label cluster.ocs.openshift.io/openshift-storage=''. The method to do this is to logon to each node and verify the device names as well, the size of each device, and that the device is available.
Logon to each worker node that will be used for OCS resources and find the unique by-id device name for each available raw block device. You will want to copy these values to a clipboard for the next step.
oc debug node/<NodeName>oc debug node/ip-10-0-135-71.us-east-2.compute.internal Starting pod/ip-10-0-135-71us-east-2computeinternal-debug ... To use host binaries, run `chroot /host` Pod IP: 10.0.135.71 If you don't see a command prompt, try pressing enter. sh-4.2# chroot /host sh-4.4# lsblk NAME MAJ:MIN RM SIZE RO TYPE MOUNTPOINT xvda 202:0 0 120G 0 disk |-xvda1 202:1 0 384M 0 part /boot |-xvda2 202:2 0 127M 0 part /boot/efi |-xvda3 202:3 0 1M 0 part `-xvda4 202:4 0 119.5G 0 part `-coreos-luks-root-nocrypt 253:0 0 119.5G 0 dm /sysroot nvme0n1 259:0 0 1.7T 0 disk nvme1n1 259:1 0 1.7T 0 disk
After you know which local devices are available, in this case nvme0n1 and nvme1n1, you can now find the by-id, a unique name depending on the hardware serial number for each device.
sh-4.4# ls -l /dev/disk/by-id/
total 0
lrwxrwxrwx. 1 root root 10 Mar 17 16:24 dm-name-coreos-luks-root-nocrypt -> ../../dm-0
lrwxrwxrwx. 1 root root 13 Mar 17 16:24 nvme-Amazon_EC2_NVMe_Instance_Storage_AWS10382E5D7441494EC -> ../../nvme0n1
lrwxrwxrwx. 1 root root 13 Mar 17 16:24 nvme-Amazon_EC2_NVMe_Instance_Storage_AWS60382E5D7441494EC -> ../../nvme1n1
lrwxrwxrwx. 1 root root 13 Mar 17 16:24 nvme-nvme.1d0f-4157533130333832453544373434313439344543-416d617a6f6e20454332204e564d6520496e7374616e63652053746f72616765-00000001 -> ../../nvme0n1
lrwxrwxrwx. 1 root root 13 Mar 17 16:24 nvme-nvme.1d0f-4157533630333832453544373434313439344543-416d617a6f6e20454332204e564d6520496e7374616e63652053746f72616765-00000001 -> ../../nvme1n1
In this case the EC2 instance type is i3.4xlarge so we know all 3 worker nodes are the same type of machine but their by-id identifier is unique for every local device. As shown above, the results of lsblk shows the last 2 devices nvme0n1 and nvme1n1 are available with a size of 1.7 TB.
For each worker node that has the OCS label (minimum 3) you will need to find the unique by-id. For this node they are:
-
nvme-Amazon_EC2_NVMe_Instance_Storage_AWS10382E5D7441494EC -
nvme-Amazon_EC2_NVMe_Instance_Storage_AWS60382E5D7441494EC
This example just shows results for one node so this method needs to be repeated for the other nodes that have storage devices to be used by OCS. Next step is to create new PVs using these devices.
Using the LSO LocalVolume Custom Resource to Create PVs
The next step is to create the LSO LocalVolume CR which in turn will create PVs and a new StorageClass for creating Ceph storage. For this example only device nvme0n1 will be used on each node using the by-id unique identifier in the CR.
Before you create this resource make sure you have labeled your OCP worker nodes with the OCS label.
oc get nodes -l cluster.ocs.openshift.io/openshift-storage -o jsonpath='{range .items[*]}{.metadata.name}{"\n"}'ip-10-0-135-71.us-east-2.compute.internal ip-10-0-145-125.us-east-2.compute.internal ip-10-0-160-91.us-east-2.compute.internal
Now that you know a minimum of 3 nodes are labeled you can proceed. The label is important because it is used as the nodeSelector below.
by-id device identifier:apiVersion: local.storage.openshift.io/v1
kind: LocalVolume
metadata:
name: local-block
namespace: local-storage
spec:
nodeSelector:
nodeSelectorTerms:
- matchExpressions:
- key: cluster.ocs.openshift.io/openshift-storage
operator: In
values:
- ""
storageClassDevices:
- storageClassName: localblock
volumeMode: Block
devicePaths:
- /dev/disk/by-id/nvme-Amazon_EC2_NVMe_Instance_Storage_AWS10382E5D7441494EC # <-- modify this line
- /dev/disk/by-id/nvme-Amazon_EC2_NVMe_Instance_Storage_AWS1F45C01D7E84FE3E9 # <-- modify this line
- /dev/disk/by-id/nvme-Amazon_EC2_NVMe_Instance_Storage_AWS136BC945B4ECB9AE4 # <-- modify this lineCreate this LocalVolume CR using the following command:
oc create -f local-storage-block.yamllocalvolume.local.storage.openshift.io/local-block created
Now that the CR is created let’s see the results.
oc -n local-storage get podsNAME READY STATUS RESTARTS AGE local-block-local-diskmaker-kkp7j 1/1 Running 0 5m1s local-block-local-diskmaker-nqcgl 1/1 Running 0 5m1s local-block-local-diskmaker-szd72 1/1 Running 0 5m1s local-block-local-provisioner-bsztg 1/1 Running 0 5m1s local-block-local-provisioner-g9zgf 1/1 Running 0 5m1s local-block-local-provisioner-gzktp 1/1 Running 0 5m1s local-storage-operator-765dc5b87-vfh69 1/1 Running 0 53m
There should now be a new PV for each of the local storage devices on the 3 worker nodes. Remember when we checked above there were 2 available storage devices per worker node. Only device nvme0n1 was used on each worker node and the size is 1.7 TB.
oc get pvNAME CAPACITY ACCESS MODES RECLAIM POLICY STATUS CLAIM STORAGECLASS REASON AGE local-pv-40bd1474 1769Gi RWO Delete Available localblock 5m53s local-pv-66631f85 1769Gi RWO Delete Available localblock 5m52s local-pv-c56e9c 1769Gi RWO Delete Available localblock 5m53s
And finally we should have an additional StorageClass as a result of creating this LocalVolume CR. This StorageClass will be used when creating PVCs in the next step of creating a StorageCluster.
oc get scNAME PROVISIONER AGE gp2 (default) kubernetes.io/aws-ebs 7h14m localblock kubernetes.io/no-provisioner 7m46s
The next sections will detail how to create and validate the OCS StorageCluster using Amazon EC2, VMware, and bare metal local storage devices.
Creating the OCS Storage Cluster on AWS
For Amazon EC2 instance that have local storage devices (e.g., i3.4xlarge) we need to create a StorageCluster Custom Resource (CR) that will use the localblock StorageClass and 3 of the 6 PVs created in the previous section.
localblock storageclass:apiVersion: ocs.openshift.io/v1
kind: StorageCluster
metadata:
name: ocs-storagecluster
namespace: openshift-storage
spec:
manageNodes: false
monDataDirHostPath: /var/lib/rook
storageDeviceSets:
- count: 1 # <-- modify count to to desired value
dataPVCTemplate:
spec:
accessModes:
- ReadWriteOnce
resources:
requests:
storage: 1
storageClassName: localblock
volumeMode: Block
name: ocs-deviceset
placement: {}
portable: false
replica: 3
resources: {}|
The |
Create this StorageCluster CR using the YAML file above (cluster-service-AWS.yaml).
oc create -f cluster-service-AWS.yamlstoragecluster.ocs.openshift.io/ocs-storagecluster created
Validating OCS Storage Cluster Deployment
Once the StorageCluster is created OCS pods will start showing up in the openshift-storage namespace. For the deployment to completely finish could take up to 10 minutes so be patient. Below you will find examples of a successful deployment of the OCS Pods and PVCs.
oc -n openshift-storage get podsNAME READY STATUS RESTARTS AGE pod/csi-cephfsplugin-kzfrx 3/3 Running 0 7m49s pod/csi-cephfsplugin-provisioner-67777bbbc9-j28s9 5/5 Running 0 7m49s pod/csi-cephfsplugin-provisioner-67777bbbc9-nrghg 5/5 Running 0 7m49s pod/csi-cephfsplugin-vm4qw 3/3 Running 0 7m49s pod/csi-cephfsplugin-xzqc6 3/3 Running 0 7m49s pod/csi-rbdplugin-9jvmd 3/3 Running 0 7m50s pod/csi-rbdplugin-bzpb2 3/3 Running 0 7m50s pod/csi-rbdplugin-provisioner-8569698c9b-hdzgh 5/5 Running 0 7m49s pod/csi-rbdplugin-provisioner-8569698c9b-ll9wm 5/5 Running 0 7m49s pod/csi-rbdplugin-tf68q 3/3 Running 0 7m50s pod/noobaa-core-0 1/1 Running 0 3m37s pod/noobaa-db-0 1/1 Running 0 3m37s pod/noobaa-endpoint-679dfc8669-2cxt5 1/1 Running 0 2m12s pod/noobaa-operator-68c8fbdff5-kgxxt 1/1 Running 0 162m pod/ocs-operator-78d98758db-dwc8h 1/1 Running 0 162m pod/rook-ceph-crashcollector-ip-10-0-135-71-7f4647b5f5-cp4nt 1/1 Running 0 4m35s pod/rook-ceph-crashcollector-ip-10-0-145-125-f765fc64b-tnlrp 1/1 Running 0 5m42s pod/rook-ceph-crashcollector-ip-10-0-160-91-5fb874cd6c-4bqvl 1/1 Running 0 6m29s pod/rook-ceph-drain-canary-86f0e65050c75c523a149de3c6c7b27c-85f4255 1/1 Running 0 3m41s pod/rook-ceph-drain-canary-a643022da9a50239ad6fc41164ccb7c4-7cnjt4n 1/1 Running 0 3m42s pod/rook-ceph-drain-canary-e290c9c7dc116eb65fcb3ad57067aa65-54mgcfs 1/1 Running 0 3m38s pod/rook-ceph-mds-ocs-storagecluster-cephfilesystem-a-7d7d5b5fxqdbs 1/1 Running 0 3m24s pod/rook-ceph-mds-ocs-storagecluster-cephfilesystem-b-6899b5b6znmtx 1/1 Running 0 3m23s pod/rook-ceph-mgr-a-544b89b5c6-l6s2l 1/1 Running 0 4m14s pod/rook-ceph-mon-a-b74c86ddf-dq25t 1/1 Running 0 5m15s pod/rook-ceph-mon-b-7cb5446957-kxz4w 1/1 Running 0 4m51s pod/rook-ceph-mon-c-56d689c77c-gb5n9 1/1 Running 0 4m35s pod/rook-ceph-operator-55cb44fcfc-wxppc 1/1 Running 0 162m pod/rook-ceph-osd-0-74b8654667-kccs8 1/1 Running 0 3m42s pod/rook-ceph-osd-1-7cc9444867-wzvmh 1/1 Running 0 3m41s pod/rook-ceph-osd-2-5b5c4dcd57-tr5ck 1/1 Running 0 3m38s pod/rook-ceph-osd-prepare-ocs-deviceset-0-0-dq89h-pzh4d 0/1 Completed 0 3m55s pod/rook-ceph-osd-prepare-ocs-deviceset-1-0-wnbrp-7ls8b 0/1 Completed 0 3m55s pod/rook-ceph-osd-prepare-ocs-deviceset-2-0-xst6j-mjpv7 0/1 Completed 0 3m55s
oc -n openshift-storage get pvcNAME STATUS VOLUME CAPACITY ACCESS MODES STORAGECLASS AGE persistentvolumeclaim/db-noobaa-db-0 Bound pvc-99634049-ee21-490d-9fa7-927bbf3c87bc 50Gi RWO ocs-storagecluster-ceph-rbd 4m16s persistentvolumeclaim/ocs-deviceset-0-0-dq89h Bound local-pv-40bd1474 1769Gi RWO localblock 4m35s persistentvolumeclaim/ocs-deviceset-1-0-wnbrp Bound local-pv-66631f85 1769Gi RWO localblock 4m35s persistentvolumeclaim/ocs-deviceset-2-0-xst6j Bound local-pv-c56e9c 1769Gi RWO localblock 4m35s persistentvolumeclaim/rook-ceph-mon-a Bound pvc-0cc612ce-22ff-4f3c-bc0d-147e88d45df3 10Gi RWO gp2 7m55s persistentvolumeclaim/rook-ceph-mon-b Bound pvc-7c0187c1-1000-4d3b-8b31-d17235328082 10Gi RWO gp2 7m44s persistentvolumeclaim/rook-ceph-mon-c Bound pvc-e30645cd-1733-46c5-b0bf-566bdd0d2ab8 10Gi RWO gp2 7m34s
If we now look again at the PVs again you will see they are now in a Bound state verses Available as they were before OCS StorageCluster was created.
oc get pv | grep localblocklocal-pv-40bd1474 1769Gi RWO Delete Bound openshift-storage/ocs-deviceset-0-0-dq89h localblock 46m local-pv-66631f85 1769Gi RWO Delete Bound openshift-storage/ocs-deviceset-1-0-wnbrp localblock 46m local-pv-c56e9c 1769Gi RWO Delete Bound openshift-storage/ocs-deviceset-2-0-xst6j localblock 46m
You can check the status of the storage cluster with the following:
oc get storagecluster -n openshift-storageNAME AGE PHASE CREATED AT VERSION ocs-storagecluster 14m Ready 2020-03-11T22:52:04Z 4.3.0
If it says Ready you can continue on to using OCS storage for applications.
Scaling out Storage by adding Nodes to OpenShift Container Storage
You must have three OCP worker nodes with the same storage type and size attached to each node (for example, 2TB NVMe drive) as the original OCS StorageCluster was created with.
-
Each OCP worker node must have a specific label to deploy OCS Pods. To label the nodes use the following command:
oc label node <NodeName> cluster.ocs.openshift.io/openshift-storage=''Once the new nodes are labeled you are ready to add the new local storage device(s) available in these new worker nodes to the OCS StorageCluster. Follow the process in the next section to create new PVs and increase the number of Ceph OSDs. The new OSDs (3 minimum) most likely will be scheduled by OpenShift on the new worker nodes with the OCS label.
Scaling up Storage by adding Devices to OpenShift Container Storage
Use this procedure to add storage capacity (additional storage devices) to your configured Red Hat OpenShift Container Storage worker nodes.
To add storage capacity to existing OCP nodes with OCS installed, you will need to find the unique by-id identifier for available devices that you want to add, a minimum of one device per worker node. See Finding Available Storage Devices for more details. Make sure to do this process for all existing nodes (minimum of 3) that you want to add storage to.
by-id device identifier:apiVersion: local.storage.openshift.io/v1
kind: LocalVolume
metadata:
name: local-block
namespace: local-storage
spec:
nodeSelector:
nodeSelectorTerms:
- matchExpressions:
- key: cluster.ocs.openshift.io/openshift-storage
operator: In
values:
- ""
storageClassDevices:
- storageClassName: localblock
volumeMode: Block
devicePaths:
- /dev/disk/by-id/nvme-Amazon_EC2_NVMe_Instance_Storage_AWS10382E5D7441494EC # <-- modify this line
- /dev/disk/by-id/nvme-Amazon_EC2_NVMe_Instance_Storage_AWS60382E5D7441494EC # <-- modify this line
- /dev/disk/by-id/nvme-Amazon_EC2_NVMe_Instance_Storage_AWS1F45C01D7E84FE3E9 # <-- modify this line
- /dev/disk/by-id/nvme-Amazon_EC2_NVMe_Instance_Storage_AWS6F45C01D7E84FE3E9 # <-- modify this line
- /dev/disk/by-id/nvme-Amazon_EC2_NVMe_Instance_Storage_AWS136BC945B4ECB9AE4 # <-- modify this line
- /dev/disk/by-id/nvme-Amazon_EC2_NVMe_Instance_Storage_AWS636BC945B4ECB9AE4 # <-- modify this lineYou can see that in this CR new by-id devices have been added. Each device maps to nvme1n1 on one of three worker node.
-
nvme-Amazon_EC2_NVMe_Instance_Storage_AWS60382E5D7441494EC
-
nvme-Amazon_EC2_NVMe_Instance_Storage_AWS6F45C01D7E84FE3E9
-
nvme-Amazon_EC2_NVMe_Instance_Storage_AWS636BC945B4ECB9AE4
Create this LocalVolume CR using the following command:
oc apply -f local-storage-block-expand.yamllocalvolume.local.storage.openshift.io/local-block configured
Now that the CR is created let’s see the results.
oc get pv | grep localblocklocal-pv-1d63db9e 1769Gi RWO Delete Available localblock 33s local-pv-1eb9da0a 1769Gi RWO Delete Available localblock 25s local-pv-31021a83 1769Gi RWO Delete Available localblock 48s ...
Now there are 3 more Available PVs to add to our StorageCluster. To do the expansion the only modification to the StorageCluster CR is to modify the count for storageDeviceSets from 1 to 2.
localblock storageclass:apiVersion: ocs.openshift.io/v1
kind: StorageCluster
metadata:
name: ocs-storagecluster
namespace: openshift-storage
spec:
manageNodes: false
monDataDirHostPath: /var/lib/rook
storageDeviceSets:
- count: 2 # <-- modify count to to desired value
dataPVCTemplate:
spec:
accessModes:
- ReadWriteOnce
resources:
requests:
storage: 1
storageClassName: localblock
volumeMode: Block
name: ocs-deviceset
placement: {}
portable: false
replica: 3
resources: {}|
The |
Create this StorageCluster CR using the YAML file above (cluster-service-AWS-expand.yaml).
oc create -f cluster-service-AWS-expand.yamlstoragecluster.ocs.openshift.io/ocs-storagecluster configured
You should now have 3 more OSD Pods (osd-3, osd-4 and osd-5) and 3 more osd-prepare Pods.
oc get pods -n openshift-storage | grep 'ceph-osd'... rook-ceph-osd-3-568d8797b6-j5xqx 1/1 Running 0 14m rook-ceph-osd-4-cc4747fdf-5glgl 1/1 Running 0 14m rook-ceph-osd-5-94c46bbcc-tb7pw 1/1 Running 0 14m ... rook-ceph-osd-prepare-ocs-deviceset-0-1-mcmlv-qmn4r 0/1 Completed 0 14m rook-ceph-osd-prepare-ocs-deviceset-1-1-tjh2d-fl5zc 0/1 Completed 0 14m rook-ceph-osd-prepare-ocs-deviceset-2-1-nqlkg-x9wdn 0/1 Completed 0 14m
Reference Validating OCS Storage Cluster Deployment section for how to validate your updated StorageCluster deployment.
Using the Rook-Ceph toolbox to Validate Ceph backing storage
Starting with OpenShift Container Storage 4.3 the deployment of a toolbox can be created by modifying the CustomResource OCSInitialization.
You can either patch the OCSInitialization ocsinit using the following command line:
oc patch OCSInitialization ocsinit -n openshift-storage --type json --patch '[{ "op": "replace", "path": "/spec/enableCephTools", "value": true }]'After the rook-ceph-tools Pod is Running you can access the toolbox like this:
TOOLS_POD=$(oc get pods -n openshift-storage -l app=rook-ceph-tools -o name)
oc rsh -n openshift-storage $TOOLS_POD
Once inside the toolbox, try out the following Ceph commands to see the status of Ceph, the total number of OSDs (example below shows six after expanding storage), and the total amount of storage available in the cluster.
ceph statusceph osd statusceph osd treesh-4.2# ceph status
cluster:
id: fb084de5-e7c8-47f4-9c45-e57953fc44fd
health: HEALTH_OK
services:
mon: 3 daemons, quorum a,b,c (age 23m)
mgr: a(active, since 42m)
mds: ocs-storagecluster-cephfilesystem:1 {0=ocs-storagecluster-cephfilesystem-b=up:active} 1 up:standby-replay
osd: 6 osds: 6 up (since 22m), 6 in (since 22m)
task status:
scrub status:
mds.ocs-storagecluster-cephfilesystem-a: idle
mds.ocs-storagecluster-cephfilesystem-b: idle
data:
pools: 3 pools, 136 pgs
objects: 95 objects, 94 MiB
usage: 6.1 GiB used, 10 TiB / 10 TiB avail
pgs: 136 active+clean
io:
client: 853 B/s rd, 25 KiB/s wr, 1 op/s rd, 3 op/s wrYou can exit the toolbox by either pressing Ctrl+D or by executing
exit