Manual OpenShift Regional Disaster Recovery
- 1. Overview
- 1.1. OpenShift Multisite Connectivity
- 1.2. Configuring Multisite Storage Replication
- 1.3. Creating Mirror storage class and Sample application
- 1.4. Installing OADP for Kubernetes resource collection
- 1.5. Failover to Secondary cluster
- 1.5.1. Installing the toolbox for Ceph commands
- 1.5.2. Enable volumes for snapshot replication
- 1.5.3. Creating Kubernetes resource backup
- 1.5.4. Scaling application down on primary cluster
- 1.5.5. Demoting and Promoting storage to alternate site
- 1.5.6. Restoring application to secondary cluster
- 1.5.7. Verifying application
- 1.6. Failback to Primary cluster
1. Overview
The intent of this guide is to detail the steps and commands necessary to be able to failover an application from one OpenShift Container Platform (OCP) cluster to another and then failback the same application to the original primary cluster.
The necessary components are two OCP 4.6 (or greater) clusters, connectivity between their private networks, and OpenShift Data Foundation (ODF) installed on both OCP clusters. ODF version 4.7 (or greater) is required for the RBD Mirroring feature to provide regional asynchronous replication between the two clusters. In order to also replicate the Kubernetes resources (pods, services, routes, etc.) from one cluster to another, this guide will make use of the Velero Backup and Restore APIs exposed via the OCP community operator OpenShift APIs for Data Protection or OADP.
Starting April 2021, OpenShift Container Storage (OCS) has been rebranded to OpenShift Data Foundation (ODF).
|
This is a general overview of the steps required to configure and execute Regional Disaster Recovery capabilities using ODF 4.7 and OADP across two distinct OCP clusters separated by distance.
| These steps are considered Dev Preview in ODF 4.7, and are provided for POCs purposes. They will be supported for production usage in a later ODF release. |
-
Ensure clusters have unique private network address ranges.
Ensure the primary and secondary OCP clusters have unique private network address ranges. -
Connect the two private networks.
Connect the private networks (cluster and service) using submariner. -
Install ODF 4.7.
Install ODF 4.7 on primary and secondary OCP clusters and validate deployment. -
Create new CephBlockPool.
To clearly keep mirrored volumes separate from any production volumes in this POC, we will create a new CephBlockPool on both primary and secondary OCP clusters. We will limit RBD Mirroring to only RBD volumes from within this new pool. -
Configure peer relationship between clusters.
Configure peer relationship between ODF clusters and create RBD Mirroring daemons. -
Create new StorageClass.
To clearly keep mirrored PVs separate from any production PVs in this POC, we will create a new StorageClass for PVCs that will have mirroring enabled. -
Configure target apps to claim PVCs from new StorageClass.
In the example, we will create a Sample Application which will use a single PVC claimed from the StorageClass mirror. -
Install OADP (OpenShift API for Data Protection).
Using OperatorHub, install OADP on both OCP clusters. We will use OADP for copying target application metadata resources (Kubernetes CRs) from the primary to the secondary OCP cluster. -
Install Ceph toolbox.
Install the Ceph toolbox on primary and secondary clusters to make Ceph CLI commands available. Ceph CLI commands will be used for enabling PVC mirroring, and for promoting/demoting each half of a mirror to be primary or secondary. -
Enable mirroring on each PVC.
On the primary cluster, use the Ceph CLI to enable PV mirroring for each target PVC. (Our Sample Application has only a single PVC.) -
Backup OpenShift resources to S3 target.
Using the Backup API from OADP, we will backup all Kubernetes resources (CRs) for the Sample Application on the primary cluster to a S3 compatible object bucket. -
Simulate cluster failure event on the primary cluster.
In our example, we will simulate a failure event simply by scaling the deployment(s) for our Sample Application to zero. This makes the application on the primary cluster unavailable. -
Demote and promote each PVC.
On the primary cluster, demote each target PVC being mirrored. On the secondary cluster, promote each target PVC. (Our Sample Application has only a single PVC.) -
Restore OpenShift resources from S3 target.
Using OADP and the Restore API copy all Kubernetes resources for theSample Applicationfrom theS3combatible object bucket to the secondary cluster. The Backup and Restore could be scheduled to run at a desired frequency to ensure that the secondary cluster always has the most recent metadata from the applications targeted for failover on the primary cluster. -
Verify application availability on the secondary cluster.
Verify the Sample Application now is operational on the secondary cluster and that new data can be saved.
1.1. OpenShift Multisite Connectivity
For this solution to work the OpenShift SDNs (Software Defined Networks) must be connected so that OpenShift Data Foundation (ODF) resources can communicate. In particular there needs to be network connectivity between the RBD Mirror POD or daemon deployed in each cluster.
There are various ways to connect the private SDNs and the choice for this guide is to use Submariner.
Whatever way the OCP clusters are connected, the default IP CIDRs (Classless inter-domain routing) for cluster and service networking must be modified to be different on one of the clusters to avoid addressing conflicts.
|
Submariner consists of several main components that work in conjunction to securely connect workloads across multiple Kubernetes or OCP clusters, both on-premises and in public clouds. They are the following:
-
Gateway Engine: manages the secure tunnels to other clusters.
-
Route Agent: routes cross-cluster traffic from nodes to the active Gateway Engine.
-
Broker: facilitates the exchange of metadata between Gateway Engines enabling them to discover one another.
-
Service Discovery: provides DNS discovery of Services across clusters.
Submariner does support connecting OCP clusters installed on AWS. There is also support for connecting non-AWS OCP clusters such as those installed on VMware or Bare Metal (BM). Hybrid connectivity of one OCP cluster on AWS and the 2nd cluster on non-AWS (i.e. VMware) infrastructure is also possible.
For more information on Submariner and the different configuration options go to submariner.io/getting-started.
1.1.1. Submariner Prerequisites
There are a few prerequisites to deploy Submariner. The first requirement is to modify the install-config.yaml configuration used with openshift-install before installing OpenShift so that the IP ranges for the cluster and service networks will be different as shown in examples below.
Example for site1 install-config.yaml:
[...]
metadata:
  name: site1
networking:
  clusterNetwork:
  - cidr: 10.6.0.0/16       (1)
    hostPrefix: 23
  machineCIDR: 10.0.0.0/16
  networkType: OpenShiftSDN
  serviceNetwork:
  - 10.16.0.0/16            (2)
[...]| 1 | clusterNetwork for site1 |
| 2 | serviceNetwork for site1 |
Example for site2 install-config.yaml
[...]
metadata:
  name: site2
networking:
  clusterNetwork:
  - cidr: 10.12.0.0/16      (1)
    hostPrefix: 23
  machineCIDR: 10.0.0.0/16
  networkType: OpenShiftSDN
  serviceNetwork:
  - 10.112.0.0/16           (2)
[...]| 1 | clusterNetwork for site2 |
| 2 | serviceNetwork for site2 |
If you already have your OCP clusters deployed, you can check your clusterNetwork and serviceNetwork configuration using the following command:
oc get networks.config.openshift.io cluster -o json | jq .spec{
"clusterNetwork": [
{
"cidr": "10.5.0.0/16",
"hostPrefix": 23
}
],
"externalIP": {
"policy": {}
},
"networkType": "OpenShiftSDN",
"serviceNetwork": [
"10.15.0.0/16"
]
}
Once the two OCP clusters are created, note the location of their unique kubeconfig (i.e.~/site1/auth/kubeconfig).
|
On AWS clusters
For installing Submariner on AWS the AWS Command Line Interface needs to be installed on your deploy host.
Refer to these links for additional information about prerequisites when at least one OCP instance is installed on AWS.
1.1.2. Submariner Installation
The Submariner installation detailed in this guide is for two non-AWS OCP clusters installed on VMware.
Make sure to delete any prior broker-info.subm file before creating a new broker-info.subm.
|
All subctl commands can be executed from any node that has network access to the API endpoint for both clusters
|
Start by deploying the broker.
subctl deploy-broker --kubeconfig site1/auth/kubeconfig ✓ Setting up broker RBAC
✓ Deploying the Submariner operator
✓ Created operator CRDs
✓ Created operator namespace: submariner-operator
✓ Created operator service account and role
✓ Updated the privileged SCC
✓ Created lighthouse service account and role
✓ Updated the privileged SCC
✓ Created Lighthouse service accounts and roles
✓ Deployed the operator successfully
✓ Deploying the broker
✓ The broker has been deployed
✓ Creating broker-info.subm file
✓ A new IPsec PSK will be generated for broker-info.submNow we want to create the connection between the two OCP clusters. The gateway Pod will be created on the node selected from the displayed list of available nodes during the subctl join.
The --natt=false flag is used when the connection between the two OCP clusters does not involve NAT (Network Address Translation). Reference Submariner documentation for how to subctl join OCP clusters using NAT.
|
subctl join --kubeconfig site1/auth/kubeconfig --clusterid site1 broker-info.subm --natt=false* broker-info.subm says broker is at: https://api.site1.chris.ocs.ninja:6443
? Which node should be used as the gateway? site1-fqldq-worker-975qq
⢄⡱ Discovering network details Discovered network details:
Network plugin: OpenShiftSDN
Service CIDRs: [10.16.0.0/16]
Cluster CIDRs: [10.6.0.0/16]
✓ Discovering network details
✓ Validating Globalnet configurations
✓ Discovering multi cluster details
✓ Deploying the Submariner operator
✓ Created Lighthouse service accounts and roles
✓ Creating SA for cluster
✓ Deploying Submariner
✓ Submariner is up and runningNext, do a similar command for site2. The displayed list of available nodes for the gateway Pod will be those for the site2 OCP instance.
subctl join --kubeconfig site2/auth/kubeconfig --clusterid site2 broker-info.subm --natt=false* broker-info.subm says broker is at: https://api.site1.chris.ocs.ninja:6443
? Which node should be used as the gateway? site2-lc8kr-worker-8j2qk
⢄⡱ Discovering network details Discovered network details:
Network plugin: OpenShiftSDN
Service CIDRs: [10.112.0.0/16]
Cluster CIDRs: [10.12.0.0/16]
✓ Discovering network details
✓ Validating Globalnet configurations
✓ Discovering multi cluster details
✓ Deploying the Submariner operator
✓ Created operator CRDs
✓ Created operator namespace: submariner-operator
✓ Created operator service account and role
✓ Updated the privileged SCC
✓ Created lighthouse service account and role
✓ Updated the privileged SCC
✓ Created Lighthouse service accounts and roles
✓ Deployed the operator successfully
✓ Creating SA for cluster
✓ Deploying Submariner
✓ Submariner is up and runningOn the site1 OCP that you are logged into you can validate that the Submariner Pods are running. The same Pods should be Running in site2 in the submariner-operator project.
oc get pods -n submariner-operator --kubeconfig site1/auth/kubeconfigNAME READY STATUS RESTARTS AGE
submariner-gateway-kthdc 1/1 Running 0 28m
submariner-lighthouse-agent-6c5755764-hjhsm 1/1 Running 0 27m
submariner-lighthouse-coredns-c4f7b6b8c-7nqxz 1/1 Running 0 27m
submariner-lighthouse-coredns-c4f7b6b8c-nt2rl 1/1 Running 0 27m
submariner-operator-6df7c9d659-9d9pm 1/1 Running 0 28m
submariner-routeagent-b476m 1/1 Running 0 27m
submariner-routeagent-bchnj 1/1 Running 0 27m
submariner-routeagent-glmlj 1/1 Running 0 27m
submariner-routeagent-qgdps 1/1 Running 0 27m
submariner-routeagent-sl2tr 1/1 Running 0 27m
submariner-routeagent-smmdt 1/1 Running 0 27mVerifying Submariner connectivity
The last step is to validate the connection between the two OCP clusters using a subctl verify command.
subctl verify site1/auth/kubeconfig site2/auth/kubeconfig --only connectivity --verbosePerforming the following verifications: connectivity
Running Suite: Submariner E2E suite
===================================
Random Seed: 1614875124
Will run 17 of 34 specs
[...]
------------------------------
Ran 11 of 34 Specs in 159.666 seconds
SUCCESS! -- 11 Passed | 0 Failed | 0 Pending | 23 SkippedYou can also verify the connectivity using site specific kubeconfig and subctl show connections.
subctl show connections --kubeconfig site1/auth/kubeconfig | egrep 'connect|error'site2-wsj9g-worker-4c446 site2 10.70.56.142 no libreswan 10.112.0.0/16, 10.12.0.0/16 connected 560.701µ
[...]And then using site2 kubeconfig.
subctl show connections --kubeconfig site2/auth/kubeconfig | egrep 'connect|error'site1-vwgpp-worker-fd4gs site1 10.70.56.202 no libreswan 10.16.0.0/16, 10.6.0.0/16 connected 459.831µs
[...]| If either site has a connecting or error status instead of connected status there is something wrong with the multisite connectivity. Only proceed after both ways show connected. Reference Submariner Troubleshooting documentation. |
Now that the two OCP instances have their clusterNetwork and serviceNetwork connected the next step is to install OpenShift Data Foundation version 4.7 and configure storage replication or RDB Mirroring.
For the rest of the instructions site1 will be referred to as the OCP primary cluster and site2 will be referred to as OCP secondary cluster.
|
1.2. Configuring Multisite Storage Replication
Mirroring is configured on a per-pool basis within peer clusters and can be configured on a specific subset of images within the pool. The rbd-mirror daemon is responsible for pulling image updates from the remote peer cluster and applying them to the image within the local cluster.
1.2.1. OpenShift Data Foundation Installation
In order to configure storage replication between the two OCP instances OpenShift Data Foundation (ODF) must be installed first. Documentation for the deployment can be found at access.redhat.com/documentation/en-us/red_hat_openshift_container_storage.
ODF deployment guides and instructions are specific to your infrastructure (i.e. AWS, VMware, BM, Azure, etc.). Install ODF version 4.7 or greater on both OCP clusters.
You can validate the successful deployment of ODF on each OCP instance with the following command:
oc get storagecluster -n openshift-storage ocs-storagecluster -o jsonpath='{.status.phase}{"\n"}'If result is Ready on primary cluster and secondary cluster you are ready to continue.
1.2.2. Configuring RBD Mirroring between ODF clusters
The next step will be to create the mirroring relationship between the two ODF clusters so the RBD volumes or images created using the Ceph RBD storageclass can be replicated from one OCP cluster to the other OCP cluster.
Enable OMAP Generator
Omap generator is a sidecar container that, when deployed with the CSI provisioner pod, generates the internal CSI omaps between the PV and the RBD image. The name of the new container is csi-omap-generator. This is required as static PVs are transferred across peer clusters in the DR use case, and hence is needed to preserve PVC to storage mappings.
Execute these steps on the primary cluster and the seconday cluster to enable the OMAP generator.
Edit the rook-ceph-operator-config configmap and add CSI_ENABLE_OMAP_GENERATOR set to true.
oc patch cm rook-ceph-operator-config -n openshift-storage --type json --patch '[{ "op": "add", "path": "/data/CSI_ENABLE_OMAP_GENERATOR", "value": "true" }]'configmap/rook-ceph-operator-config patchedValidate that there are now 7 sidecar containers and that the csi-omap-generator container is now running.
oc get pods -n openshift-storage -l app=csi-rbdplugin-provisioner -o jsonpath={.items[*].spec.containers[*].name}csi-provisioner csi-resizer csi-attacher csi-snapshotter csi-omap-generator csi-rbdplugin liveness-prometheus csi-provisioner csi-resizer csi-attacher csi-snapshotter csi-omap-generator csi-rbdplugin liveness-prometheusThere are two csi-rbdplugin-provisioner pods for availability so there should be two groups of the same 7 containers for each pod.
Repeat these steps for the secondary cluster before proceeding and also repeat the validation for the new csi-omap-generator container.
|
Create Ceph Pools for replication
In this section you will create a new CephBlockPool that is RBD mirroring enabled. Execute the steps on each of the OCP clusters to enable mirroring and configure the snapshot schedule for images.
Sample Ceph block pool that has mirroring enabled:
apiVersion: ceph.rook.io/v1
kind: CephBlockPool
metadata:
   name: replicapool
   namespace: openshift-storage
spec:
   replicated:
     size: 3
   mirroring:
     enabled: true
     mode: image
       # specify the schedules on which snapshots should be taken
     snapshotSchedules:
       - interval: 5m
       #  startTime: 00:00:00-05:00
   statusCheck:
     mirror:
       disabled: false
       interval: 60s
The snapshotSchedules is a global value for the specific CephBlockPool used to configure the snapshot interval between peers for mirror-enabled volumes in this pool. It can be as shorter if desired (i.e., 60s).
|
Now create new CephBlockPool.
curl -s https://raw.githubusercontent.com/red-hat-data-services/RDRhelper/master/docs/modules/manual/attachments/replicapool.yaml | oc apply -f -cephblockpool.ceph.rook.io/replicapool created| Repeat the steps on the OCP secondary cluster. |
Bootstrap Peer Clusters
In order for the rbd-mirror daemon to discover its peer cluster, the peer must be registered and a user account must be created. The following steps enables Bootstrapping peers to discover and authenticate to each other.
| Execute the following commands on the secondary cluster first. |
To determine the name of the rbd-mirror secret that contains the bootstrap secret do the following:
oc --kubeconfig site2/auth/kubeconfig get cephblockpool.ceph.rook.io/replicapool -n openshift-storage -ojsonpath='{.status.info.rbdMirrorBootstrapPeerSecretName}{"\n"}'pool-peer-token-replicapoolThe secret pool-peer-token-replicapool contains all the information related to the token and needs to be injected into the peer. To find the decoded secret do the following:
oc --kubeconfig site2/auth/kubeconfig get secrets pool-peer-token-replicapool -n openshift-storage -o jsonpath='{.data.token}' | base64 -deyJmc2lkIjoiYjg4OGRlNjEtODUyMC00MzgxLWE4ODMtMzY2ZTY0YmQ0MDBmIiwiY2xpZW50X2lkIjoicmJkLW1pcnJvci1wZWVyIiwia2V5IjoiQVFDOCtWTmdkNURnQkJBQUd5S0l0VE9ac3FneVM3SEMrTXh5bGc9PSIsIm1vbl9ob3N0IjoiW3YyOjEwLjExMi43MS4xNTU6MzMwMCx2MToxMC4xMTIuNzEuMTU1OjY3ODldLFt2MjoxMC4xMTIuMTI3LjE0ODozMzAwLHYxOjEwLjExMi4xMjcuMTQ4OjY3ODldLFt2MjoxMC4xMTIuNzAuMjUzOjMzMDAsdjE6MTAuMTEyLjcwLjI1Mzo2Nzg5XSJ9Now get the site name for the secondary cluster:
oc --kubeconfig site2/auth/kubeconfig get cephblockpools.ceph.rook.io replicapool -n openshift-storage -o jsonpath='{.status.mirroringInfo.summary.summary.site_name}{"\n"}'b888de61-8520-4381-a883-366e64bd400f-openshift-storage| Execute the following command on the primary cluster. |
With the decoded value, create a secret on the primary cluster, using the site name of the secondary cluster from prior step as the secret name.
| Make sure to replace site name and token with the values from your cluster. |
oc --kubeconfig site1/auth/kubeconfig -n openshift-storage \
  create secret generic b888de61-8520-4381-a883-366e64bd400f-openshift-storage \
  --from-literal=token=eyJmc2lkIjoiYjg4OGRlNjEtODUyMC00MzgxLWE4ODMtMzY2ZTY0YmQ0MDBmIiwiY2xpZW50X2lkIjoicmJkLW1pcnJvci1wZWVyIiwia2V5IjoiQVFDOCtWTmdkNURnQkJBQUd5S0l0VE9ac3FneVM3SEMrTXh5bGc9PSIsIm1vbl9ob3N0IjoiW3YyOjEwLjExMi43MS4xNTU6MzMwMCx2MToxMC4xMTIuNzEuMTU1OjY3ODldLFt2MjoxMC4xMTIuMTI3LjE0ODozMzAwLHYxOjEwLjExMi4xMjcuMTQ4OjY3ODldLFt2MjoxMC4xMTIuNzAuMjUzOjMzMDAsdjE6MTAuMTEyLjcwLjI1Mzo2Nzg5XSJ9 \
--from-literal=pool=replicapoolsecret/b888de61-8520-4381-a883-366e64bd400f-openshift-storage createdThis completes the bootstrap process for the primary cluster to the secondary cluster.
| Repeat the process switching the steps for the secondary cluster and the primary cluster. |
To determine the name of the rbd-mirror secret that contains the bootstrap secret do the following:
oc --kubeconfig site1/auth/kubeconfig get cephblockpool.ceph.rook.io/replicapool -n openshift-storage -ojsonpath='{.status.info.rbdMirrorBootstrapPeerSecretName}{"\n"}'pool-peer-token-replicapoolThe secret pool-peer-token-replicapool is the same as found in the secondary cluster. To find the decoded secret for the primary cluster do the following:
oc --kubeconfig site1/auth/kubeconfig get secrets pool-peer-token-replicapool -n openshift-storage -o jsonpath='{.data.token}' | base64 -deyJmc2lkIjoiZjI4YWJjZjktMWZmZS00MWEwLWJkMmYtZjQzMDU2NGYwZWU1IiwiY2xpZW50X2lkIjoicmJkLW1pcnJvci1wZWVyIiwia2V5IjoiQVFDeStWTmdHQ25GQWhBQU5MNWQ1Zk9IQ1lMcTFYRDBSTkxMRHc9PSIsIm1vbl9ob3N0IjoiW3YyOjEwLjE2Ljc1LjE2NTozMzAwLHYxOjEwLjE2Ljc1LjE2NTo2Nzg5XSxbdjI6MTAuMTYuMTc2LjEwMTozMzAwLHYxOjEwLjE2LjE3Ni4xMDE6Njc4OV0sW3YyOjEwLjE2LjI0OC4yNDM6MzMwMCx2MToxMC4xNi4yNDguMjQzOjY3ODldIn0=Now get the site name for the primary cluster:
oc --kubeconfig site1/auth/kubeconfig get cephblockpools.ceph.rook.io replicapool -n openshift-storage -o jsonpath='{.status.mirroringInfo.summary.summary.site_name}{"\n"}'f28abcf9-1ffe-41a0-bd2f-f430564f0ee5-openshift-storage| Execute the following command on the secondary cluster. |
| Make sure to replace site name and token with the values from your cluster. |
oc --kubeconfig site2/auth/kubeconfig -n openshift-storage \
  create secret generic f28abcf9-1ffe-41a0-bd2f-f430564f0ee5-openshift-storage \
  --from-literal=token=eyJmc2lkIjoiZjI4YWJjZjktMWZmZS00MWEwLWJkMmYtZjQzMDU2NGYwZWU1IiwiY2xpZW50X2lkIjoicmJkLW1pcnJvci1wZWVyIiwia2V5IjoiQVFDeStWTmdHQ25GQWhBQU5MNWQ1Zk9IQ1lMcTFYRDBSTkxMRHc9PSIsIm1vbl9ob3N0IjoiW3YyOjEwLjE2Ljc1LjE2NTozMzAwLHYxOjEwLjE2Ljc1LjE2NTo2Nzg5XSxbdjI6MTAuMTYuMTc2LjEwMTozMzAwLHYxOjEwLjE2LjE3Ni4xMDE6Njc4OV0sW3YyOjEwLjE2LjI0OC4yNDM6MzMwMCx2MToxMC4xNi4yNDguMjQzOjY3ODldIn0= \
--from-literal=pool=replicapoolsecret/f28abcf9-1ffe-41a0-bd2f-f430564f0ee5-openshift-storage createdThis completes the bootstrap process for the secondary cluster to the primary cluster.
Create RBD Mirror Custom Resource
Replication is handled by the rbd-mirror daemon. The rbd-mirror daemon is responsible for pulling image updates from the remote cluster, and applying them to images within the local cluster.
The rbd-mirror daemon(s) can be created using a custom resource (CR). There must be a rbd-mirror daemon or Pod created on the primary cluster and the secondary cluster using this CR:
apiVersion: ceph.rook.io/v1
kind: CephRBDMirror
metadata:
  name: rbd-mirror
  namespace: openshift-storage
spec:
  # the number of rbd-mirror daemons to deploy
  count: 1
  # The affinity rules to apply to the mirror deployment
  placement:
    nodeAffinity:
      requiredDuringSchedulingIgnoredDuringExecution:
        nodeSelectorTerms:
        - matchExpressions:
          - key: cluster.ocs.openshift.io/openshift-storage
            operator: Exists
    tolerations:
    - effect: NoSchedule
      key: node.ocs.openshift.io/storage
      operator: Equal
      value: "true"
  peers:
    secretNames:
      # list of Kubernetes Secrets containing the peer token
      - SECRET  # <-- Fill in correct value
  resources:
    # The pod requests and limits
    limits:
      cpu: "1"
      memory: "2Gi"
    requests:
      cpu: "1"
      memory: "2Gi"
To get the secret for the primary cluster do the following:
SECRET=$(oc get secrets | grep openshift-storage | awk {'print $1}')
echo $SECRET59b89021-3ee2-4a25-b087-b43ee80b3dde-openshift-storageNow create the rbd-mirror Pod for the primary site:
curl -s https://raw.githubusercontent.com/red-hat-data-services/RDRhelper/master/docs/modules/manual/attachments/rbd-mirror.yaml | sed -e "s/SECRET/${SECRET}/g" | oc apply -f -cephrbdmirror.ceph.rook.io/rbd-mirror createdCheck to see if the new`rbd-mirror` Pod is created and Running.
oc get pods -l 'app=rook-ceph-rbd-mirror' -n openshift-storagerook-ceph-rbd-mirror-a-57ccc68d88-lts87 2/2 Running 0 5mCheck the status of the rbd-mirror daemon health.
oc get cephblockpools.ceph.rook.io replicapool -n openshift-storage -o jsonpath='{.status.mirroringStatus.summary.summary}{"\n"}'{"daemon_health":"OK","health":"OK","image_health":"OK","states":{}}Now repeat process for secondary cluster.
Make sure to do all steps above on the secondary cluster. The results for SECRET should be different than the primary cluster as a way to check you are on the secondary cluster.
|
You have now completed the steps for configuring RBD Mirroring between the primary cluster and the secondary cluster. The next sections will cover how to enable Ceph RBD images (volumes) for mirroring data between clusters asynchronously. Also, using a sample application, detailed instructions will be provided on how to failover from primary cluster to the secondary cluster all the while preserving the persistent data.
1.3. Creating Mirror storage class and Sample application
In order to fully understand the process of failover between clusters we need to deploy a sample application for validation after failover. Also, the default Ceph RBD StorageClasse created when ODF is installed is not useable for this testing given these instructions have you create a new CephBlockPool named replicapool.
1.3.1. Storageclass for volume replication
Before any new ODF volumes are created for replication a new StorageClass needs to be created using CephBlockPool replicapool that was created in prior section.
The reclaimPolicy needs to be Retain rather than Delete which is the usual default setting. This is needed to retain the image in Ceph even if the associated PVC and PV are deleted in OCP.
|
Example StorageClass:
allowVolumeExpansion: true
apiVersion: storage.k8s.io/v1
kind: StorageClass
metadata:
  name: ocs-storagecluster-ceph-mirror
parameters:
  clusterID: openshift-storage
  csi.storage.k8s.io/controller-expand-secret-name: rook-csi-rbd-provisioner
  csi.storage.k8s.io/controller-expand-secret-namespace: openshift-storage
  csi.storage.k8s.io/fstype: ext4
  csi.storage.k8s.io/node-stage-secret-name: rook-csi-rbd-node
  csi.storage.k8s.io/node-stage-secret-namespace: openshift-storage
  csi.storage.k8s.io/provisioner-secret-name: rook-csi-rbd-provisioner
  csi.storage.k8s.io/provisioner-secret-namespace: openshift-storage
  imageFeatures: layering
  imageFormat: "2"
  pool: replicapool
provisioner: openshift-storage.rbd.csi.ceph.com
reclaimPolicy: Retain
volumeBindingMode: Immediate
Now create the StorageClass:
curl -s https://raw.githubusercontent.com/red-hat-data-services/RDRhelper/master/docs/modules/manual/attachments/ocs-storagecluster-ceph-mirror.yaml | oc apply -f -storageclass.storage.k8s.io/ocs-storagecluster-ceph-mirror created
Make sure to also create the ocs-storagecluster-ceph-mirror StorageClass on the secondary cluster before proceeding.
|
1.3.2. Sample Application
In order to test failing over from one OCP cluster to another we need a simple application to and verify that replication is working.
Start by creating a new project on the primary cluster:
oc new-project my-database-appThen use the rails-pgsql-persistent template to create the new application. The new postgresql volume will be claimed from the new StorageClass.
curl -s https://raw.githubusercontent.com/red-hat-storage/ocs-training/master/training/modules/ocs4/attachments/configurable-rails-app.yaml | oc new-app -p STORAGE_CLASS=ocs-storagecluster-ceph-mirror -p VOLUME_CAPACITY=5Gi -f -After the deployment is started you can monitor with these commands.
oc statusCheck the PVC is created.
oc get pvc -n my-database-appThis step could take 5 or more minutes. Wait until there are 2 Pods in
Running STATUS and 4 Pods in Completed STATUS as shown below.
watch oc get pods -n my-database-appNAME READY STATUS RESTARTS AGE
postgresql-1-deploy 0/1 Completed 0 5m48s
postgresql-1-lf7qt 1/1 Running 0 5m40s
rails-pgsql-persistent-1-build 0/1 Completed 0 5m49s
rails-pgsql-persistent-1-deploy 0/1 Completed 0 3m36s
rails-pgsql-persistent-1-hook-pre 0/1 Completed 0 3m28s
rails-pgsql-persistent-1-pjh6q 1/1 Running 0 3m14sYou can exit by pressing Ctrl+C.
Once the deployment is complete you can now test the application and the persistent storage on Ceph.
oc get route rails-pgsql-persistent -n my-database-app -o jsonpath --template="http://{.spec.host}/articles{'\n'}"This will return a route similar to this one.
http://rails-pgsql-persistent-my-database-app.apps.cluster-ocs4-8613.ocs4-8613.sandbox944.opentlc.com/articlesCopy your route (different than above) to a browser window to create articles.
Enter the username and password below to create articles and comments.
The articles and comments are saved in a PostgreSQL database which stores its
table spaces on the Ceph RBD volume provisioned using the
ocs-storagecluster-ceph-mirror StorageClass during the application
deployment.
username: openshift
password: secret
Once you have added a new article you can verify it exists in the postgresql database by issuing this command:
oc rsh -n my-database-app $(oc get pods -n my-database-app|grep postgresql | grep -v deploy | awk {'print $1}') psql -c "\c root" -c "\d+" -c "select * from articles"You are now connected to database "root" as user "postgres".
List of relations
Schema | Name | Type | Owner | Size | Description
--------+----------------------+----------+---------+------------+-------------
public | ar_internal_metadata | table | userXQR | 16 kB |
public | articles | table | userXQR | 16 kB |
public | articles_id_seq | sequence | userXQR | 8192 bytes |
public | comments | table | userXQR | 8192 bytes |
public | comments_id_seq | sequence | userXQR | 8192 bytes |
public | schema_migrations | table | userXQR | 16 kB |
(6 rows)
id | title | body | created_a
t | updated_at
----+---------------+----------------------------------------+------------------
----------+----------------------------
2 | First Article | This is article #1 on primary cluster. | 2021-03-19 22:05:
07.255362 | 2021-03-19 22:05:07.255362
(1 row)1.4. Installing OADP for Kubernetes resource collection
OADP (OpenShift APIs for Data Protection) is a community operator and is available in OperatorHub.
We will be using OADP for the Backup and Restore APIs for collecting the Kubernetes objects at a namespace level. The collection or backup of resources is needed to restore the application on the secondary cluster.
1.4.1. Installing OADP from OperatorHub
First is to find OADP in OperatorHub. Login to your OpenShift Web Console and navigate to OperatorHub. Filter for OADP as shown below:
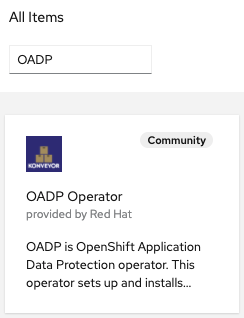
If you are not finding OADP in OperatorHub most likely the community-operator catalogsource is not deployed in your cluster.
|
Select Continue on next screen.
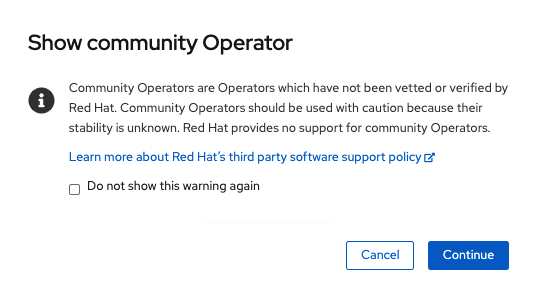
| OADP is a community operator and as such is not supported by Red Hat. More information can be found at github.com/konveyor/oadp-operator. |
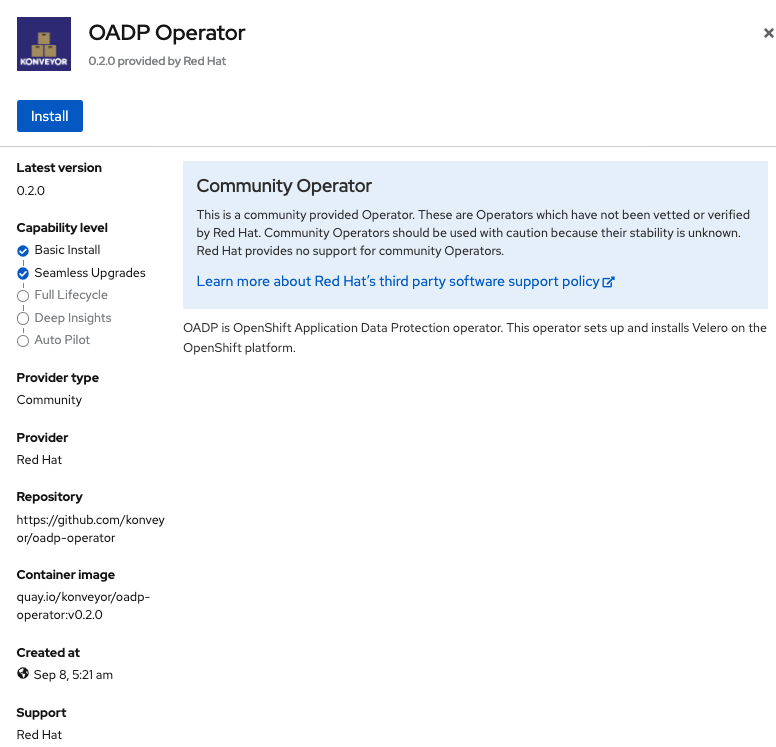
Select Install on next screen.
Now you will create the new namespace oadp-operator and install the OADP operator into this namespace. Select Install again.
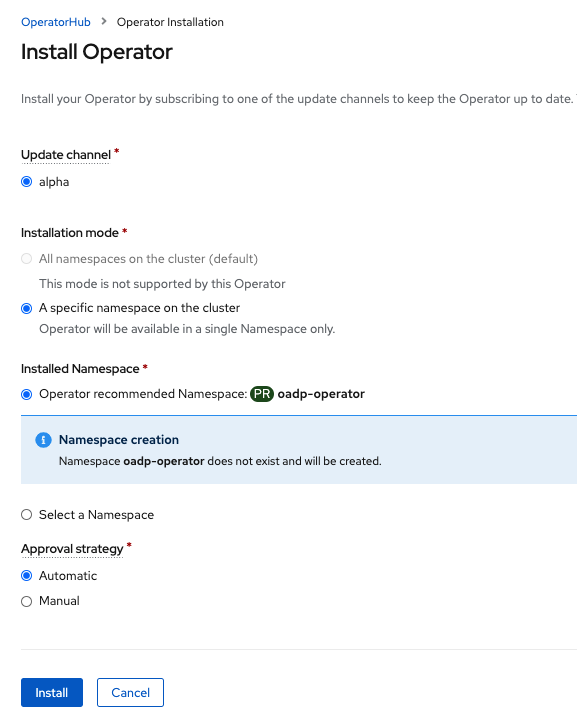
Wait for operator to install. When you see this screen the OADP operator is installed.

The next step is to create the Velero CustomResource or CR. For this you will need to have a S3 compatible object bucket created that you know the bucket name as well as the credentials to access the bucket.
It is not recommended to use ODF object buckets (MCG or RGW) as the S3 BackingStorageLocation for Velero CR. If your remote or secondary clusters become unavailable and the S3 bucket is created on that cluster there is no way to recover to alternate cluster.
|
1.4.2. Creating bucket credentials secret
Before creating the Velero CR you must create the cloud-credentials file with the creditials for your S3 bucket. The format of the file needs to be this:
[default]
aws_access_key_id=VELERO_ACCESS_KEY_ID
aws_secret_access_key=VELERO_SECRET_ACCESS_KEY
Copy your unique credentials into file cloud-credentials and save file.
Now use this new cloud-credentials file to create a new Secret. Replace <CREDENTIALS_FILE_PATH> with path to file you created with S3 credentials.
oc create secret generic cloud-credentials --namespace oadp-operator --from-file cloud=<CREDENTIALS_FILE_PATH>/cloud-credentials1.4.3. Creating Velero resource
The velero YAML file needs to be modified to be correct for your S3 bucket. The example is for a S3 bucket on AWS saved as file velero-aws.yaml. It is recommended to use an object bucket off-platform meaning not backed by storage in the primary cluster or the secondary cluster.
Your velero YAML file will be slightly different if using a S3 object bucket from a different provider (GCP, Azure), from an external Ceph cluster with RGW, or from ODF MCG.
|
apiVersion: konveyor.openshift.io/v1alpha1
kind: Velero
metadata:
  name: oadp-velero
  namespace: oadp-operator
spec:
  olm_managed: true
  backup_storage_locations:
    - config:
        profile: default
        region: us-east-2  # <-- Modify to bucket AWS region or region for your provider
      credentials_secret_ref:
        name: cloud-credentials
        namespace: oadp-operator
      name: default
      object_storage:
        bucket: oadp-xxxxxx # Modify to your bucket name
        prefix: velero
      provider: aws
  default_velero_plugins:
    - aws
    - openshift
  enable_restic: false
Once you have your unique values copied into your YAML file create the Velero CR.
If wanting to us a MCG object bucket instead of a bucket off-platform (i.e. AWS) as recommended, reference these instructions github.com/konveyor/oadp-operator/blob/master/docs/noobaa/install_oadp_noobaa.md.
|
oc create -f velero-aws.yaml -n oadp-operatorValidate that the velero pod is Running and that the BackingStorageLocation have been created as well that has the details to access your S3 bucket for Kubernetes object storage.
oc get pods,backupstoragelocation -n oadp-operatorNAME READY STATUS RESTARTS AGE
pod/oadp-default-aws-registry-88f556c5-2mk6h 1/1 Running 0 4m59s
pod/oadp-operator-6bb9fb6cfc-mc6vw 1/1 Running 0 49m
pod/velero-6c6fd6d84d-mbct9 1/1 Running 0 5m3s
NAME PHASE LAST VALIDATED AGE
backupstoragelocation.velero.io/default Available 9s 5m1s
Repeat these steps and install OADP on the secondary cluster. Make sure to use the same S3 bucket and credentials as for the primary cluster when creating the Velero CR.
|
1.5. Failover to Secondary cluster
The setup and configuration steps in the prior section have prepared the environment to support a failover event from the primary cluster to the secondary cluster. In our case this will be for just one namespace (my-database-app) that includes restoring the Kubernetes objects and persistent data stored in PVCs. The following steps will be followed for the failover:
-
Using the toolbox enable image(s) for replication via snapshot to peer cluster.
-
Use OADP and the
BackupCR to collect Kubernetes objects for application namespace. -
Scale application deployment down to take application offline.
-
Using the
toolboxdemote the storage for the application on the primary cluster. -
Using the
toolboxpromote the storage on the secondary cluster. -
Use OADP and the
RestoreCR to bring the application online using collected Kubernetes objects. -
Verify use of the application on the secondary cluster.
1.5.1. Installing the toolbox for Ceph commands
Since the Rook-Ceph toolbox is not shipped with ODF you will need to deploy it manually because a few steps of the failover process require use of Ceph commands today.
You can patch the OCSInitialization ocsinit to create the toolbox using the following command line:
oc patch OCSInitialization ocsinit -n openshift-storage --type json --patch '[{ "op": "replace", "path": "/spec/enableCephTools", "value": true }]'After the rook-ceph-tools Pod is Running you can access the toolbox
like this:
TOOLS_POD=$(oc get pods -n openshift-storage -l app=rook-ceph-tools -o name)
oc rsh -n openshift-storage $TOOLS_POD
Once inside the toolbox try out the following Ceph commands:
Check the health of the Ceph cluster first.
ceph healthHEALTH_OK
Make sure that HEALTH_OK is the status before proceeding.
|
rbd -p replicapool mirror pool statushealth: OK
daemon health: OK
image health: OK
images: 0 totalrbd -p replicapool mirror snapshot schedule lsevery 5mYou can exit the toolbox by either pressing Ctrl+D or by executing exit.
exit| Make sure to repeat these steps on the secondary cluster as well and logon to the toolbox and run the same Ceph commands to validate the health of the cluster and mirroring. |
1.5.2. Enable volumes for snapshot replication
In order to have persistent data replicated for a particular application the volume(s) or images have to be enabled for mirroring. This is currently done using Ceph commands after logging into the toolbox.
To map a PVC name to a image name in Ceph you can use these commands.
Change the PVC name in the command if your name is different than postgresql.
|
CSIVOL=$(kubectl get pv $(kubectl get pv | grep postgresql | awk '{ print $1 }') -o jsonpath='{.spec.csi.volumeHandle}' | cut -d '-' -f 6- | awk '{print "csi-vol-"$1}')
echo $CSIVOLcsi-vol-94953897-88fc-11eb-b175-0a580a061092Now that you know your image name(s), login to the toolbox again on the primary cluster.
TOOLS_POD=$(oc get pods -n openshift-storage -l app=rook-ceph-tools -o name)
oc rsh -n openshift-storage $TOOLS_POD
List the images in the CephBlockPool replicapool.
rbd -p replicapool lscsi-vol-94953897-88fc-11eb-b175-0a580a061092In this case there is only one image or volume that was created for the postgresql persistent data storage. This is the image you want to enable for mirroring on the primary cluster.
| Your image name will be different. Use your image name for following commands. |
rbd -p replicapool mirror image enable csi-vol-94953897-88fc-11eb-b175-0a580a061092 snapshotMirroring enabledYou can now get more information about image mirroring by doing this command on the primary cluster,
rbd -p replicapool info csi-vol-94953897-88fc-11eb-b175-0a580a061092rbd image 'csi-vol-94953897-88fc-11eb-b175-0a580a061092':
size 5 GiB in 1280 objects
order 22 (4 MiB objects)
snapshot_count: 1
id: ee409072562b
block_name_prefix: rbd_data.ee409072562b
format: 2
features: layering
op_features:
flags:
create_timestamp: Fri Mar 19 21:46:38 2021
access_timestamp: Fri Mar 19 21:46:38 2021
modify_timestamp: Fri Mar 19 21:46:38 2021
mirroring state: enabled
mirroring mode: snapshot
mirroring global id: 8cd6c7e8-a92b-4d1c-bcac-d9c9cd234980
mirroring primary: true (1)| 1 | Currently storage is promoted on primary cluster |
To validate the mirroring or replication is working you can logon to the toolbox on the secondary cluster and run the same command for the exact same image name which should now be replicated to the peer cluster.
rbd -p replicapool info csi-vol-94953897-88fc-11eb-b175-0a580a061092rbd image 'csi-vol-94953897-88fc-11eb-b175-0a580a061092':
size 5 GiB in 1280 objects
order 22 (4 MiB objects)
snapshot_count: 1
id: 74c39ad8d17a
block_name_prefix: rbd_data.74c39ad8d17a
format: 2
features: layering, non-primary
op_features:
flags:
create_timestamp: Sun Mar 21 00:49:58 2021
access_timestamp: Sun Mar 21 00:49:58 2021
modify_timestamp: Sun Mar 21 00:49:58 2021
mirroring state: enabled
mirroring mode: snapshot
mirroring global id: 8cd6c7e8-a92b-4d1c-bcac-d9c9cd234980
mirroring primary: false (1)| 1 | Currently storage is demoted on secondary cluster |
These steps would be repeated for every image that you want to mirror via snapshot to the peer cluster. For this example the snapshot interval is 1 hour and was configured in the replicapool CephBlockPool CR.
You can exit the toolbox by either pressing Ctrl+D or by executing exit.
exit1.5.3. Creating Kubernetes resource backup
The Kubernetese objects or resources for the OpenShift namespace my-database-app have to be backed up and stored in a location where the secondary cluster can access. In this case using the OADP or Velero Backup API is how this will be done.
Here is a sample backup.yaml file for the sample application:
apiVersion: velero.io/v1
kind: Backup
metadata:
  namespace: oadp-operator
  name: backup1
spec:
  includedNamespaces:
  - my-database-app
  excludedResources:
  - imagetags.image.openshift.io
  snapshotVolumes: false
Given the persistent data is going to be mirrored or replicated from the primary cluster to the secondary cluster we do not need the OADP Backup to include this data and therefore set snapshotVolumes: false.
There is one additional resource to exclude that will be done by adding a label to the specific configmap. This is needed, excluding this resource for the Backup, because this configmap includes a service-ca.crt that needs to be uniquely created on the secondary cluster (not copied).
oc label -n my-database-app configmaps rails-pgsql-persistent-1-ca velero.io/exclude-from-backup=trueconfigmap/rails-pgsql-persistent-1-ca labeledNow create the Backup for my-database-app namespace.
curl -s https://raw.githubusercontent.com/red-hat-data-services/RDRhelper/master/docs/modules/manual/attachments/backup.yaml | oc apply -f -backup.velero.io/backup1 createdVerify the Backup completed successfully to your S3 object bucket target using the following command:
oc describe backup backup1 -n oadp-operatorName: backup1
Namespace: oadp-operator
Labels: velero.io/storage-location=default
Annotations: velero.io/source-cluster-k8s-gitversion: v1.20.0+bd9e442
velero.io/source-cluster-k8s-major-version: 1
velero.io/source-cluster-k8s-minor-version: 20
API Version: velero.io/v1
Kind: Backup
[...]
Spec:
Default Volumes To Restic: false
Excluded Resources: (1)
imagetags.image.openshift.io
Included Namespaces:
my-database-app (2)
Snapshot Volumes: false
Storage Location: default
Ttl: 720h0m0s
Status:
Completion Timestamp: 2021-03-22T19:18:57Z
Expiration: 2021-04-21T19:17:20Z
Format Version: 1.1.0
Phase: Completed (3)
Progress:
Items Backed Up: 63 (4)
Total Items: 63
Start Timestamp: 2021-03-22T19:17:20Z
Version: 1
Events: <none>| 1 | Excluded resources for backup |
| 2 | Namespace for which resources copied to object bucket |
| 3 | Successul backup with Completed status |
| 4 | The number of Kubernetes resources backed up |
1.5.4. Scaling application down on primary cluster
The reason for Disaster Recovery (DR) of an OCP cluster or application would usually happen because the primary cluster has become partially or completely unavailable. In order to simulate this behavior for our sample application the easiest way is to scale the deployments down on the primary cluster so as to make the application unavailable.
Let’s take a look at the DeploymentConfig for our application.
oc get deploymentconfig -n my-database-appNAME REVISION DESIRED CURRENT TRIGGERED BY
postgresql 1 1 1 config,image(postgresql:10)
rails-pgsql-persistent 1 1 1 config,image(rails-pgsql-persistent:latest)There are two DeploymentConfig to scale to zero.
oc scale deploymentconfig postgresql -n my-database-app --replicas=0deploymentconfig.apps.openshift.io/postgresql scaledNow scale the second deployment to zero.
oc scale deploymentconfig rails-pgsql-persistent -n my-database-app --replicas=0deploymentconfig.apps.openshift.io/rails-pgsql-persistent scaledCheck to see the Pods are deleted. The following command should return no results if both DeploymentConfig are scaled to zero.
oc get pods -n my-database-app | grep RunningTest that the application is down on the primary cluster by refreshing the route in your browser or get route again and copy to browser tab.
oc get route rails-pgsql-persistent -n my-database-app -o jsonpath --template="http://{.spec.host}/articles{'\n'}"You show see something like this now.

1.5.5. Demoting and Promoting storage to alternate site
In order to failover the storage on the primary cluster must be demoted and the storage on the secondary cluster must be `promoted. This is currently done on a per image basis using the toolbox.
To map a PVC name to a image name in Ceph you can use these commands.
Change the PVC name in the command if your name is different than postgresql.
|
CSIVOL=$(kubectl get pv $(kubectl get pv | grep postgresql | awk '{ print $1 }') -o jsonpath='{.spec.csi.volumeHandle}' | cut -d '-' -f 6- | awk '{print "csi-vol-"$1}')
echo $CSIVOLcsi-vol-94953897-88fc-11eb-b175-0a580a061092Now that you know the image name(s), logon again to the toolbox on the primary cluster to use Ceph commands.
TOOLS_POD=$(oc get pods -n openshift-storage -l app=rook-ceph-tools -o name)
oc rsh -n openshift-storage $TOOLS_POD
List the images in the CephBlockPool replicapool.
rbd -p replicapool lscsi-vol-94953897-88fc-11eb-b175-0a580a061092| Your image name will be different. Use your image name for following commands. |
First demote the postgresql image on the primary cluster.
rbd -p replicapool mirror image demote csi-vol-94953897-88fc-11eb-b175-0a580a061092Image demoted to non-primaryNow logon to the toolbox on the secondary cluster and promote the postgresql image.
rbd -p replicapool mirror image promote csi-vol-94953897-88fc-11eb-b175-0a580a06109Image promoted to primaryUsing the toolbox on the secondary cluster validate the image is now promoted.
rbd -p replicapool info csi-vol-94953897-88fc-11eb-b175-0a580a061092rbd image 'csi-vol-94953897-88fc-11eb-b175-0a580a061092':
size 5 GiB in 1280 objects
order 22 (4 MiB objects)
snapshot_count: 1
id: 74c39ad8d17a
block_name_prefix: rbd_data.74c39ad8d17a
format: 2
features: layering
op_features:
flags:
create_timestamp: Sun Mar 21 00:49:58 2021
access_timestamp: Sun Mar 21 00:49:58 2021
modify_timestamp: Sun Mar 21 00:49:58 2021
mirroring state: enabled
mirroring mode: snapshot
mirroring global id: 8cd6c7e8-a92b-4d1c-bcac-d9c9cd234980
mirroring primary: true (1)| 1 | Image is now promoted on secondary cluster |
These steps would be repeated for every image that you want to demote and promote to the secondary cluster.
Also validate that the mirror pool status is healthy on the secondary cluster.
rbd -p replicapool mirror pool statushealth: OK
daemon health: OK
image health: OK
images: 1 total
1 replayingYou can exit the toolbox by either pressing Ctrl+D or by executing exit.
exit1.5.6. Restoring application to secondary cluster
The last step in the process to failover to the secondary cluster is to now use OADP and the Restore CR to copy the Kubernetes objects to the remote cluster. The persistent data is already mirrored to the secondary cluster from the primary cluster and therefore does not need to be copied.
Here is a the restore.yaml file for the sample application:
apiVersion: velero.io/v1
kind: Restore
metadata:
  namespace: oadp-operator
  name: restore1
spec:
  backupName: backup1
  includedNamespaces:
  - my-database-app
Now create the Restore on the secondary cluster for the my-database-app namespace. You notice in the Restore that the backup1 created earlier is referenced.
Make sure to issue this command on the secondary cluster. The namespace my-database-app should not exist on the secondary cluster yet.
|
curl -s https://raw.githubusercontent.com/red-hat-data-services/RDRhelper/master/docs/modules/manual/attachments/restore.yaml | oc apply -f -restore.velero.io/restore1 createdVerify the Restore completed successfully from your S3 object bucket target using the following command:
oc describe restore restore1 -n oadp-operatorName: restore1
Namespace: oadp-operator
Labels: <none>
Annotations: <none>
API Version: velero.io/v1
Kind: Restore
[...]
Spec:
Backup Name: backup1 (1)
Excluded Resources:
nodes
events
events.events.k8s.io
backups.velero.io
restores.velero.io
resticrepositories.velero.io
Included Namespaces:
my-database-app (2)
Status:
Completion Timestamp: 2021-03-23T23:51:43Z
Phase: Completed (3)
Start Timestamp: 2021-03-23T23:51:28Z
Warnings: 7
Events: <none>| 1 | Name of backup used for restore operation |
| 2 | Namespace to be restored from backup1 |
| 3 | Successul restore with Completed status |
Check to see that the PODs and PVC are created correctly in `my-database-app`namespace on secondary cluster.
oc get pods,pvc -n my-database-appNAME READY STATUS RESTARTS AGE
pod/postgresql-1-deploy 0/1 Completed 0 9m10s
pod/postgresql-1-nld26 1/1 Running 0 9m7s
pod/rails-pgsql-persistent-1-build 0/1 Completed 0 9m4s
pod/rails-pgsql-persistent-1-deploy 0/1 Completed 0 9m4s
pod/rails-pgsql-persistent-1-hook-pre 0/1 Completed 0 9m1s
pod/rails-pgsql-persistent-2-4b28n 1/1 Running 0 6m39s
pod/rails-pgsql-persistent-2-deploy 0/1 Completed 0 7m1s
pod/rails-pgsql-persistent-2-hook-pre 0/1 Completed 0 6m58s
NAME STATUS VOLUME CAPACITY ACCESS MODES STORAGECLASS AGE
persistentvolumeclaim/postgresql Bound pvc-c1b313c2-8e96-45b0-b9c8-57864b9437e7 5Gi RWO ocs-storagecluster-ceph-mirror 9m13s1.5.7. Verifying application
To verify the application on the secondary cluster you will want to access the application again and create a new article.
oc get route rails-pgsql-persistent -n my-database-app -o jsonpath --template="http://{.spec.host}/articles{'\n'}"This will return a route similar to this one.
http://rails-pgsql-persistent-my-database-app.apps.cluster-ocs4-8613.ocs4-8613.sandbox944.opentlc.com/articlesCopy your route (different than above) to a browser window to create another article on the secondary cluster.
Enter the username and password below to create articles and comments.
username: openshift
password: secret
Once you have added a new article you can verify it exists in the postgresql database by issuing this command:
oc rsh -n my-database-app $(oc get pods -n my-database-app|grep postgresql | grep -v deploy | awk {'print $1}') psql -c "\c root" -c "select * from articles"You are now connected to database "root" as user "postgres".
id | title | body | create
d_at | updated_at
----+----------------+------------------------------------------+---------------
-------------+----------------------------
2 | First Article | This is article #1 on primary cluster. | 2021-03-19 22:
05:07.255362 | 2021-03-19 22:05:07.255362
3 | Second Article | This is article #2 on secondary cluster. | 2021-03-22 23:
29:24.051123 | 2021-03-22 23:29:24.051123
(2 rows)You should see your first article created on the primary cluster and the second article created on the secondary cluster. The application is now verified and the failover is completed.
If you want to delete the my-database-app project from the secondary cluster and the primary cluster it is important to modify the associated PV reclaimPolicy from Retain to Delete. Then, when the my-database-app project and PVC is deleted, the associated PV will be deleted as well as the associated image in Ceph.
|
1.6. Failback to Primary cluster
In order to failback to the primary cluster from the secondary cluster repeat the steps for failover except reverse the order between primary and secondary. If the primary cluster has been offline for some amount of time it could be necessary to either force promote or resync the image{s} using the toolbox.